4- & 8-Channel Digital Video Recorder
Chapter 3 ─ Configuration
NOTE: Your DVR should be completely installed before proceeding. Refer to Chapter 2 ─ Installation.
Front Panel Controls
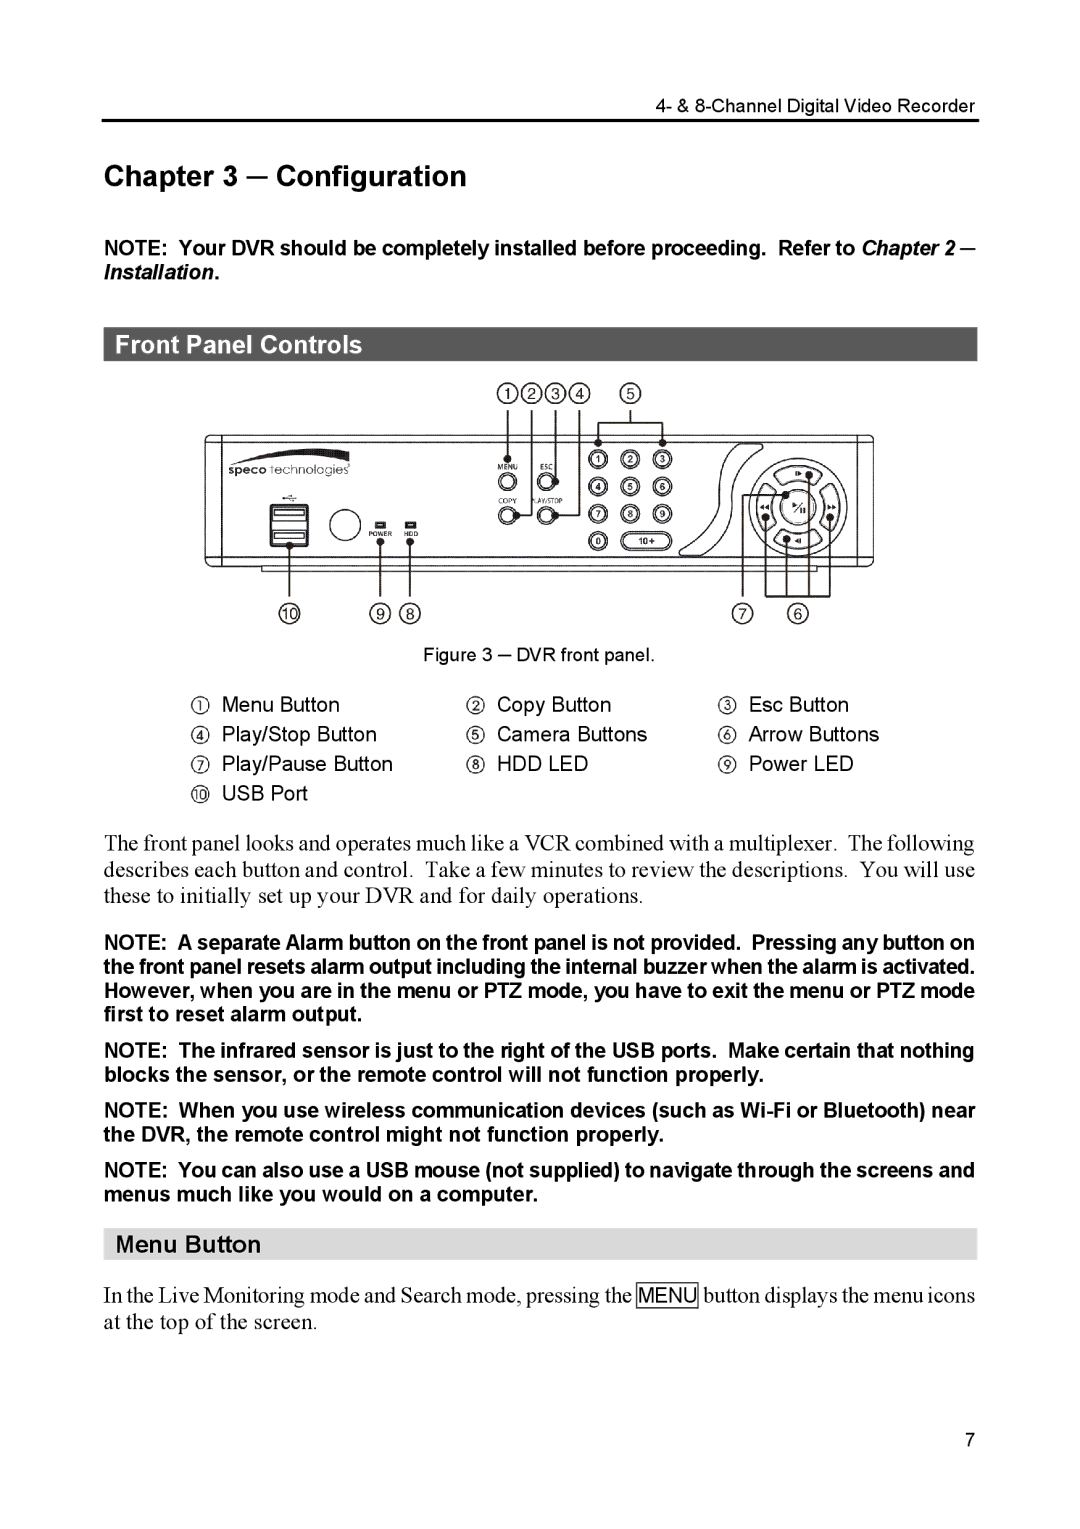
| Figure 3 ─ DVR front panel. |
|
Menu Button | Copy Button | Esc Button |
Play/Stop Button | Camera Buttons | Arrow Buttons |
Play/Pause Button | HDD LED | Power LED |
USB Port |
|
|
The front panel looks and operates much like a VCR combined with a multiplexer. The following describes each button and control. Take a few minutes to review the descriptions. You will use these to initially set up your DVR and for daily operations.
NOTE: A separate Alarm button on the front panel is not provided. Pressing any button on the front panel resets alarm output including the internal buzzer when the alarm is activated. However, when you are in the menu or PTZ mode, you have to exit the menu or PTZ mode first to reset alarm output.
NOTE: The infrared sensor is just to the right of the USB ports. Make certain that nothing blocks the sensor, or the remote control will not function properly.
NOTE: When you use wireless communication devices (such as
NOTE: You can also use a USB mouse (not supplied) to navigate through the screens and menus much like you would on a computer.
Menu Button
In the Live Monitoring mode and Search mode, pressing the MENU at the top of the screen.
button displays the menu icons
7