Operation Instruction
Motion Detection
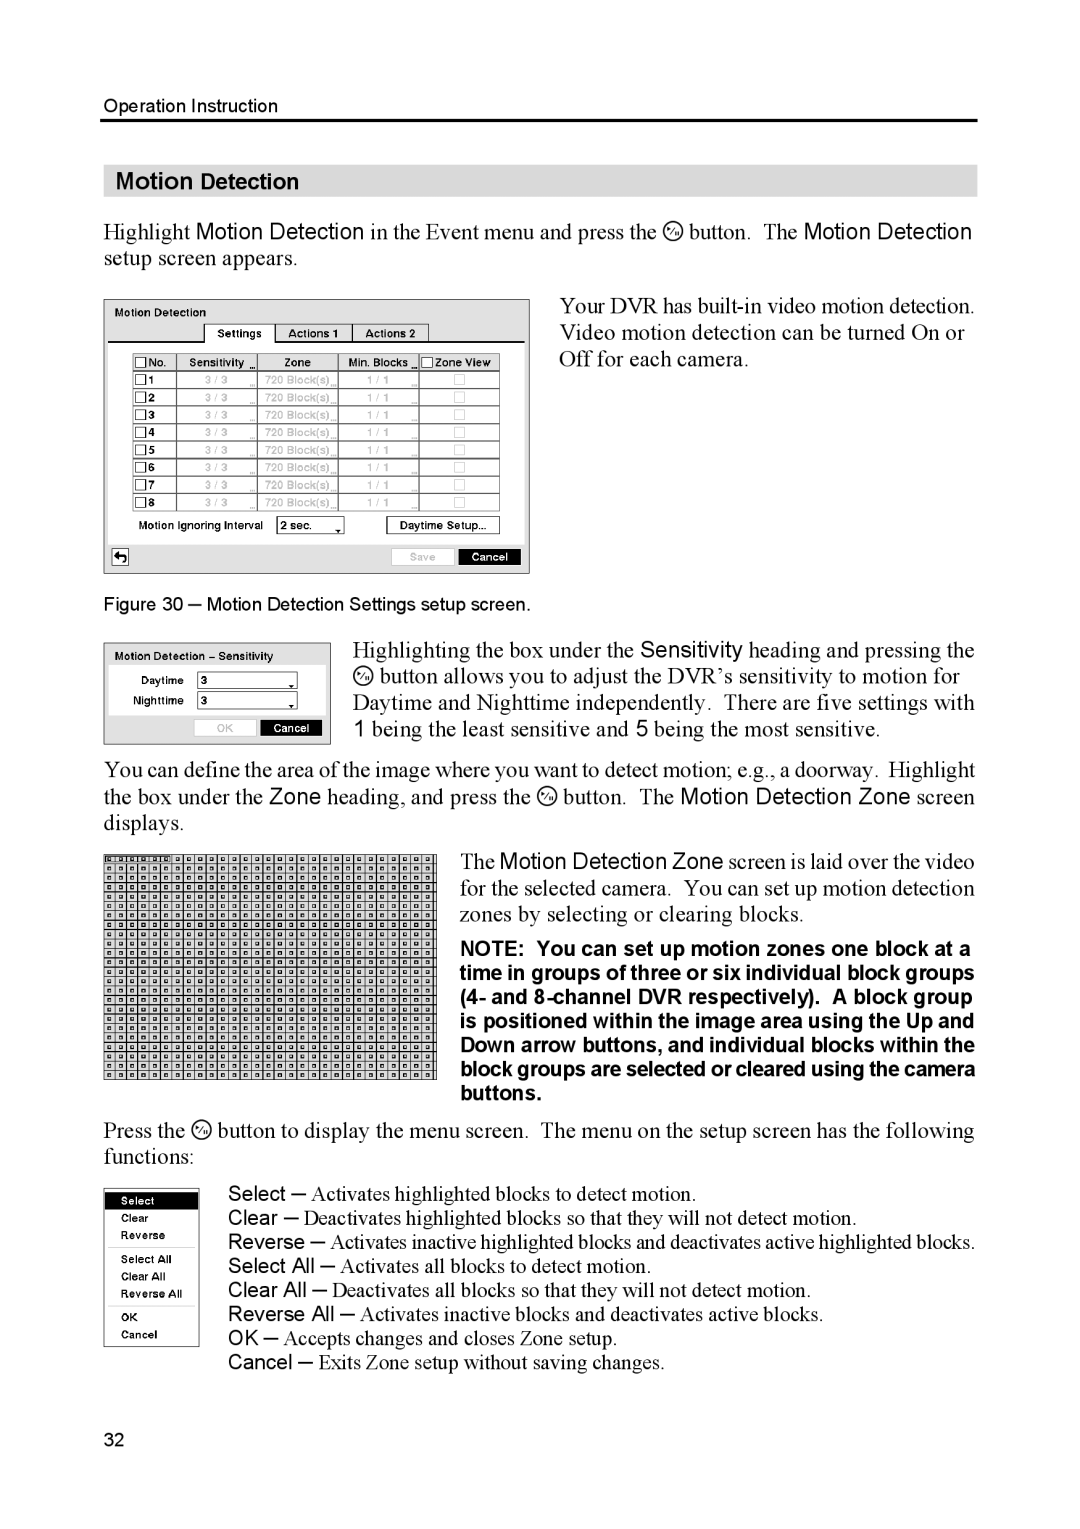
Highlight Motion Detection in the Event menu and press the ![]() button. The Motion Detection setup screen appears.
button. The Motion Detection setup screen appears.
Your DVR has
Video motion detection can be turned On or
Off for each camera.
Figure 30 ─ Motion Detection Settings setup screen.
Highlighting the box under the Sensitivity heading and pressing the ![]() button allows you to adjust the DVR’s sensitivity to motion for Daytime and Nighttime independently. There are five settings with 1 being the least sensitive and 5 being the most sensitive.
button allows you to adjust the DVR’s sensitivity to motion for Daytime and Nighttime independently. There are five settings with 1 being the least sensitive and 5 being the most sensitive.
You can define the area of the image where you want to detect motion; e.g., a doorway. Highlight the box under the Zone heading, and press the ![]() button. The Motion Detection Zone screen displays.
button. The Motion Detection Zone screen displays.
The Motion Detection Zone screen is laid over the video for the selected camera. You can set up motion detection zones by selecting or clearing blocks.
NOTE: You can set up motion zones one block at a time in groups of three or six individual block groups (4- and
Press the ![]() button to display the menu screen. The menu on the setup screen has the following functions:
button to display the menu screen. The menu on the setup screen has the following functions:
Select ─ Activates highlighted blocks to detect motion.
Clear ─ Deactivates highlighted blocks so that they will not detect motion.
Reverse ─ Activates inactive highlighted blocks and deactivates active highlighted blocks. Select All ─ Activates all blocks to detect motion.
Clear All ─ Deactivates all blocks so that they will not detect motion. Reverse All ─ Activates inactive blocks and deactivates active blocks. OK ─ Accepts changes and closes Zone setup.
Cancel ─ Exits Zone setup without saving changes.
32
