Operation Instruction
Highlight the box beside Retry and enter the number of times you would like the DVR to try contacting the computer. You can select from 1 to 10 retries.
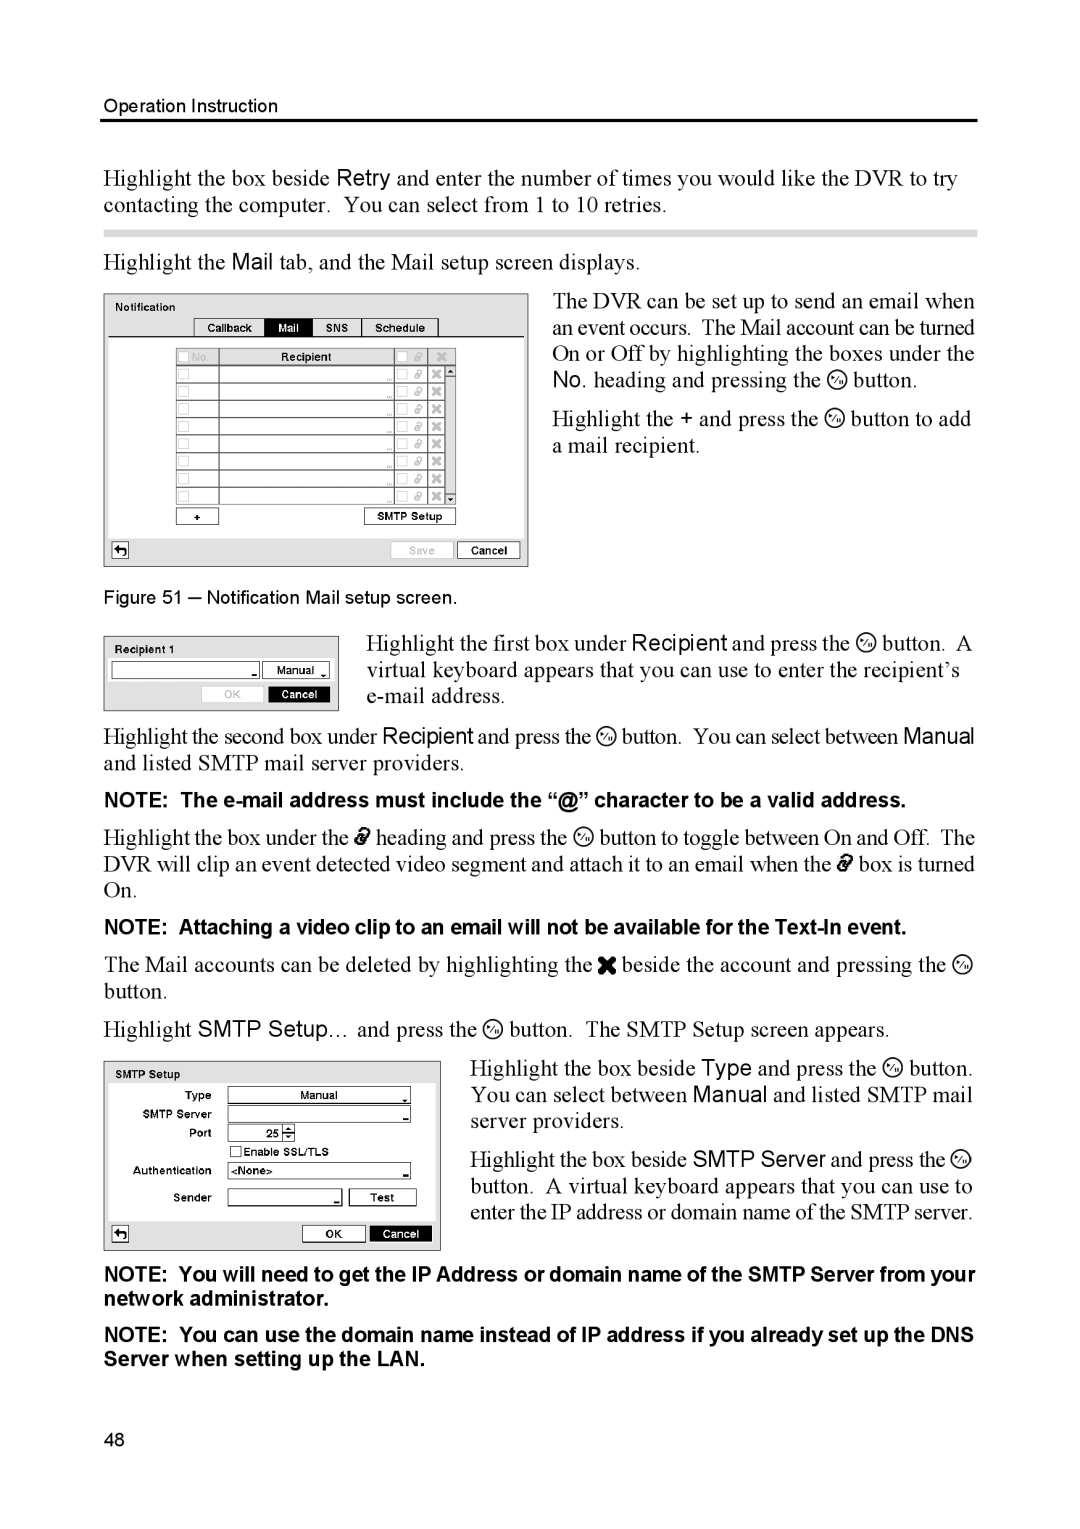
Highlight the Mail tab, and the Mail setup screen displays.
The DVR can be set up to send an email when an event occurs. The Mail account can be turned On or Off by highlighting the boxes under the No. heading and pressing the ![]() button.
button.
Highlight the + and press the  button to add a mail recipient.
Figure 51 ─ Notification Mail setup screen.
Highlight the first box under Recipient and press the ![]() button. A virtual keyboard appears that you can use to enter the recipient’s
button. A virtual keyboard appears that you can use to enter the recipient’s
Highlight the second box under Recipient and press the ![]() button. You can select between Manual and listed SMTP mail server providers.
button. You can select between Manual and listed SMTP mail server providers.
NOTE: The
Highlight the box under the ![]() heading and press the
heading and press the ![]() button to toggle between On and Off. The DVR will clip an event detected video segment and attach it to an email when the
button to toggle between On and Off. The DVR will clip an event detected video segment and attach it to an email when the ![]() box is turned On.
box is turned On.
NOTE: Attaching a video clip to an email will not be available for the
The Mail accounts can be deleted by highlighting the ![]() beside the account and pressing the
beside the account and pressing the ![]() button.
button.
Highlight SMTP Setup… and press the ![]() button. The SMTP Setup screen appears.
button. The SMTP Setup screen appears.
Highlight the box beside Type and press the ![]() button. You can select between Manual and listed SMTP mail server providers.
button. You can select between Manual and listed SMTP mail server providers.
Highlight the box beside SMTP Server and press the ![]() button. A virtual keyboard appears that you can use to enter the IP address or domain name of the SMTP server.
button. A virtual keyboard appears that you can use to enter the IP address or domain name of the SMTP server.
NOTE: You will need to get the IP Address or domain name of the SMTP Server from your network administrator.
NOTE: You can use the domain name instead of IP address if you already set up the DNS Server when setting up the LAN.
48
