Remove the printer cover (if attached).
Identify the “snap levers” as shown in Figure
Pull both snap levers forward, and at the same time . . .
Rock the tractor unit up and towards you about half an inch. Now lift the tractor up and away from the printer.
Up to this point, we’ve been clearing the decks for action, so to speak. Only two more things are left to do before we can start printing. They are, 1) attach the paper separator, and 2) install the ink ribbon cartridge. Actually, if you’re planning to print on single sheets only, you won’t need to use the paper separator,
which are designed expressly to guide continuous paper
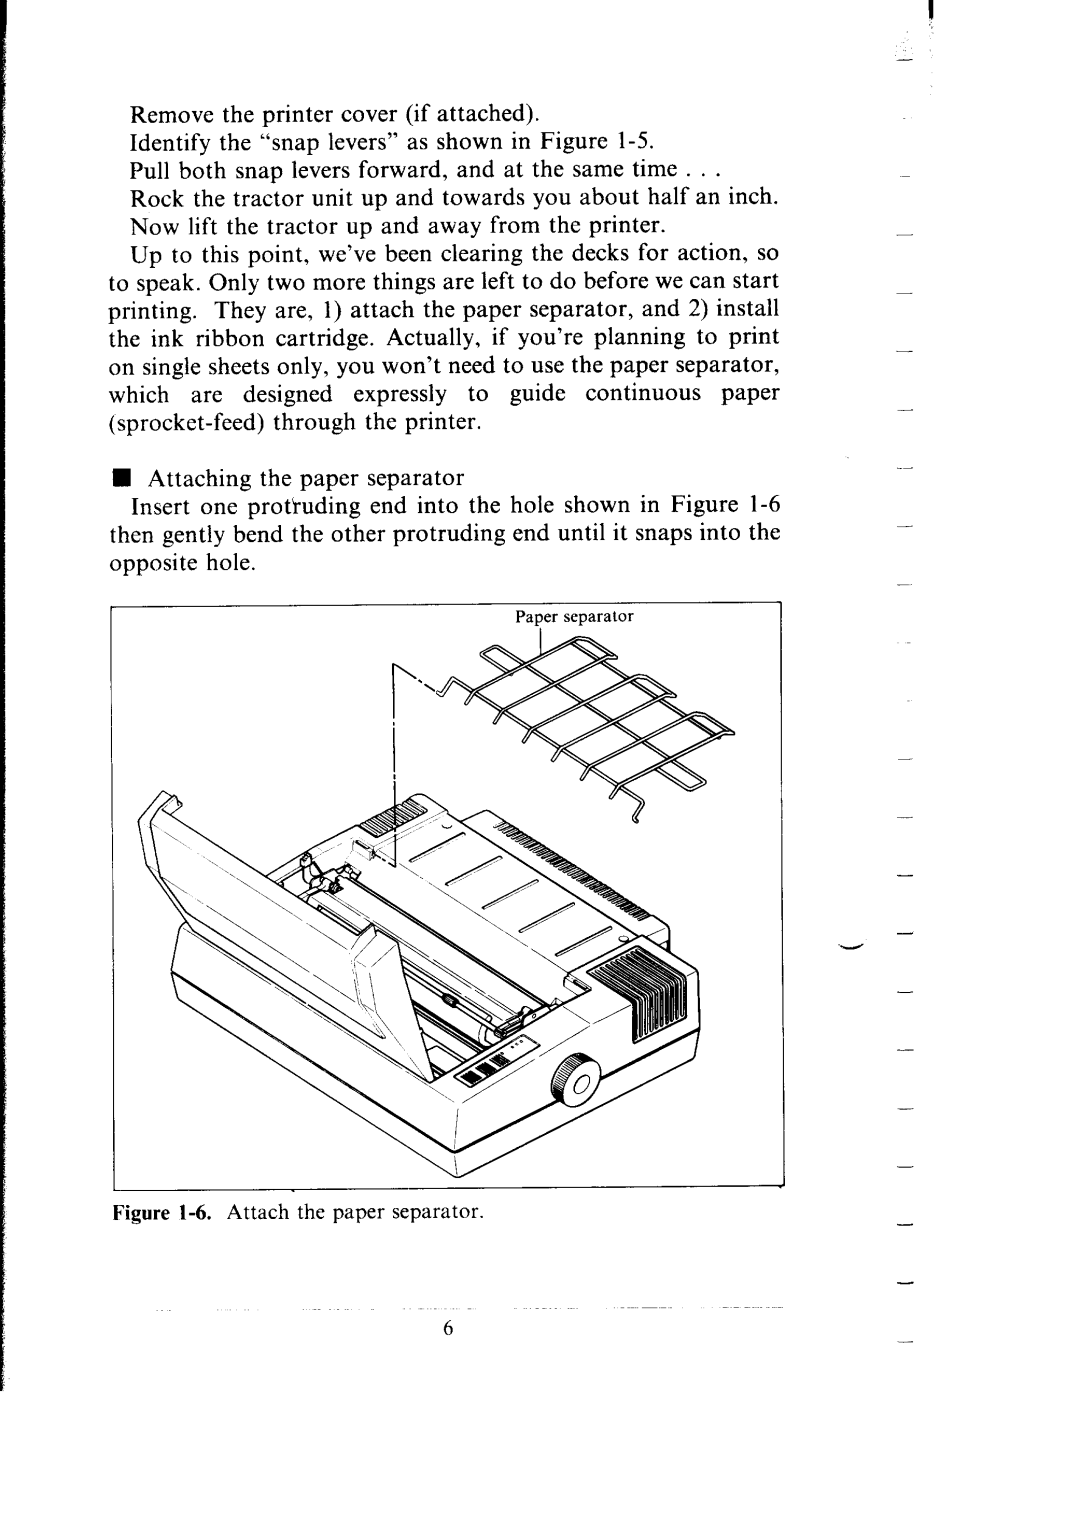
H Attaching the paper separator
Insert one protruding end into the hole shown in Figure
Paper separator
Figure 1-6. Attach the paper separator.
-
-
-
-
_-
-
-
-
-
6 | - |
|