3.Raise the paper bail bar; lift the paper separator upright.
4.Place the stack of
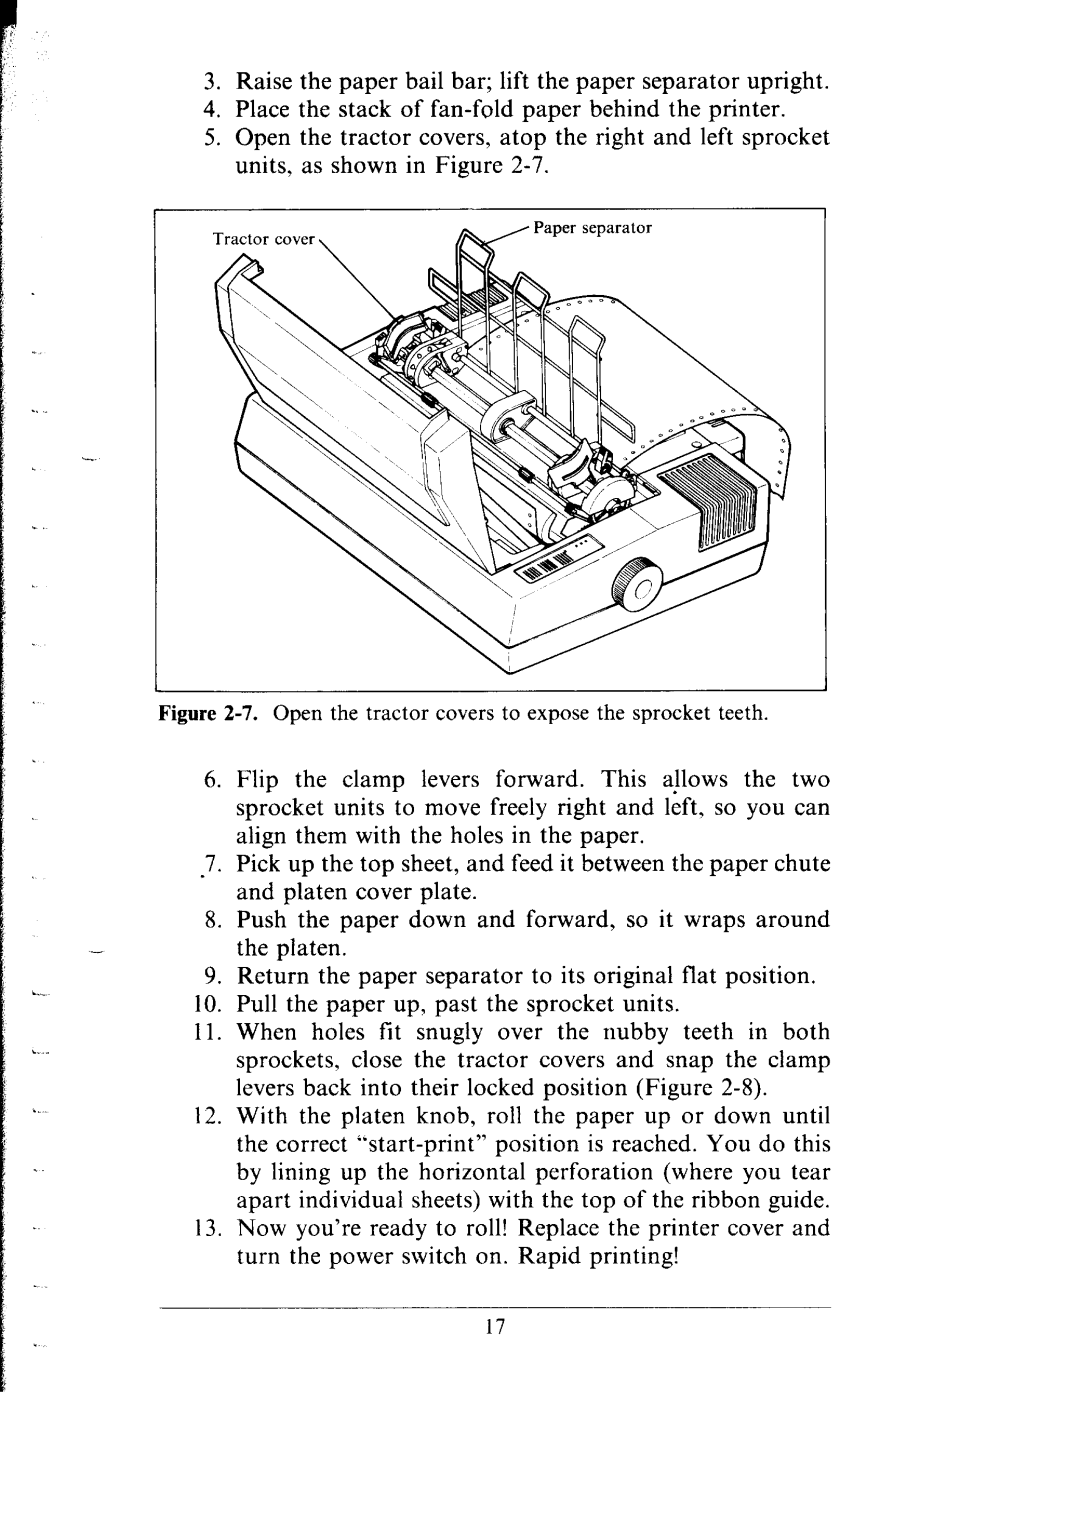
5.Open the tractor covers, atop the right and left sprocket units, as shown in Figure
Figure 2-7. Open the tractor covers to expose the sprocket teeth.
| 6. Flip the clamp levers forward. This aLlows the two |
| sprocket units to move freely right and left. so you can |
| align them with the holes in the paper. |
|
|
| and platen cover plate. |
| 8. Push the paper down and forward, so it wraps around |
- | the platen. |
9.Return the paper separator to its original flat position.
10. Pull the paper up, past the sprocket units.
11. When holes fit snugly over the nubby teeth in both sprockets, close the tractor covers and snap the clamp levers back into their locked position (Figure
12. With the platen knob, roll the paper up or down until the correct
13. Now you’re ready to roll! Replace the printer cover and turn the power switch on. Rapid printing!
17