Important news: If you get this in upside down, they won’t work. So take another sharp look at Figure
on to the final
nInstalling the ribbon cartridge
The ribbon cartridge greatly simplifies installing the ink ribbon. For easy installation, though, it’s wise to follow the sequence and diagrams shown here.
1.Turn the power switch off, and remove the printer cover (as explained earlier.)
2.Slide the print head gently with your fingers to the ap-
proximate center of its pathway. | ’ |
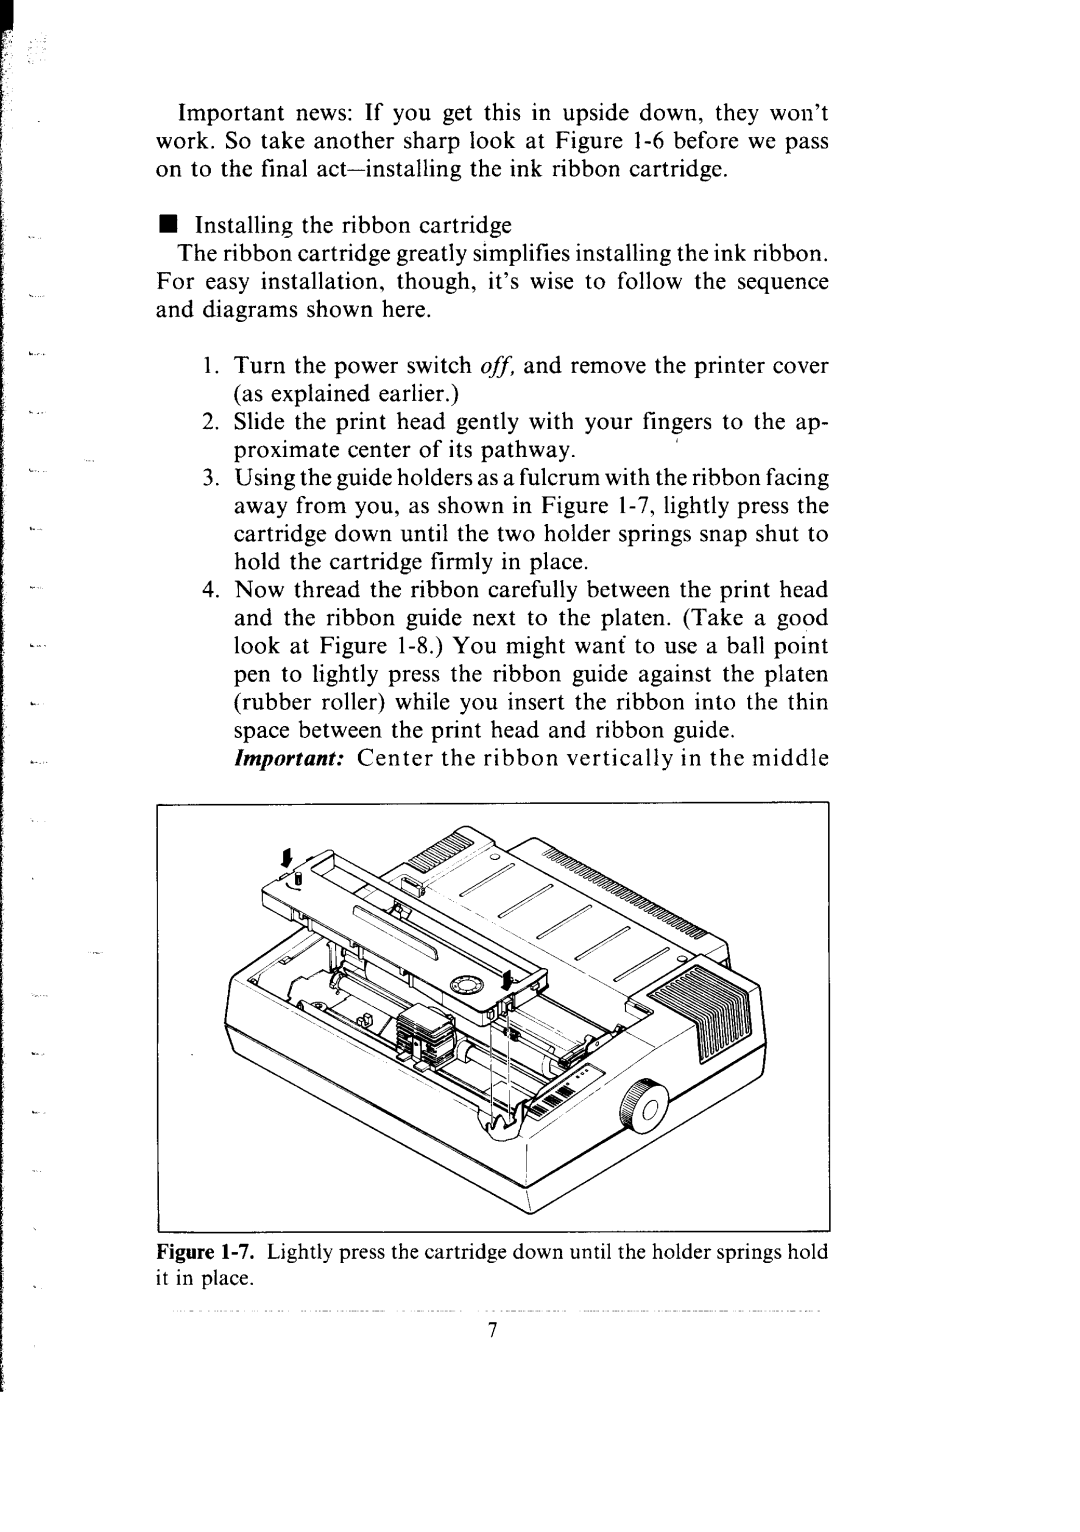
3.Using the guide holders as a fulcrum with the ribbon facing away from you, as shown in Figure
4.Now thread the ribbon carefully between the print head and the ribbon guide next to the platen. (Take a good look at Figure
Zmpovtant: Center the ribbon vertically in the middle
Figure 1-7. Lightly press the cartridge down until the holder springs hold
it in place.
7