c
RIBBON INSTALLATION
This is described in two places: installation of the ribbon car- tridge is explained in Chapter 1; replacing the ink ribbon inside
the ribbon cartridge casing is described in Chapter 11 (“Maintenance”).
ADJUSTING THE GAP
The gap is the space between the print head and the platen. Adjusting the gap is simply adjusting the printer to accommodate different thicknesses of paper.
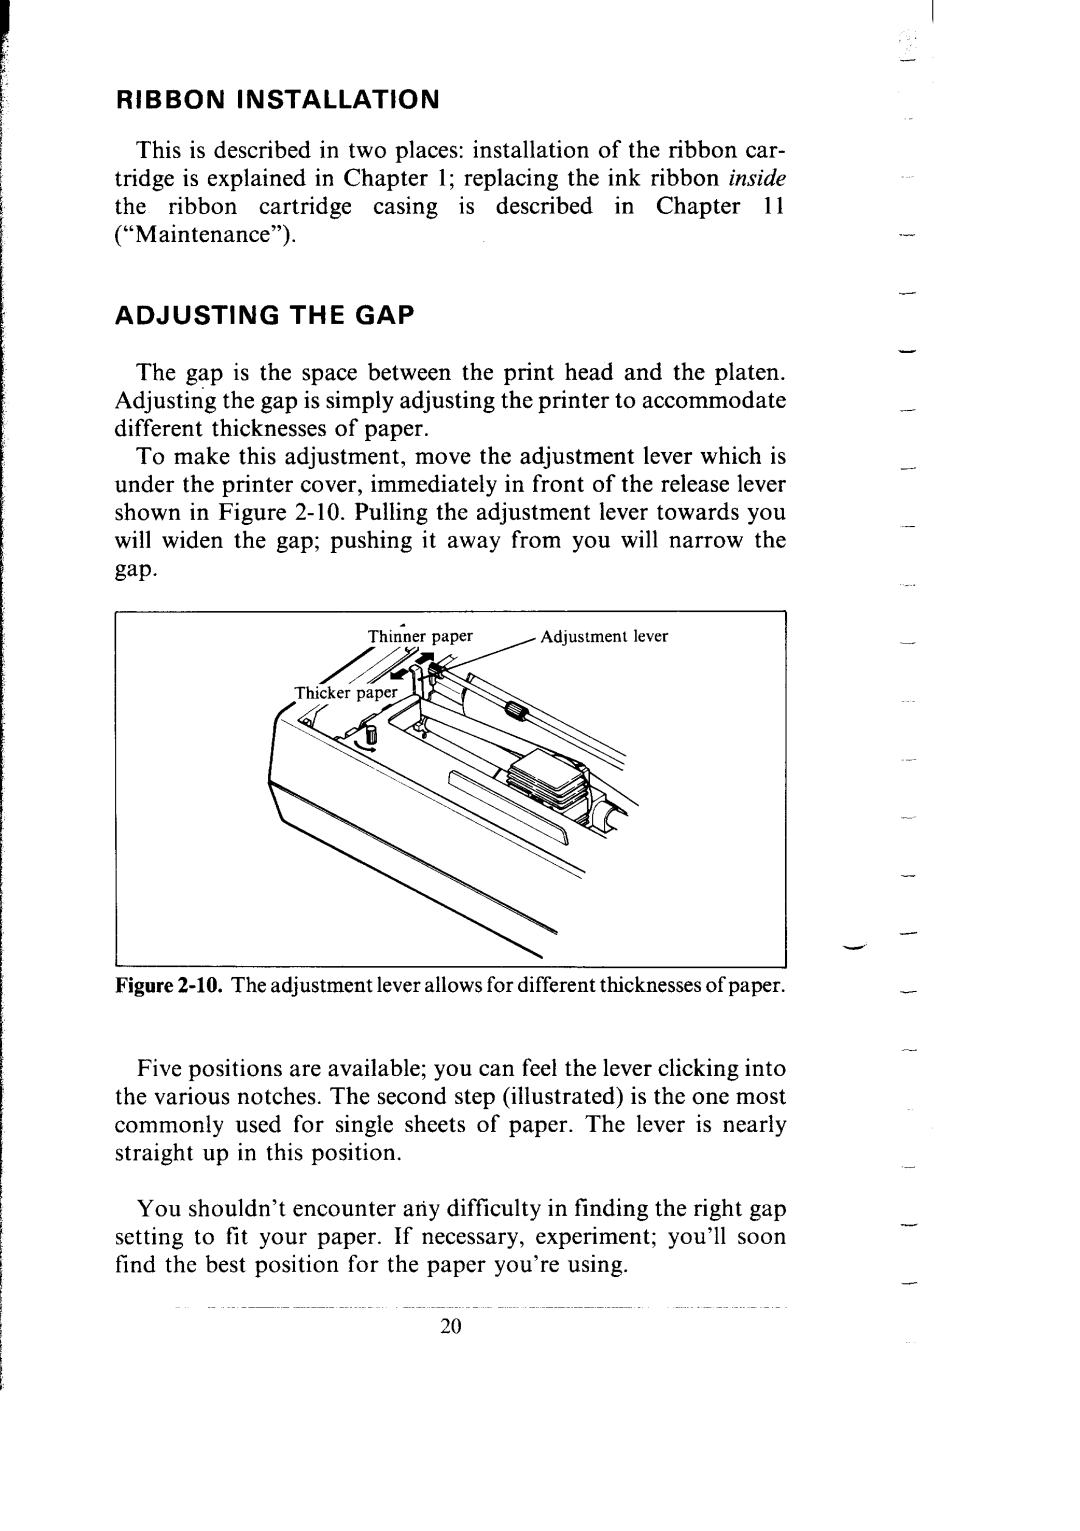
To make this adjustment, move the adjustment lever which is under the printer cover, immediately in front of the release lever shown in Figure
gap.
Figure 2-10. The adjustment lever allows for different thicknesses of paper.
Five positions are available; you can feel the lever clicking into the various notches. The second step (illustrated) is the one most commonly used for single sheets of paper. The lever is nearly straight up in this position.
You shouldn’t encounter any difficulty in finding the right gap setting to fit your paper. If necessary, experiment; you’ll soon find the best position for the paper you’re using.
-
.-
-
-
-
-
-
-
-
-
20