6. Appendix
Error Message List
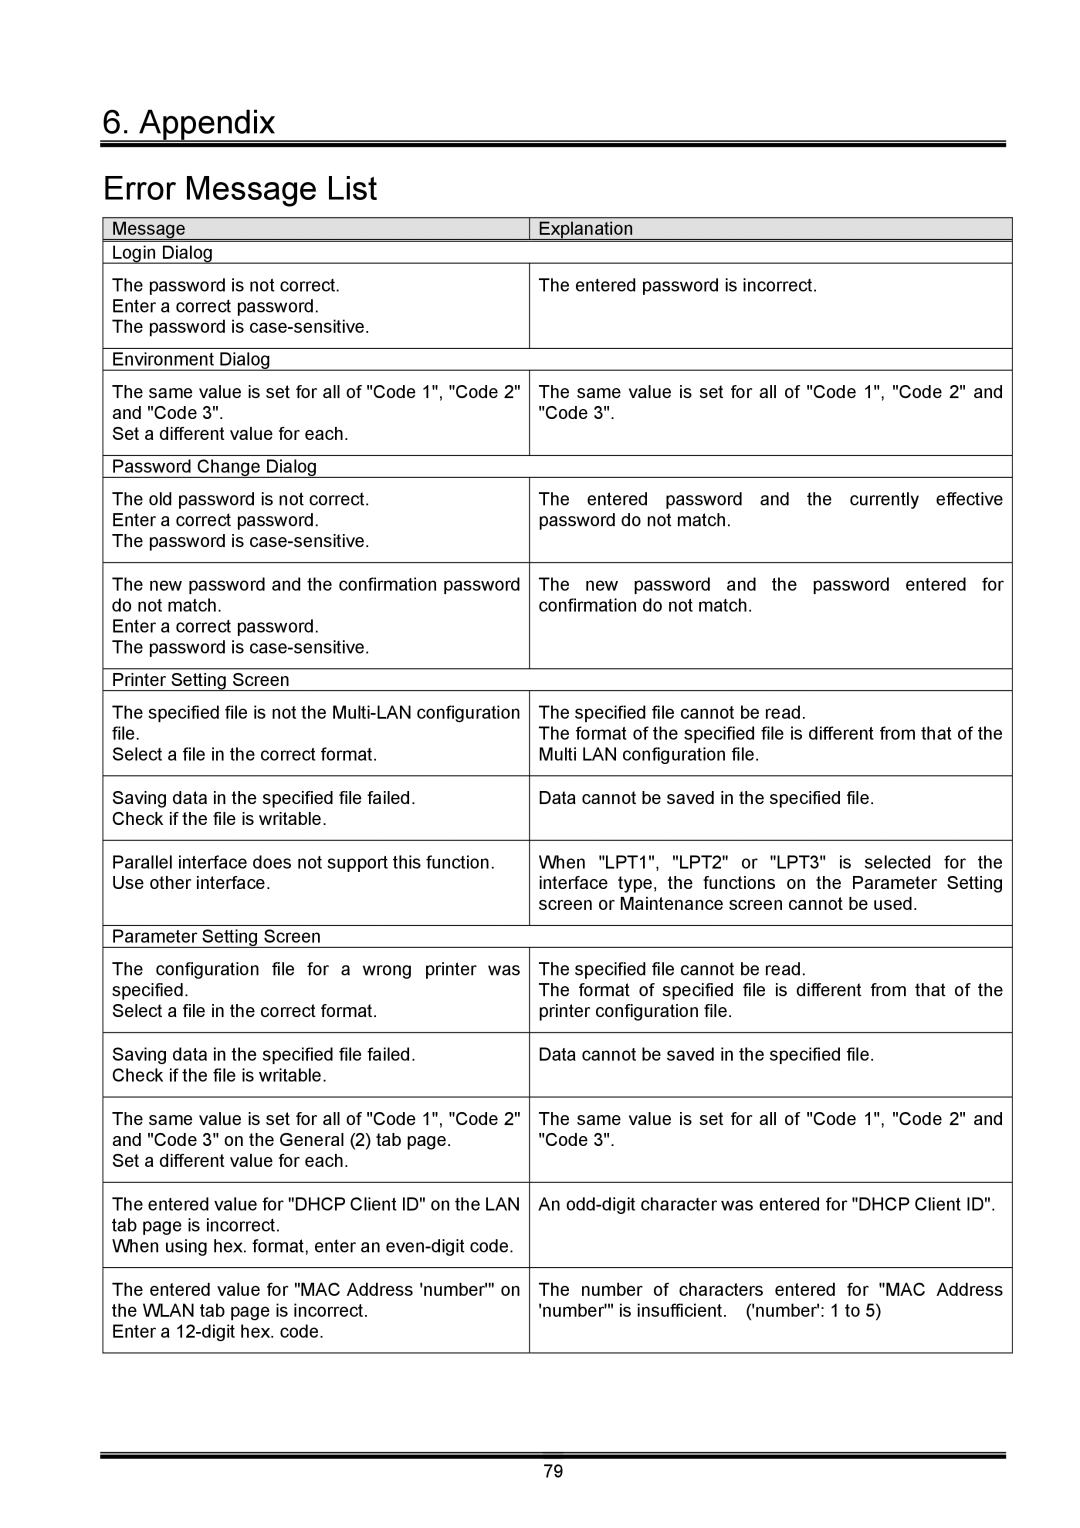
Message | Explanation |
Login Dialog |
|
The password is not correct. | The entered password is incorrect. |
Enter a correct password. |
|
The password is |
|
|
|
Environment Dialog |
|
The same value is set for all of "Code 1", "Code 2" | The same value is set for all of "Code 1", "Code 2" and |
and "Code 3". | "Code 3". |
Set a different value for each. |
|
|
|
Password Change Dialog |
|
The old password is not correct. | The entered password and the currently effective |
Enter a correct password. | password do not match. |
The password is |
|
|
|
The new password and the confirmation password | The new password and the password entered for |
do not match. | confirmation do not match. |
Enter a correct password. |
|
The password is |
|
|
|
Printer Setting Screen |
|
The specified file is not the | The specified file cannot be read. |
file. | The format of the specified file is different from that of the |
Select a file in the correct format. | Multi LAN configuration file. |
|
|
Saving data in the specified file failed. | Data cannot be saved in the specified file. |
Check if the file is writable. |
|
|
|
Parallel interface does not support this function. | When "LPT1", "LPT2" or "LPT3" is selected for the |
Use other interface. | interface type, the functions on the Parameter Setting |
| screen or Maintenance screen cannot be used. |
|
|
Parameter Setting Screen |
|
The configuration file for a wrong printer was | The specified file cannot be read. |
specified. | The format of specified file is different from that of the |
Select a file in the correct format. | printer configuration file. |
|
|
Saving data in the specified file failed. | Data cannot be saved in the specified file. |
Check if the file is writable. |
|
|
|
The same value is set for all of "Code 1", "Code 2" | The same value is set for all of "Code 1", "Code 2" and |
and "Code 3" on the General (2) tab page. | "Code 3". |
Set a different value for each. |
|
|
|
The entered value for "DHCP Client ID" on the LAN | An |
tab page is incorrect. |
|
When using hex. format, enter an |
|
|
|
The entered value for "MAC Address 'number'" on | The number of characters entered for "MAC Address |
the WLAN tab page is incorrect. | 'number'" is insufficient. ('number': 1 to 5) |
Enter a |
|
|
|
79