Group
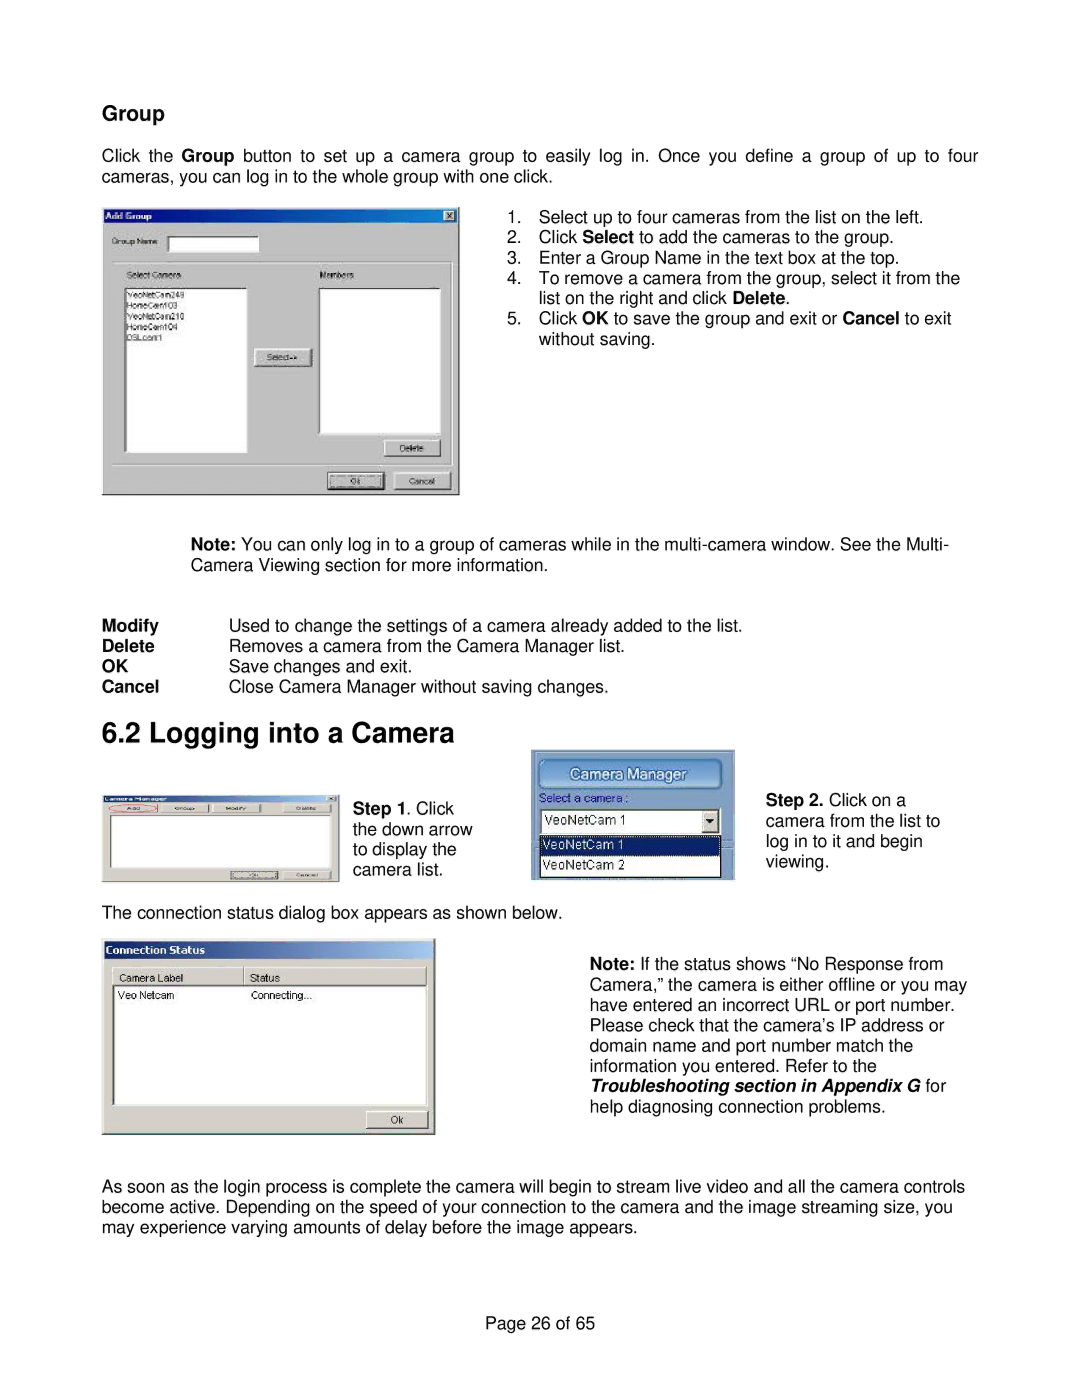
Click the Group button to set up a camera group to easily log in. Once you define a group of up to four cameras, you can log in to the whole group with one click.
1.Select up to four cameras from the list on the left.
2.Click Select to add the cameras to the group.
3.Enter a Group Name in the text box at the top.
4.To remove a camera from the group, select it from the list on the right and click Delete.
5.Click OK to save the group and exit or Cancel to exit without saving.
| Note: You can only log in to a group of cameras while in the |
| Camera Viewing section for more information. |
Modify | Used to change the settings of a camera already added to the list. |
Delete | Removes a camera from the Camera Manager list. |
OK | Save changes and exit. |
Cancel | Close Camera Manager without saving changes. |
6.2 Logging into a Camera
Step 1. Click the down arrow to display the camera list.
The connection status dialog box appears as shown below.
Step 2. Click on a camera from the list to log in to it and begin viewing.
Note: If the status shows “No Response from Camera,” the camera is either offline or you may have entered an incorrect URL or port number. Please check that the camera’s IP address or domain name and port number match the information you entered. Refer to the Troubleshooting section in Appendix G for help diagnosing connection problems.
As soon as the login process is complete the camera will begin to stream live video and all the camera controls become active. Depending on the speed of your connection to the camera and the image streaming size, you may experience varying amounts of delay before the image appears.
Page 26 of 65