Installing a T1 or E1 Dual Port Digital PBX Interface Card
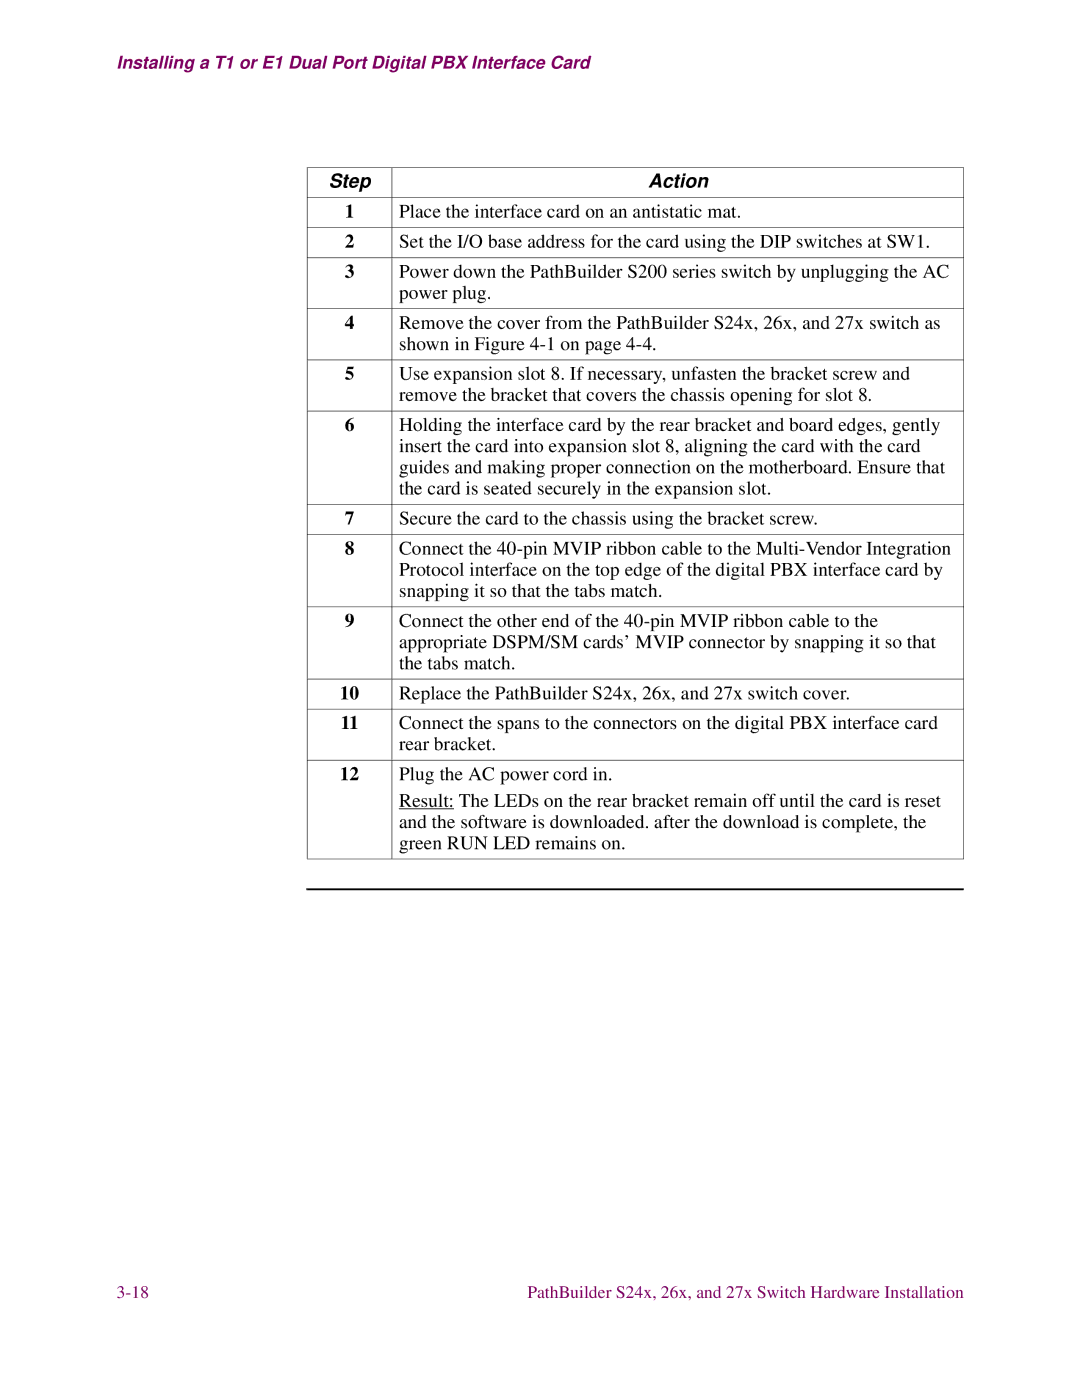
Step | Action |
|
|
1 | Place the interface card on an antistatic mat. |
|
|
2 | Set the I/O base address for the card using the DIP switches at SW1. |
|
|
3 | Power down the PathBuilder S200 series switch by unplugging the AC |
| power plug. |
|
|
4 | Remove the cover from the PathBuilder S24x, 26x, and 27x switch as |
| shown in Figure |
|
|
5 | Use expansion slot 8. If necessary, unfasten the bracket screw and |
| remove the bracket that covers the chassis opening for slot 8. |
|
|
6 | Holding the interface card by the rear bracket and board edges, gently |
| insert the card into expansion slot 8, aligning the card with the card |
| guides and making proper connection on the motherboard. Ensure that |
| the card is seated securely in the expansion slot. |
|
|
7 | Secure the card to the chassis using the bracket screw. |
|
|
8 | Connect the |
| Protocol interface on the top edge of the digital PBX interface card by |
| snapping it so that the tabs match. |
|
|
9 | Connect the other end of the |
| appropriate DSPM/SM cards’ MVIP connector by snapping it so that |
| the tabs match. |
|
|
10 | Replace the PathBuilder S24x, 26x, and 27x switch cover. |
|
|
11 | Connect the spans to the connectors on the digital PBX interface card |
| rear bracket. |
|
|
12 | Plug the AC power cord in. |
| Result: The LEDs on the rear bracket remain off until the card is reset |
| and the software is downloaded. after the download is complete, the |
| green RUN LED remains on. |
|
|
|
|
PathBuilder S24x, 26x, and 27x Switch Hardware Installation |