Installing the PathBuilder S24x, 26x, and 27x Switch in an Equipment Rack
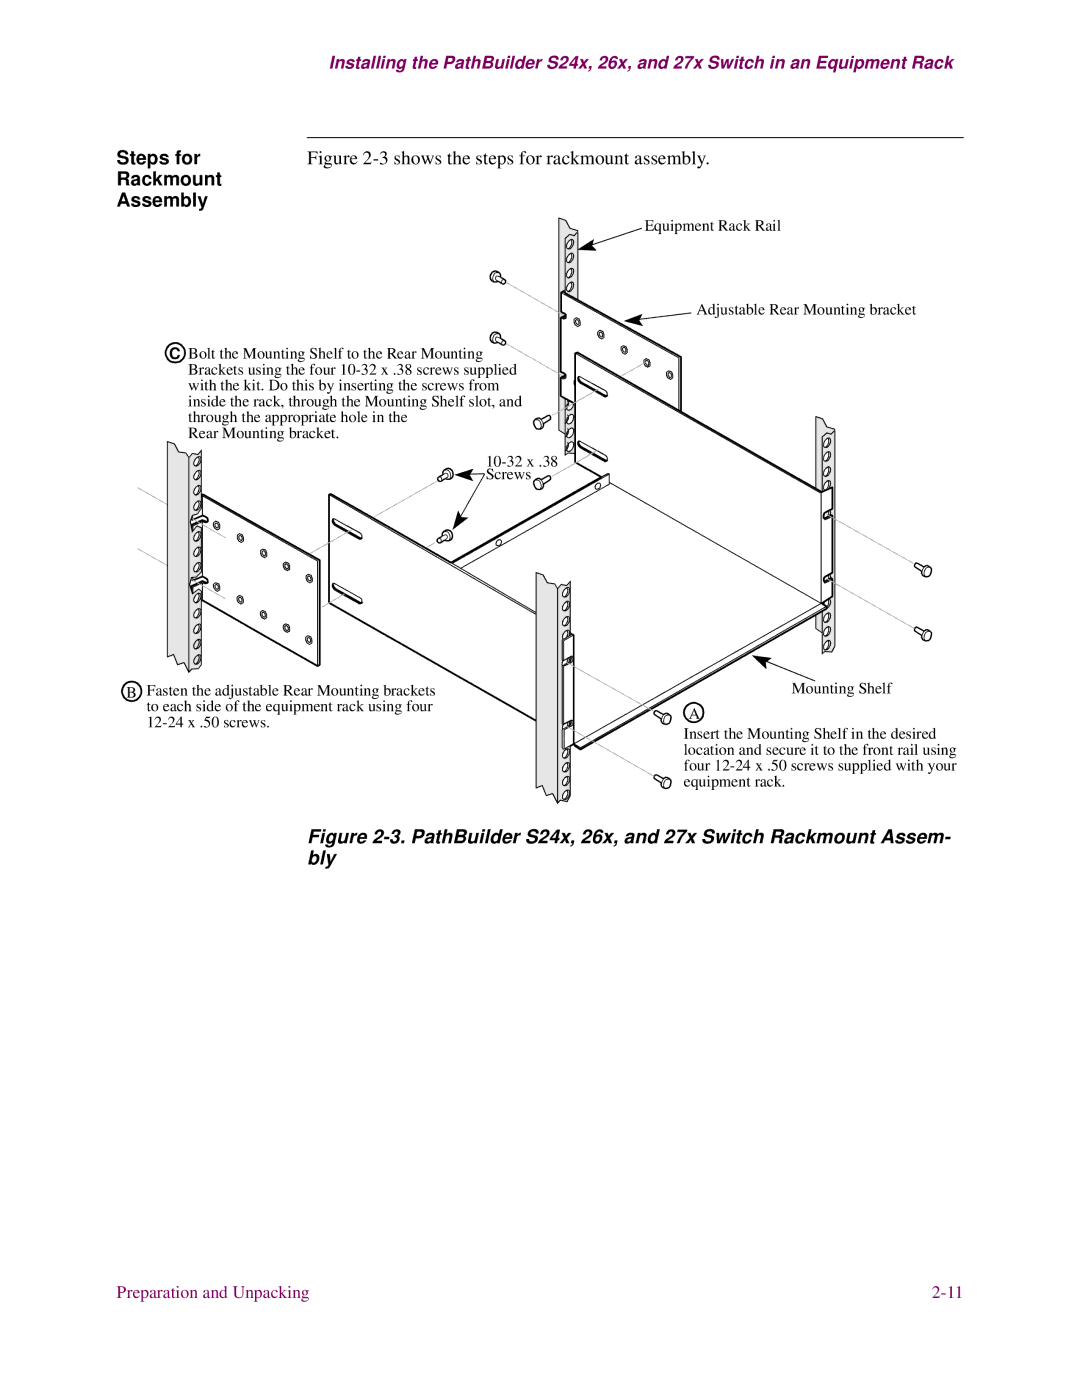
Steps for | Figure |
Rackmount |
|
Assembly |
|
| Equipment Rack Rail |
Adjustable Rear Mounting bracket
C Bolt the Mounting Shelf to the Rear Mounting Brackets using the four
Rear Mounting bracket.
![]()
![]() Screws
Screws
BFasten the adjustable Rear Mounting brackets to each side of the equipment rack using four
Mounting Shelf
A
Insert the Mounting Shelf in the desired location and secure it to the front rail using four
Figure 2-3. PathBuilder S24x, 26x, and 27x Switch Rackmount Assem- bly
Preparation and Unpacking |
