Measuring the density
Note If the liquid temperature or the type of liquid is changed during measurement, input again the value of the liquid density as necessary.
Density display is four decimal places. Minimum display can not change with the RANGE key.
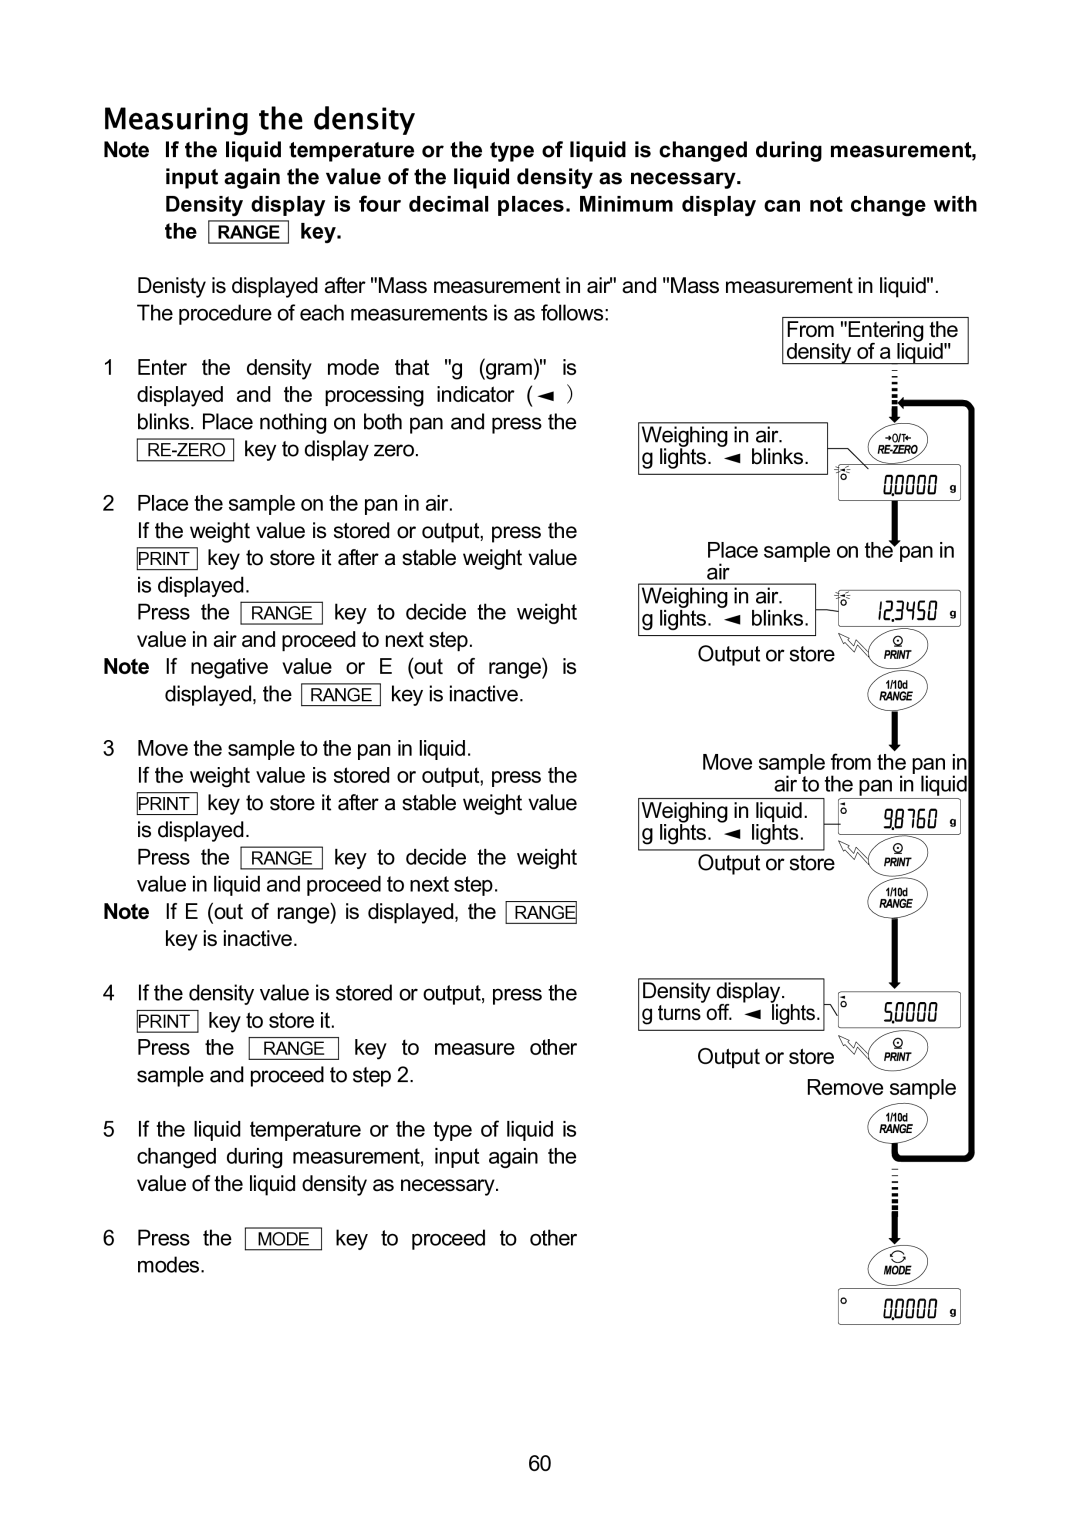
Denisty is displayed after "Mass measurement in air" and "Mass measurement in liquid". The procedure of each measurements is as follows:
1Enter the density mode that "g (gram)" is displayed and the processing indicator (![]() ) blinks. Place nothing on both pan and press the
) blinks. Place nothing on both pan and press the
2Place the sample on the pan in air.
If the weight value is stored or output, press the PRINT key to store it after a stable weight value is displayed.
Press the RANGE key to decide the weight value in air and proceed to next step.
Note If negative value or E (out of range) is displayed, the RANGE key is inactive.
3Move the sample to the pan in liquid.
If the weight value is stored or output, press the PRINT key to store it after a stable weight value is displayed.
Press the RANGE key to decide the weight value in liquid and proceed to next step.
Note If E (out of range) is displayed, the RANGE key is inactive.
4If the density value is stored or output, press the PRINT key to store it.
Press the RANGE key to measure other sample and proceed to step 2.
5If the liquid temperature or the type of liquid is changed during measurement, input again the value of the liquid density as necessary.
Weighing in air.
g lights. ![]() blinks.
blinks.
Place sample on the pan in air
Weighing in air. g lights. ![]()
![]()
![]() blinks.
blinks.
Output or store![]()
![]()
![]()
![]()
Move sample from the pan in air to the pan in liquid
Weighing in liquid. g lights. ![]()
![]()
![]() lights.
lights.
Output or store
Density display.
g turns off.  lights.
Output or store ![]()
![]()
![]()
![]() Remove sample
Remove sample
6Press the modes.
MODE
key to proceed to other
60
