11. ID Number and GLP Report
The ID number is used to identify the balance when Good Laboratory Practice (GLP) is used. The ID number is maintained in
The GLP output format is selected at "GLP output (info)" of the function table and can be output to a personal computer or printer using the
The GLP output format includes the balance manufacturer, model, serial number, ID number, date, time and space for signature for weighing data, the weight used and results for calibration or calibration test data.
The balance can output the following reports for GLP.
"Calibration report" of the calibration, using the internal mass (Calibration due to changes in temperature and
"Calibration report" of the calibration, using an external weight.
"Calibration test report" of the calibration test, using an external weight.
"Title block" and "End block" for the weighing data.
Calibration and calibration test data can be stored in memory to output several reports at the same time. Refer to "12. Data Memory" for details.
For details on confirming and setting the time and date for the GH series. Refer to "10.7. Clock and Calendar Function".
11.1.Setting the ID Number
1Press and hold the release the key.
RANGE
key until
ba5fnc
of the function table is displayed, then
RANGE
key several times to display
id
.
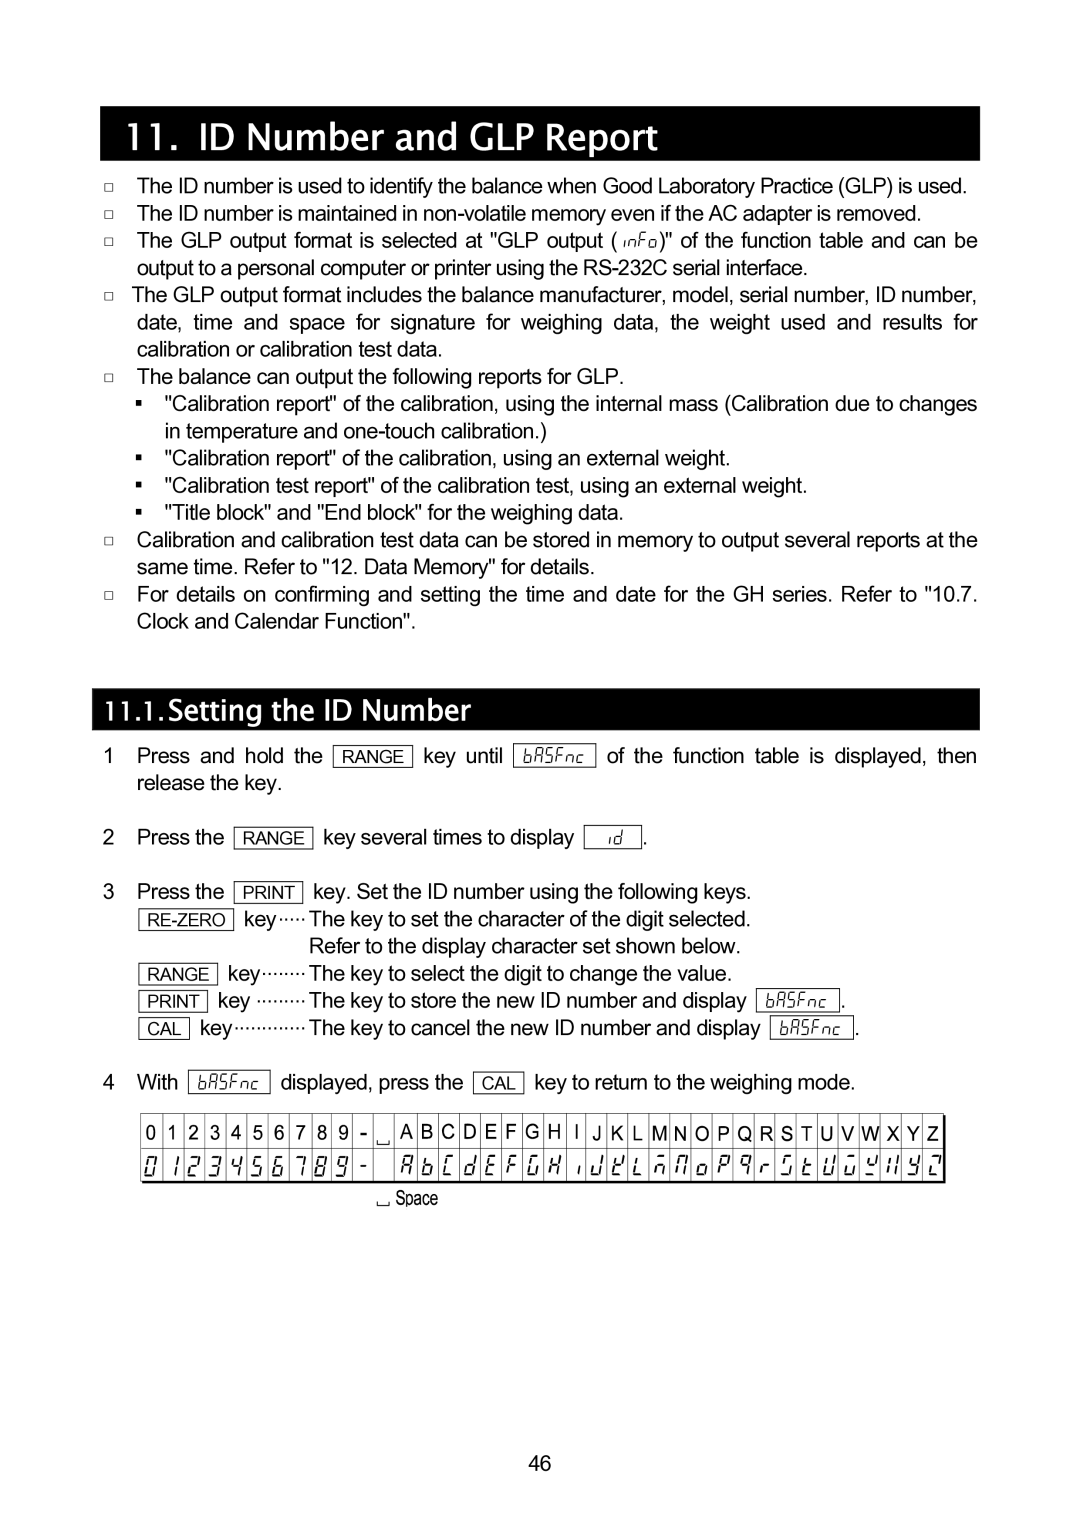
3 Press the | key. Set the ID number using the following keys. |
|
|
| ||||||
|
|
|
|
| key | The key to set the character of the digit selected. |
|
|
| |
|
|
|
| |||||||
|
|
|
|
|
| Refer to the display character set shown below. |
|
|
| |
|
|
|
| key........ The key to select the digit to change the value. |
|
|
| |||
| RANGE |
|
|
| ||||||
|
|
|
| key ......... The key to store the new ID number and display |
|
|
| . | ||
|
|
|
|
| ba5fnc | |||||
| ||||||||||
|
| key............. The key to cancel the new ID number and display |
|
| ||||||
|
|
| ba5fnc | |||||||
| CAL | |||||||||
.
4 With
ba5fnc
displayed, press the
CAL
key to return to the weighing mode.
46