18 en Installation | |
|
|
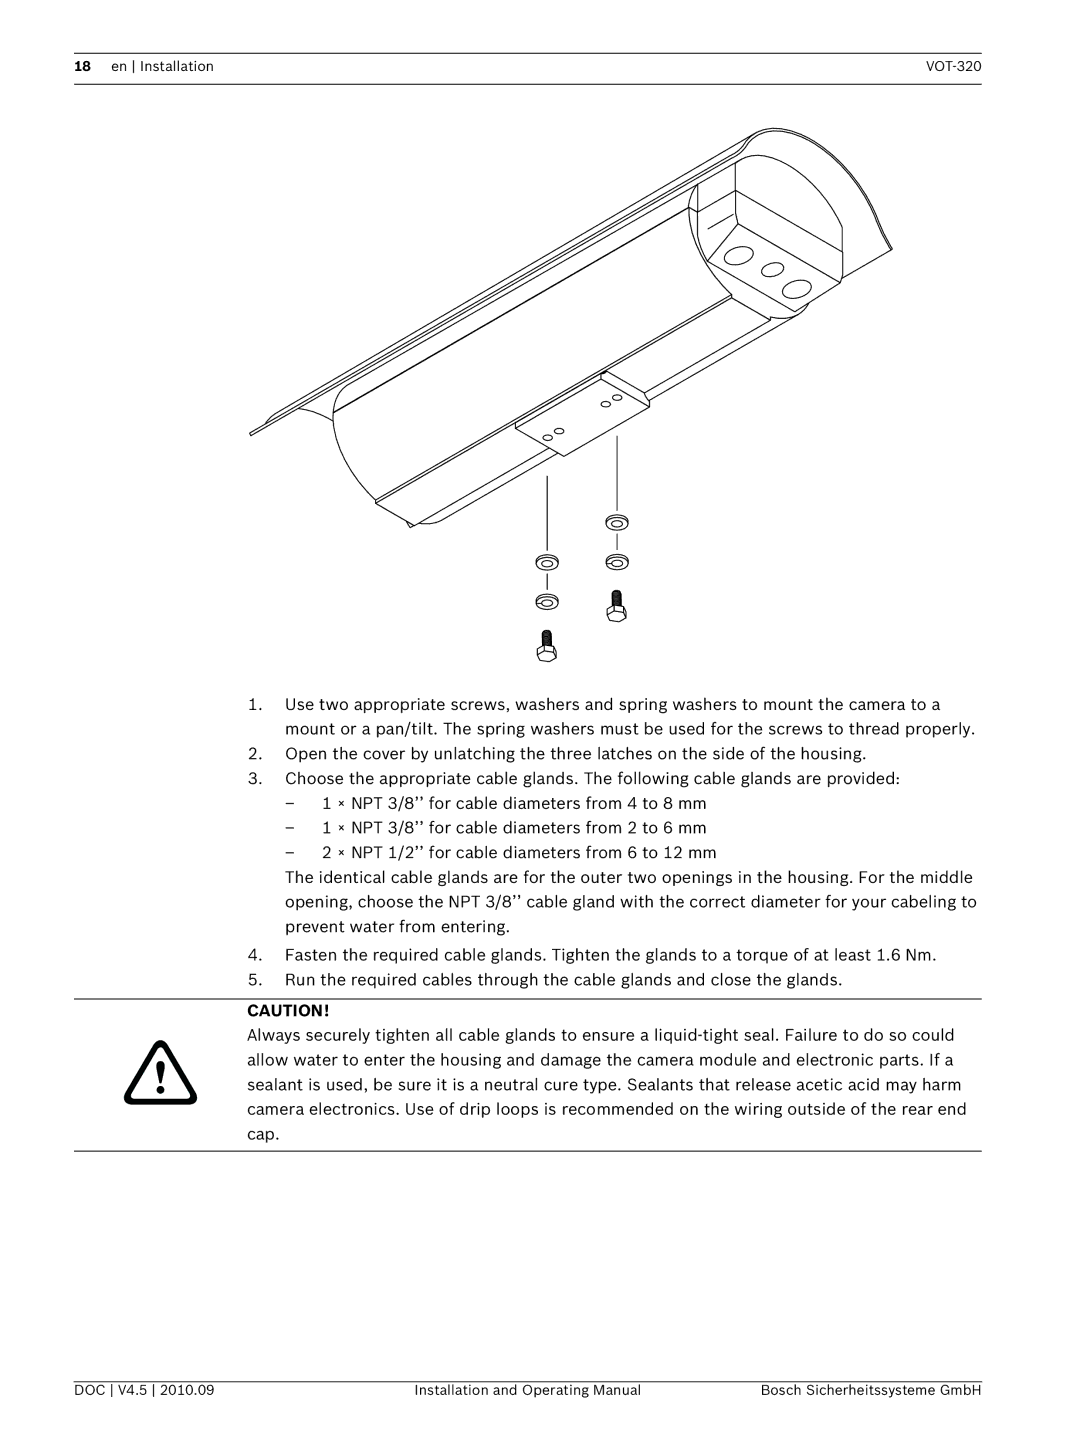
1.Use two appropriate screws, washers and spring washers to mount the camera to a mount or a pan/tilt. The spring washers must be used for the screws to thread properly.
2.Open the cover by unlatching the three latches on the side of the housing.
3.Choose the appropriate cable glands. The following cable glands are provided:
–1 × NPT 3/8’’ for cable diameters from 4 to 8 mm
–1 × NPT 3/8’’ for cable diameters from 2 to 6 mm
–2 × NPT 1/2’’ for cable diameters from 6 to 12 mm
The identical cable glands are for the outer two openings in the housing. For the middle opening, choose the NPT 3/8’’ cable gland with the correct diameter for your cabeling to prevent water from entering.
4.Fasten the required cable glands. Tighten the glands to a torque of at least 1.6 Nm.
5.Run the required cables through the cable glands and close the glands.
CAUTION!
Always securely tighten all cable glands to ensure a
DOC V4.5 2010.09 | Installation and Operating Manual | Bosch Sicherheitssysteme GmbH |
