Section 3: Operation
White Boost
This option allows you to recapture some of the lost light from the transition between segments in the color wheel when it is spinning. Use the slidebar to increase the value of White Boost from 0 to 10. When set to a value of “0” the option is OFF. As you increase the value, you will notice the image becomes slightly brighter and a little less saturated.
NOTE: It is recommended Auto Setup and Auto Input Levels be adjusted prior to applying White Boost for new sources. 2) For NTSC, HDTV, PAL and SECAM video and graphics signals the default is set to “10”. 3) White Boost is disabled when an internal test pattern is displayed – the option appears in yellow text. 4) It is recommended White Boost remain at 0 when adjusting input levels.
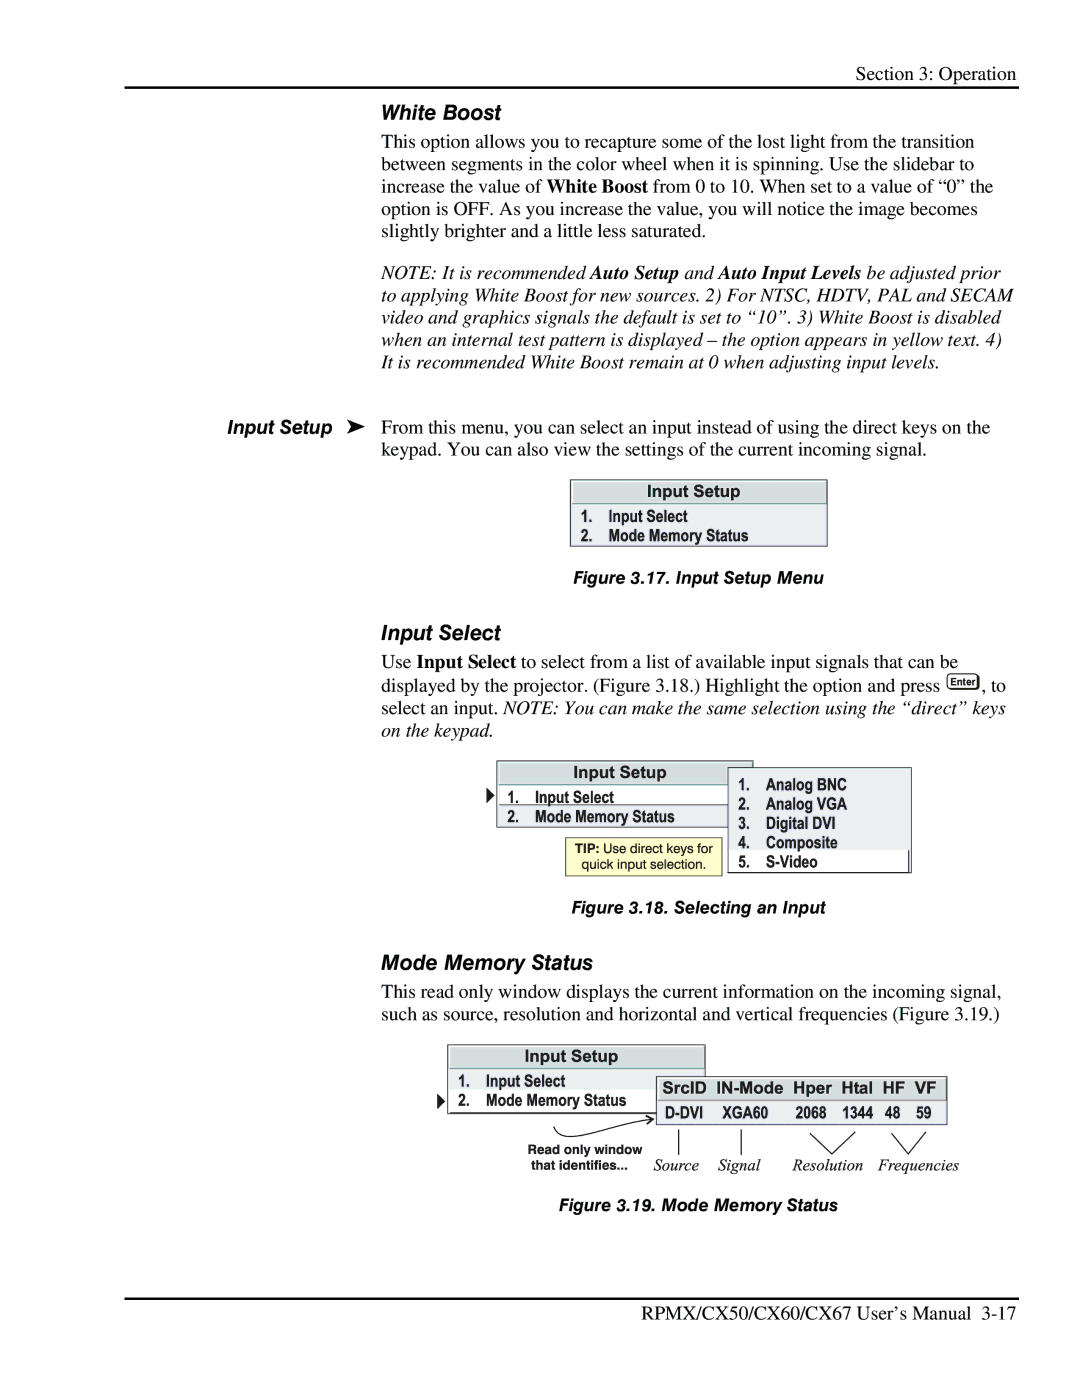
Input Setup ' From this menu, you can select an input instead of using the direct keys on the keypad. You can also view the settings of the current incoming signal.
Figure 3.17. Input Setup Menu
Input Select
Use Input Select to select from a list of available input signals that can be displayed by the projector. (Figure 3.18.) Highlight the option and press Enter , to select an input. NOTE: You can make the same selection using the “direct” keys on the keypad.
Figure 3.18. Selecting an Input
Mode Memory Status
This read only window displays the current information on the incoming signal, such as source, resolution and horizontal and vertical frequencies (Figure 3.19.)
Figure 3.19. Mode Memory Status
RPMX/CX50/CX60/CX67 User’s Manual
