Section 4: Maintenance and Troubleshooting
Figure 4.3.
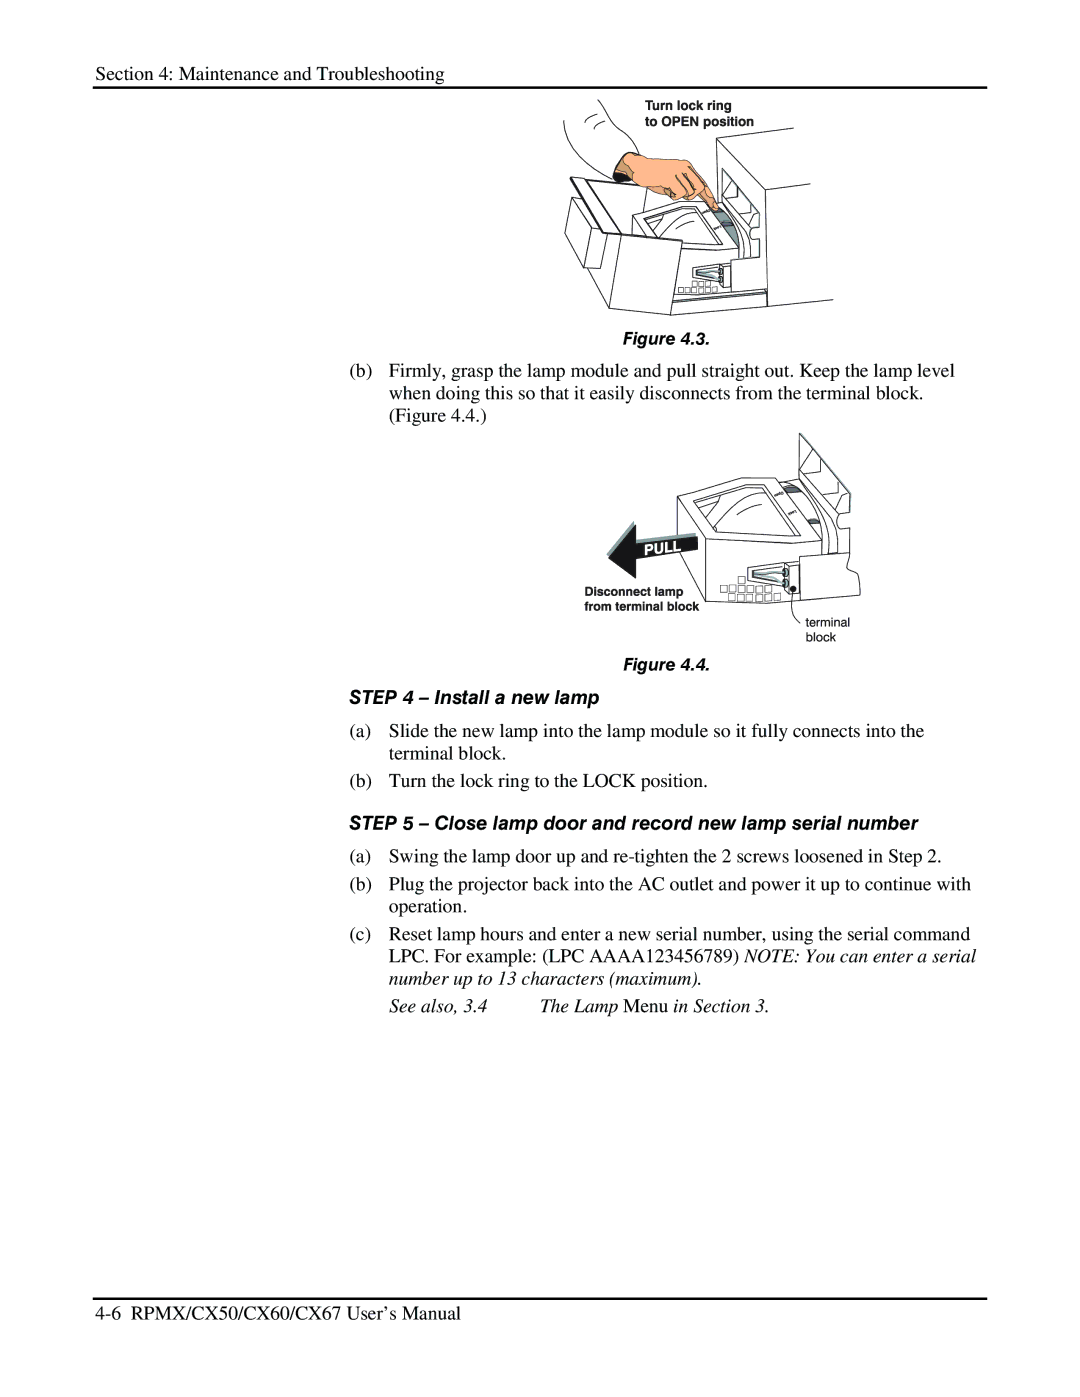
(b)Firmly, grasp the lamp module and pull straight out. Keep the lamp level when doing this so that it easily disconnects from the terminal block. (Figure 4.4.)
Figure 4.4.
STEP 4 – Install a new lamp
(a)Slide the new lamp into the lamp module so it fully connects into the terminal block.
(b)Turn the lock ring to the LOCK position.
STEP 5 – Close lamp door and record new lamp serial number
(a)Swing the lamp door up and
(b)Plug the projector back into the AC outlet and power it up to continue with operation.
(c)Reset lamp hours and enter a new serial number, using the serial command LPC. For example: (LPC AAAA123456789) NOTE: You can enter a serial number up to 13 characters (maximum).