Chapter 4 Installing or Replacing the Backup Battery
Connecting the Backup Battery Cable and Closing the Radio Cover
Connecting the Backup Battery Cable and Closing the Radio Cover
To connect the backup battery cable and close the access point radio cover, follow these steps:
Step 1 Carefully position the access point radio cover over the access point as shown in Figure
Step 2 Hold the radio cover upright while placing the edge of the radio cover on the top edge of the access point. Step 3 Carefully push the backup battery cable connector into the internal battery connector (see Figure
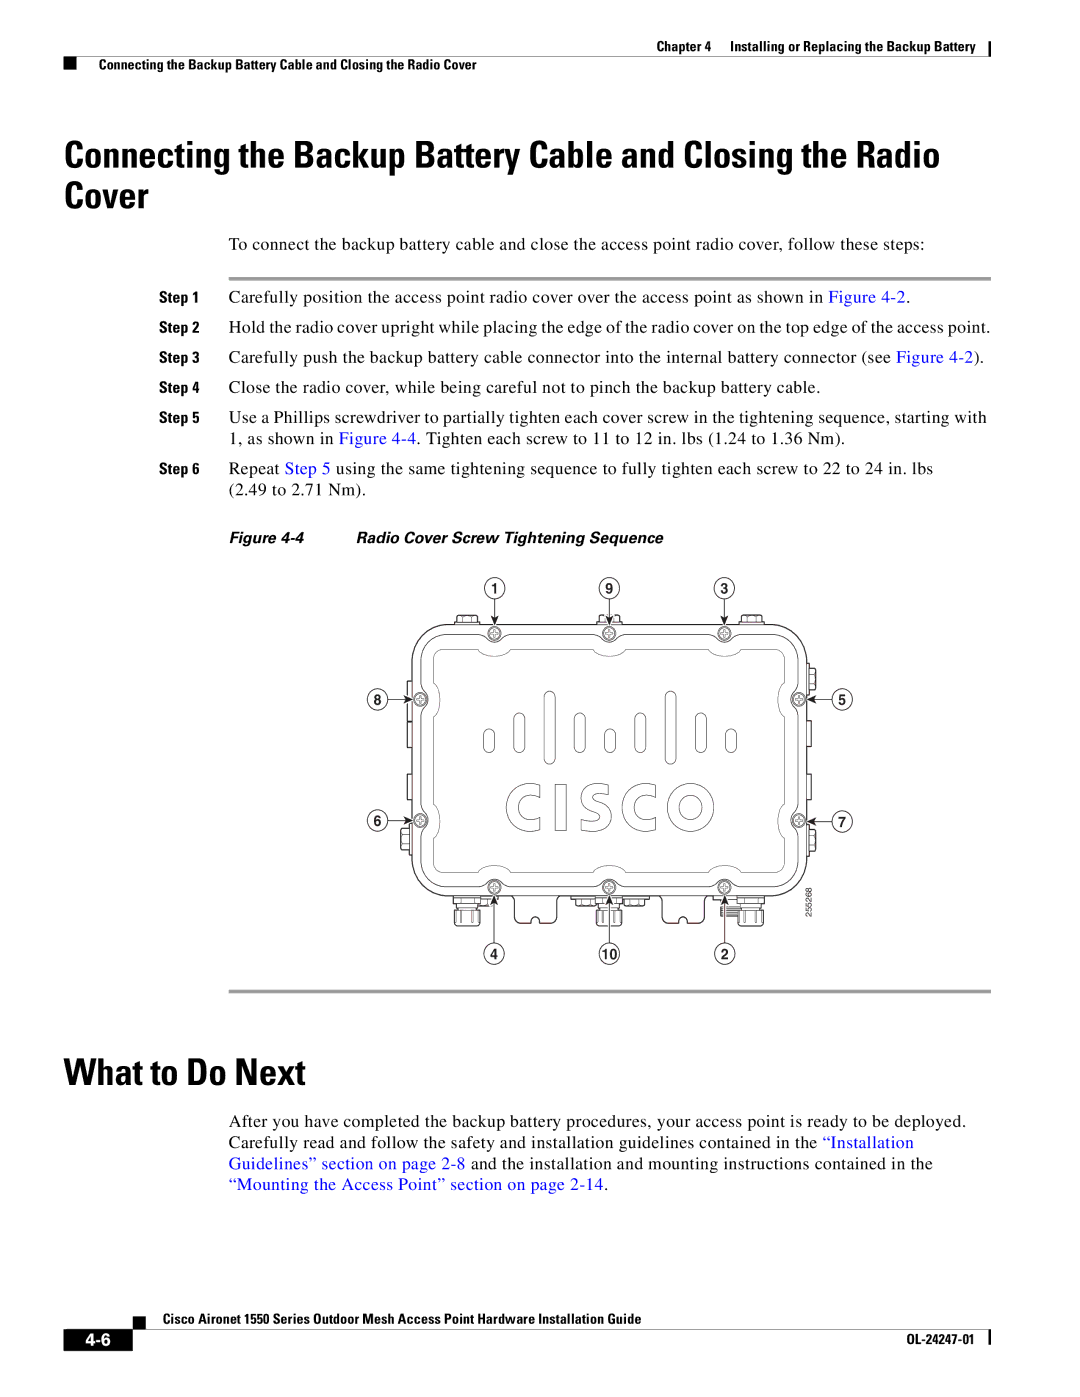
Step 5 Use a Phillips screwdriver to partially tighten each cover screw in the tightening sequence, starting with 1, as shown in Figure
Step 6 Repeat Step 5 using the same tightening sequence to fully tighten each screw to 22 to 24 in. lbs (2.49 to 2.71 Nm).
Figure 4-4 Radio Cover Screw Tightening Sequence
1 | 9 | 3 |
8
6
5
7
|
| 255268 |
4 | 10 | 2 |
What to Do Next
After you have completed the backup battery procedures, your access point is ready to be deployed. Carefully read and follow the safety and installation guidelines contained in the “Installation Guidelines” section on page
Cisco Aironet 1550 Series Outdoor Mesh Access Point Hardware Installation Guide
|
| |
|