Chapter 2 Installing the Access Point
Mounting the Access Point
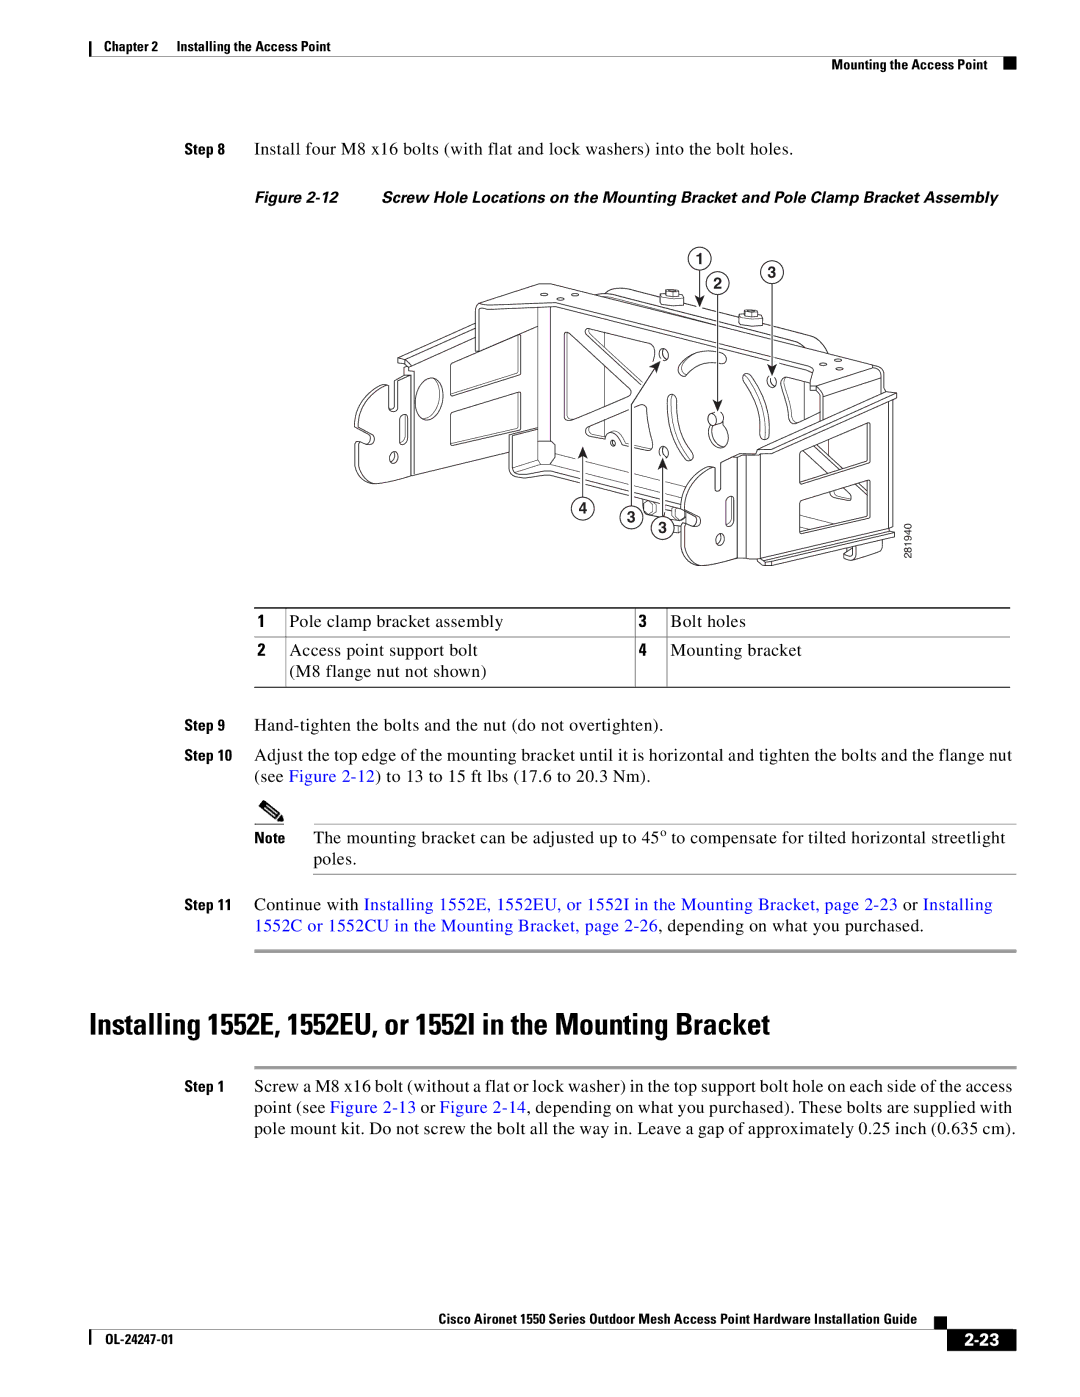
Step 8 Install four M8 x16 bolts (with flat and lock washers) into the bolt holes.
Figure 2-12 Screw Hole Locations on the Mounting Bracket and Pole Clamp Bracket Assembly
1
2
3
4
3
3
281940
| 1 |
| Pole clamp bracket assembly | 3 | Bolt holes |
| |
|
|
|
|
|
|
| |
| 2 |
| Access point support bolt | 4 | Mounting bracket | ||
|
|
| (M8 flange nut not shown) |
|
|
| |
|
|
|
|
|
| ||
Step 9 |
|
| |||||
Step 10 | Adjust the top edge of the mounting bracket until it is horizontal and tighten the bolts and the flange nut | ||||||
| (see Figure |
|
| ||||
|
|
|
|
|
|
|
|
| Note |
| The mounting bracket can be adjusted up to 45o to compensate for tilted horizontal streetlight | ||||
|
|
|
| poles. |
|
|
|
|
|
|
|
|
|
| |
Step 11 | Continue with Installing 1552E, 1552EU, or 1552I in the Mounting Bracket, page | ||||||
| 1552C or 1552CU in the Mounting Bracket, page | ||||||
|
|
|
|
|
|
|
|
Installing 1552E, 1552EU, or 1552I in the Mounting Bracket
Step 1 Screw a M8 x16 bolt (without a flat or lock washer) in the top support bolt hole on each side of the access point (see Figure
|
| Cisco Aironet 1550 Series Outdoor Mesh Access Point Hardware Installation Guide |
|
| |
|
|
| |||
|
|
|
| ||
|
|
|
| ||
