Chapter 2 Installing the Access Point
Mounting the Access Point
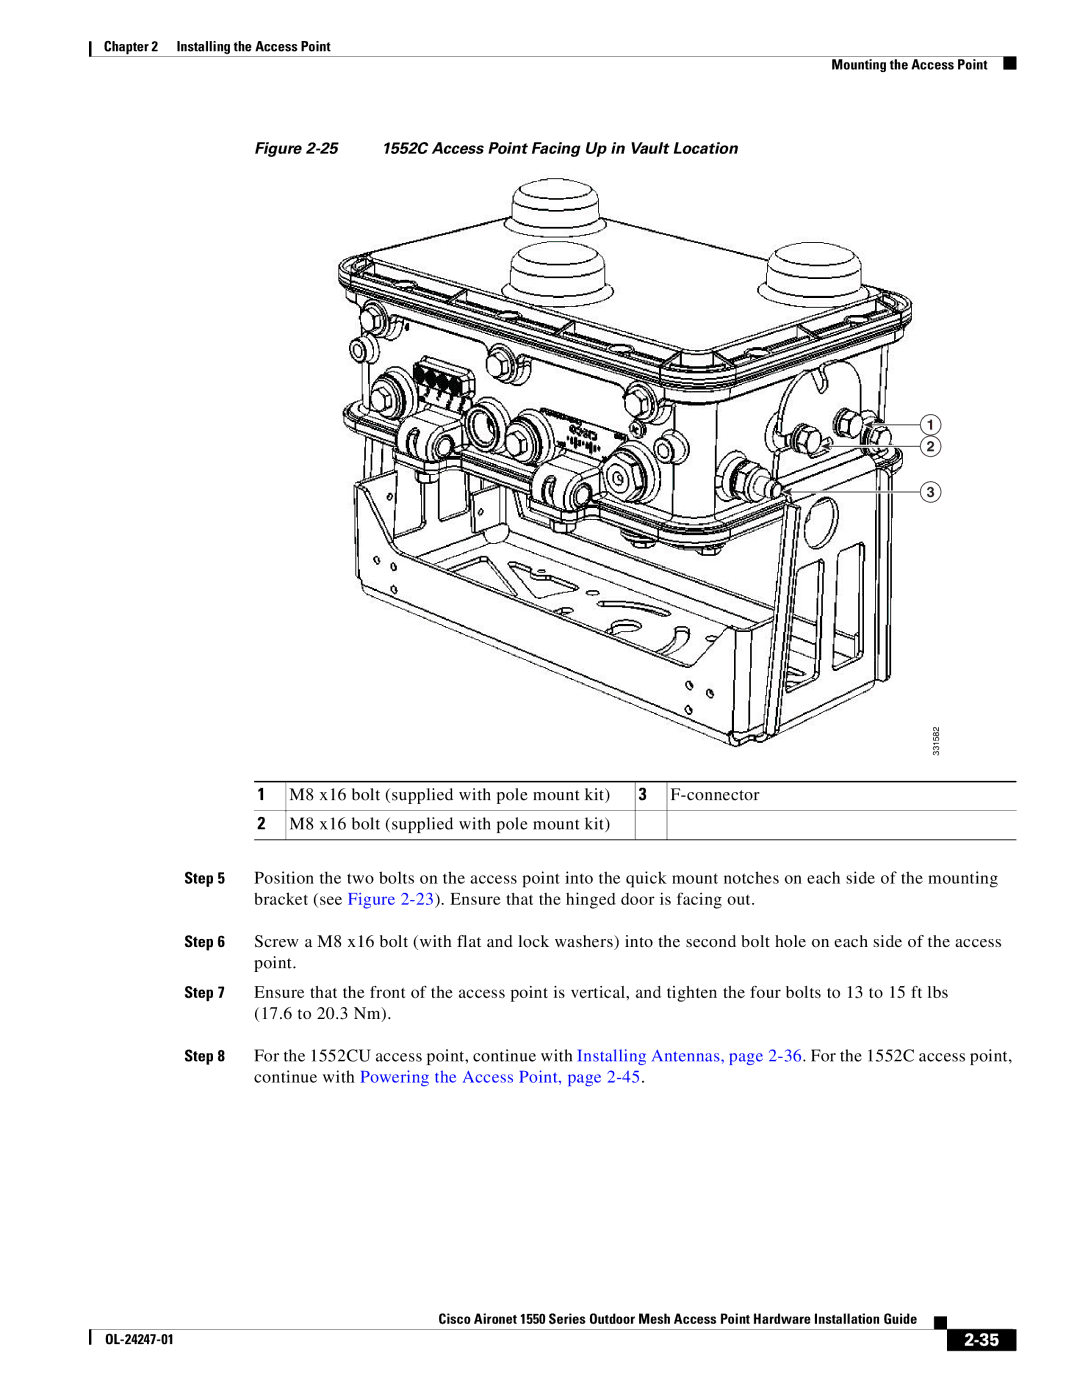
Figure 2-25 1552C Access Point Facing Up in Vault Location
1
2
3
1
2
331582
M8 x16 bolt (supplied with pole mount kit) | 3 |
M8 x16 bolt (supplied with pole mount kit)
Step 5 Position the two bolts on the access point into the quick mount notches on each side of the mounting bracket (see Figure
Step 6 Screw a M8 x16 bolt (with flat and lock washers) into the second bolt hole on each side of the access point.
Step 7 Ensure that the front of the access point is vertical, and tighten the four bolts to 13 to 15 ft lbs (17.6 to 20.3 Nm).
Step 8 For the 1552CU access point, continue with Installing Antennas, page
|
| Cisco Aironet 1550 Series Outdoor Mesh Access Point Hardware Installation Guide |
|
| |
|
|
| |||
|
|
|
| ||
|
|
|
| ||