Chapter 2 Installing the Access Point
Powering the Access Point
Warning This unit might have more than one power supply connection. All connections must be removed to
Note If your access point contains a backup battery pack, you must press the reset button for 10 seconds or more (see the “Disabling Backup Battery Power” section on page
Step 2 Ensure a 6 AWG ground wire is connected to the access point (see the “Grounding the Access Point” section on page
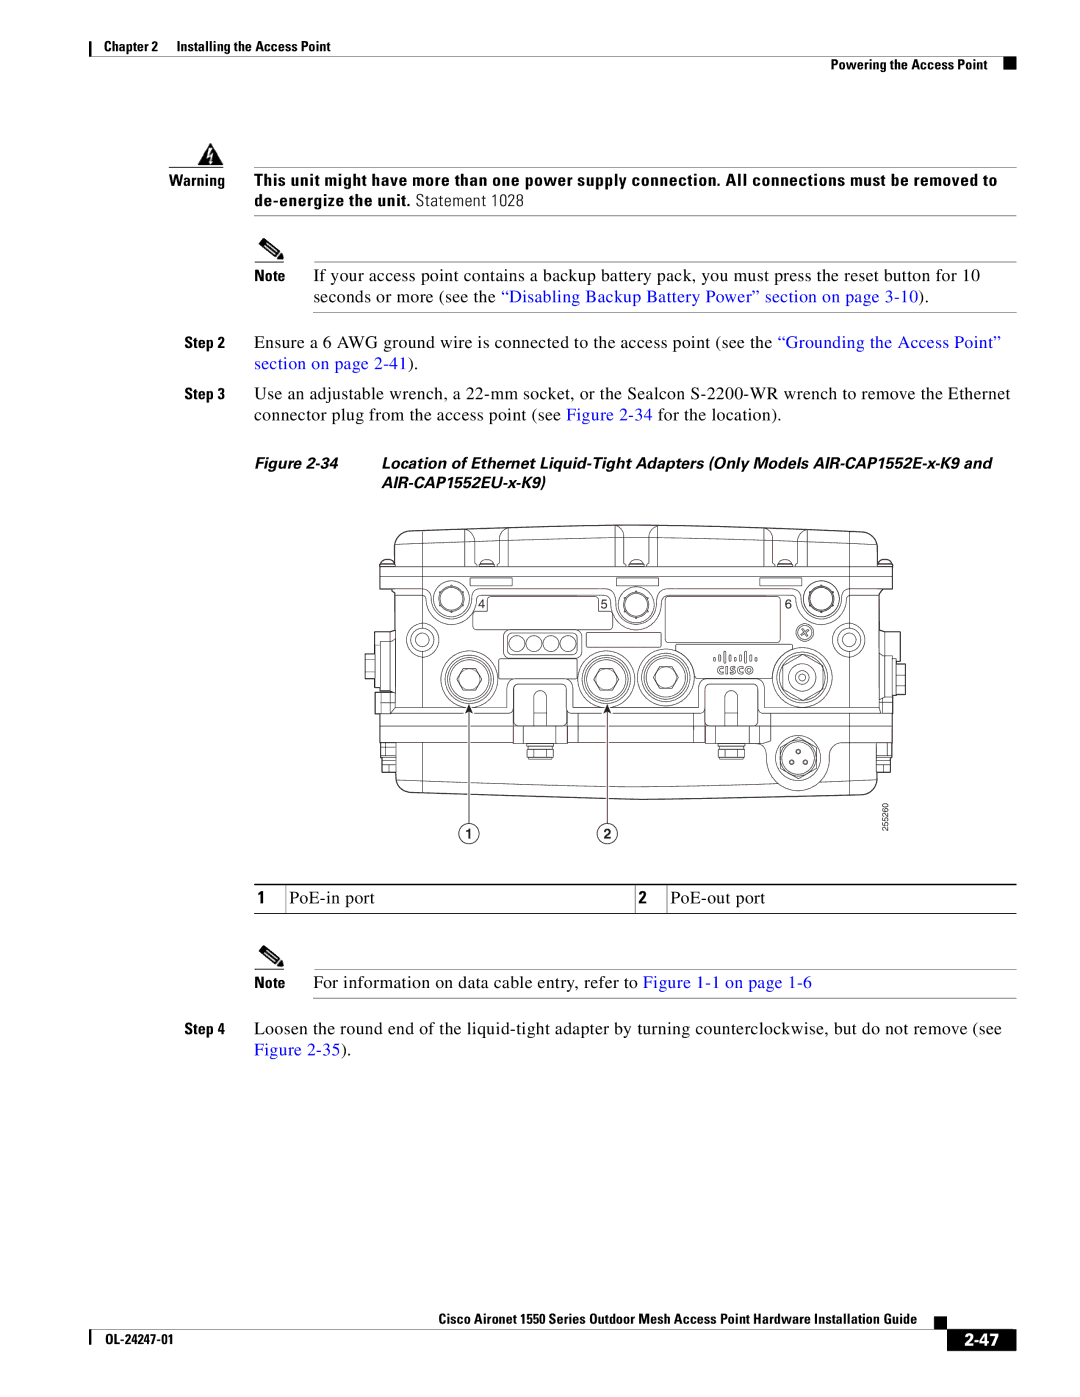
Step 3 Use an adjustable wrench, a
Figure 2-34 Location of Ethernet Liquid-Tight Adapters (Only Models AIR-CAP1552E-x-K9 and
|
|
|
4 | 5 | 6 |
1 | 2 | 255260 |
|
1
2
Note For information on data cable entry, refer to Figure
Step 4 Loosen the round end of the
|
| Cisco Aironet 1550 Series Outdoor Mesh Access Point Hardware Installation Guide |
|
| |
|
|
| |||
|
|
|
| ||
|
|
|
| ||
