Chapter 2 Installing the Access Point
Connecting a
Step 1 Ensure that all power sources have been disconnected from the access point.
Warning This unit might have more than one power supply connection. All connections must be removed to
Note If your access point contains a backup battery pack, you must depress the reset button for 10 seconds or more (see the “Disabling Backup Battery Power” section on page
Step 2 Open the hinged cover (see the “Opening the Access Point Hinged Cover” section on page
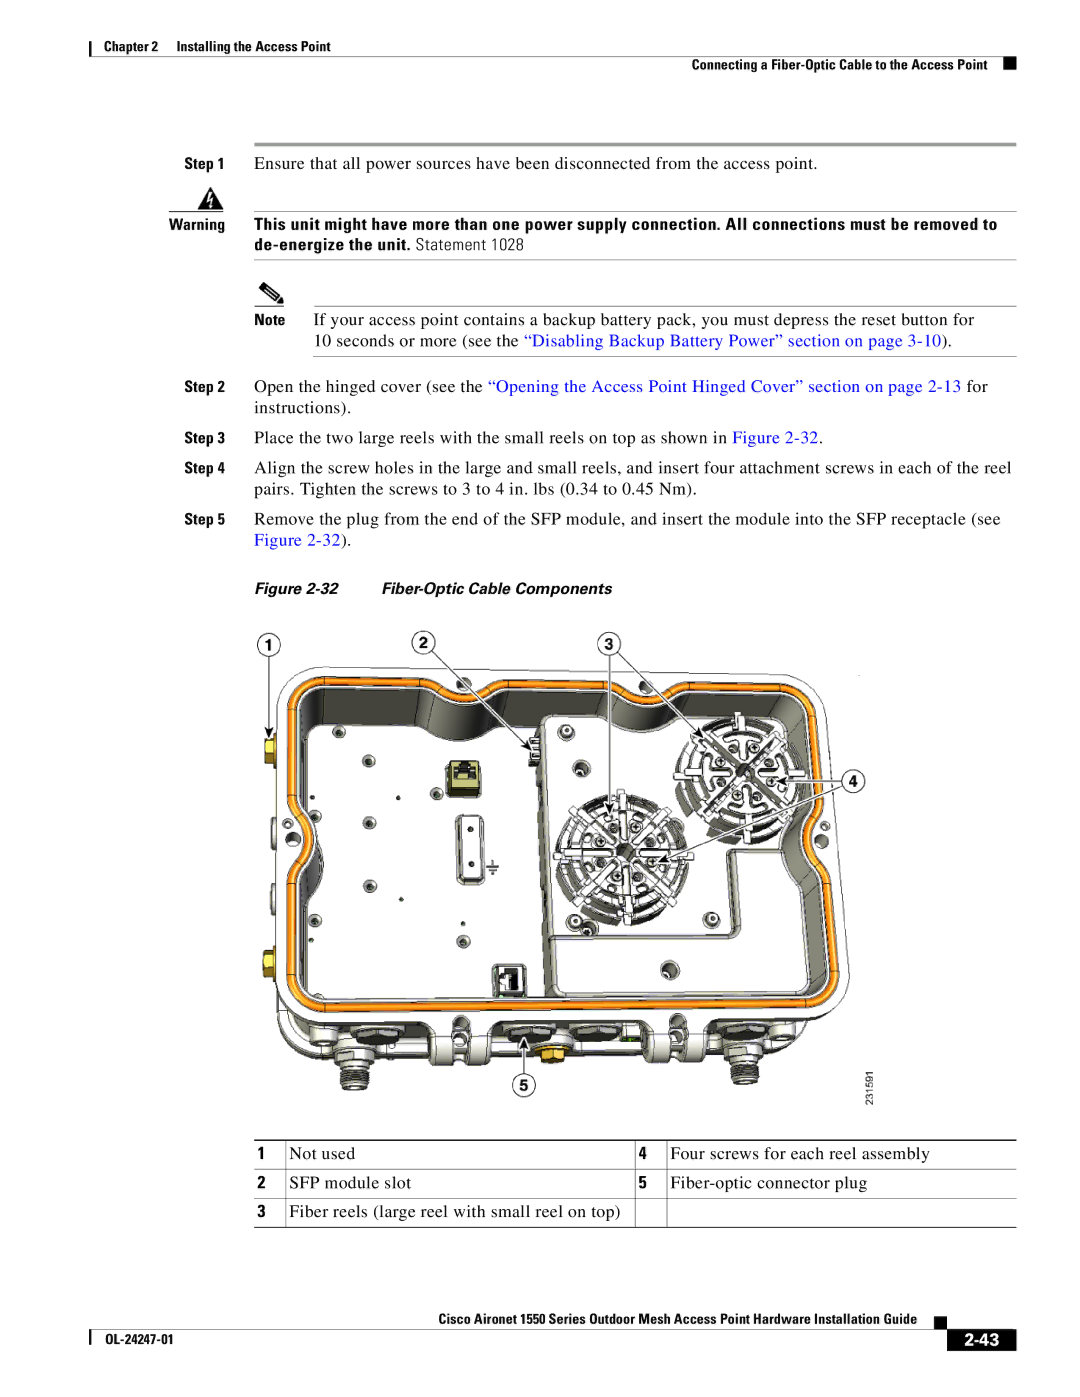
Step 3 Place the two large reels with the small reels on top as shown in Figure
Step 4 Align the screw holes in the large and small reels, and insert four attachment screws in each of the reel pairs. Tighten the screws to 3 to 4 in. lbs (0.34 to 0.45 Nm).
Step 5 Remove the plug from the end of the SFP module, and insert the module into the SFP receptacle (see Figure
Figure 2-32 Fiber-Optic Cable Components
| 1 | Not used |
| 4 | Four screws for each reel assembly | ||||
|
|
|
|
|
| ||||
2 | SFP module slot |
| 5 | ||||||
|
|
|
|
|
|
|
| ||
3 | Fiber reels (large reel with small reel on top) |
|
|
|
|
| |||
|
|
|
|
|
|
|
|
| |
|
|
|
| Cisco Aironet 1550 Series Outdoor Mesh Access Point Hardware Installation Guide |
|
| |||
|
|
|
|
| |||||
|
|
|
|
|
|
|
|
|
|
|
|
|
|
|
|
|
| ||
|
|
|
|
|
|
| |||
