Chapter 2 Unpacking and Installing the Chassis
Installing the Cisco ASR 9001 Chassis
Installing the Chassis in a Two-Post Rack
Before you install the chassis in the rack, make sure that you have the necessary tools and equipment (see Before you Begin, page
Note Six mounting bracket screws (three per side) are provided to attach the chassis to the rack. If the bracket holes do not line up with the rack rails, make sure that you attach a minimum of four screws (two screws per bracket) on each side.
To install the chassis in a
Step 1 Attach the mounting flanges to the chassis by using the
To accommodate racks with different hole patterns in their mounting flanges, the chassis
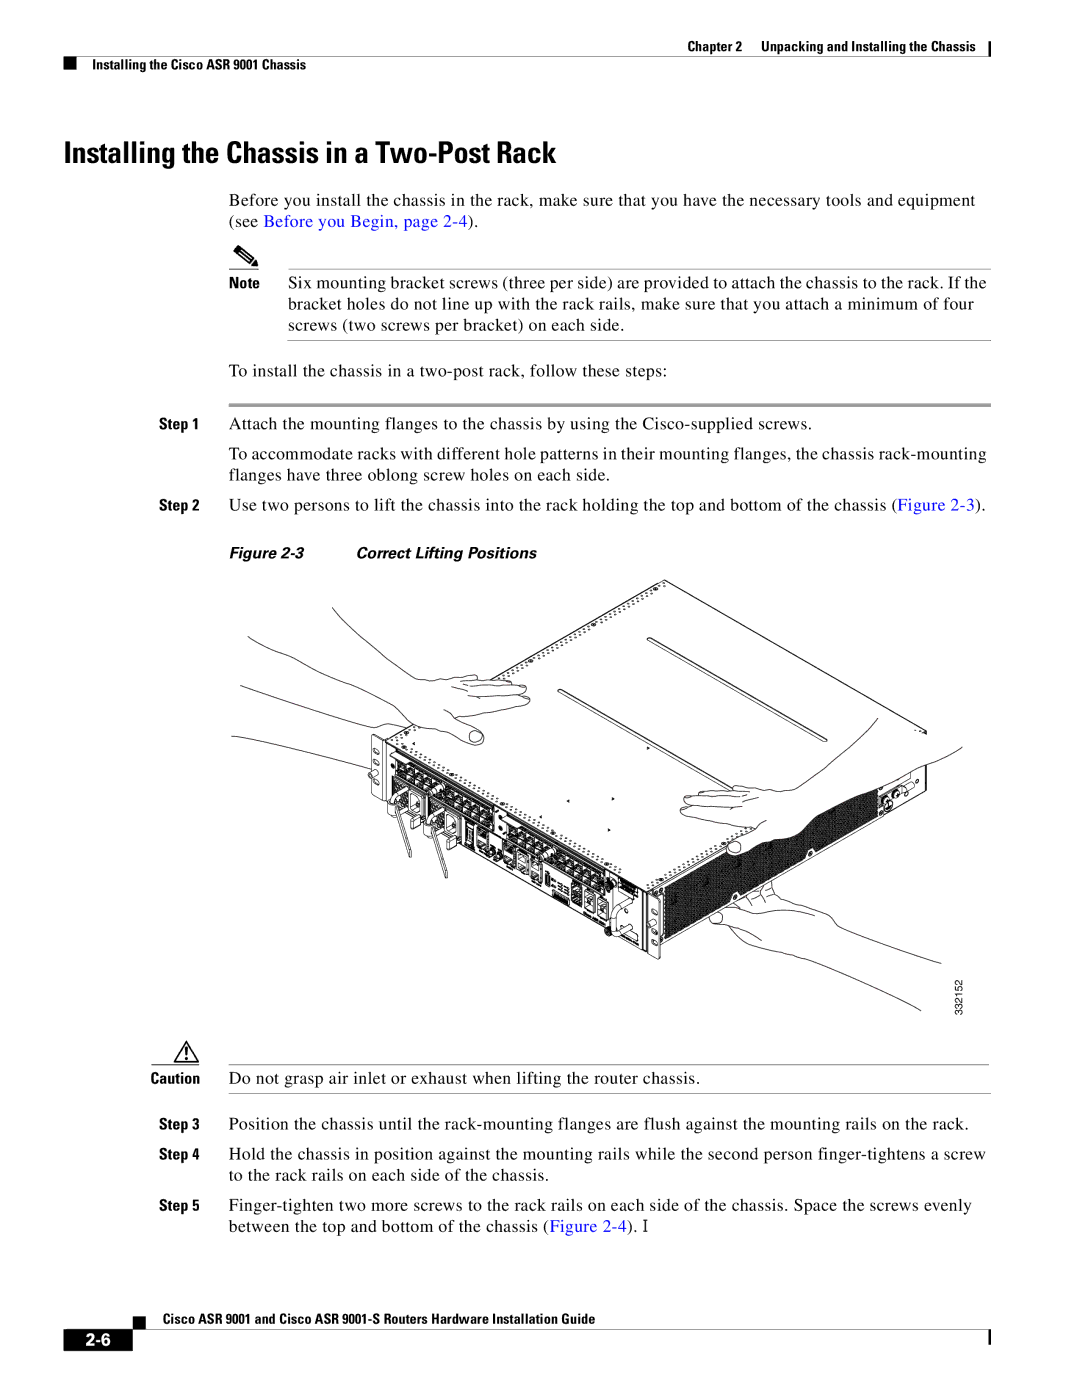
Step 2 Use two persons to lift the chassis into the rack holding the top and bottom of the chassis (Figure
Figure 2-3 Correct Lifting Positions
332152
Caution Do not grasp air inlet or exhaust when lifting the router chassis.
Step 3 Position the chassis until the
Step 4 Hold the chassis in position against the mounting rails while the second person
Step 5
Cisco ASR 9001 and Cisco ASR
