US CA
10
Using your oven
Positioning the shelves | 8 | ||
| |||
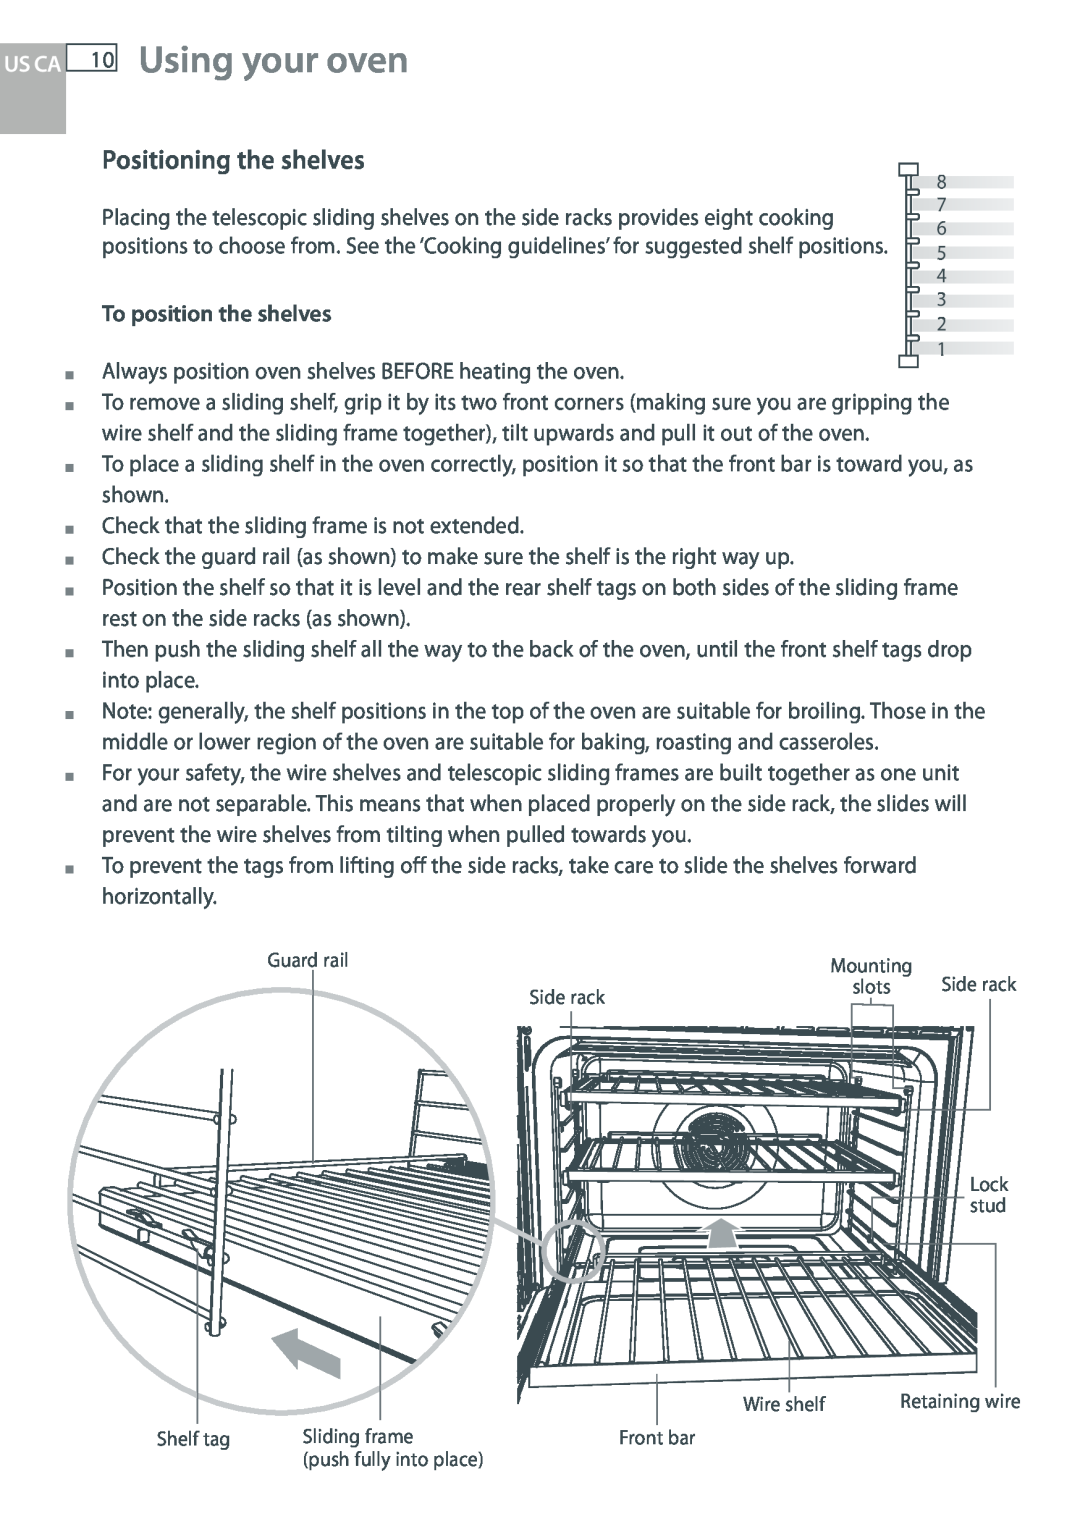
Placing the telescopic sliding shelves on the side racks provides eight cooking | 7 | ||
6 | |||
positions to choose from. See the ‘Cooking guidelines’ for suggested shelf positions. | |||
5 | |||
| 4 | ||
To position the shelves | 3 | ||
2 | |||
| |||
|
| 1 | |
Always position oven shelves BEFORE heating the oven.
To remove a sliding shelf, grip it by its two front corners (making sure you are gripping the wire shelf and the sliding frame together), tilt upwards and pull it out of the oven.
To place a sliding shelf in the oven correctly, position it so that the front bar is toward you, as shown.
Check that the sliding frame is not extended.
Check the guard rail (as shown) to make sure the shelf is the right way up.
Position the shelf so that it is level and the rear shelf tags on both sides of the sliding frame rest on the side racks (as shown).
Then push the sliding shelf all the way to the back of the oven, until the front shelf tags drop into place.
Note: generally, the shelf positions in the top of the oven are suitable for broiling. Those in the middle or lower region of the oven are suitable for baking, roasting and casseroles.
For your safety, the wire shelves and telescopic sliding frames are built together as one unit and are not separable. This means that when placed properly on the side rack, the slides will prevent the wire shelves from tilting when pulled towards you.
To prevent the tags from lifting off the side racks, take care to slide the shelves forward horizontally.
Guard | rail |
|
| Mounting | Side rack | ||
|
| Side rack | slots | ||||
|
|
|
|
|
| ||
|
|
|
|
|
|
|
|
|
|
|
|
|
|
|
|
Lock stud
Wire shelf | Retaining wire |
Shelf tag | Sliding frame | Front bar |
| (push fully into place) |
|
