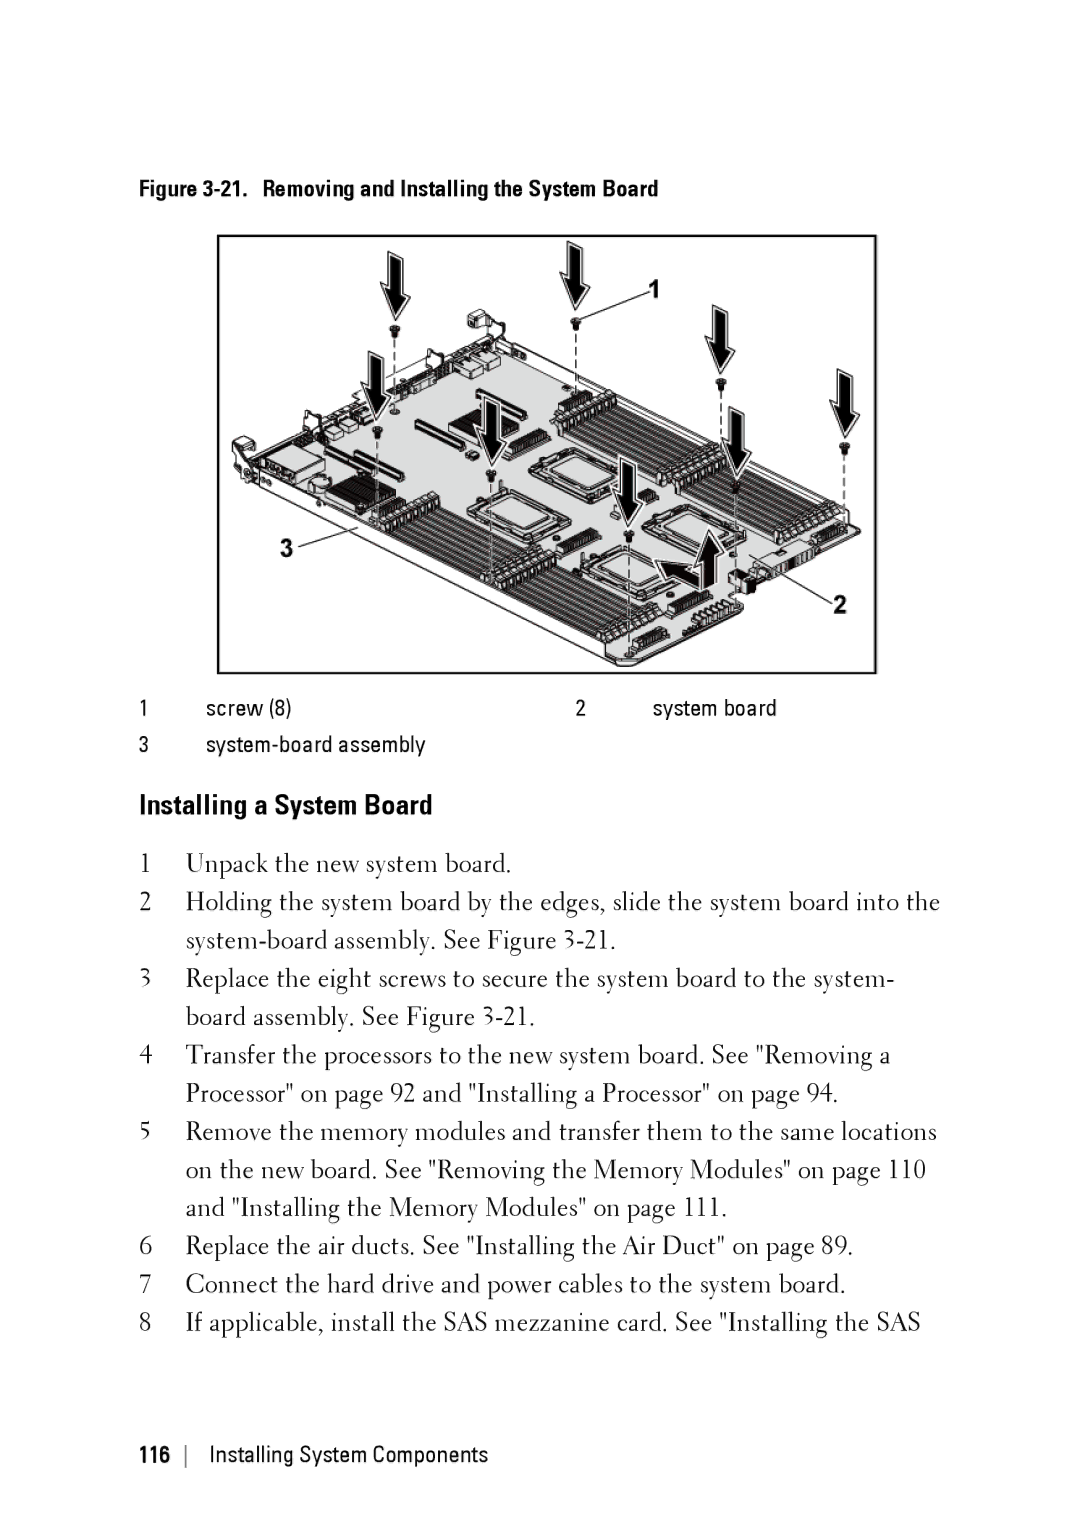
Figure 3-21. Removing and Installing the System Board
1 | screw (8) | 2 | system board |
3 |
|
|
Installing a System Board
1Unpack the new system board.
2Holding the system board by the edges, slide the system board into the
3Replace the eight screws to secure the system board to the system- board assembly. See Figure
4Transfer the processors to the new system board. See "Removing a Processor" on page 92 and "Installing a Processor" on page 94.
5Remove the memory modules and transfer them to the same locations on the new board. See "Removing the Memory Modules" on page 110 and "Installing the Memory Modules" on page 111.
6Replace the air ducts. See "Installing the Air Duct" on page 89.
7Connect the hard drive and power cables to the system board.
8If applicable, install the SAS mezzanine card. See "Installing the SAS
