Gemini User’sManual
set them. Other products call them “internal switches” because you must take their printers apart to get to them. The Gemini DIP switches are easy to set, which is explained in Chapter 4.
Next to the DIP switches is the connector for the parallel interface. This is where you connect your Gemini to your personal computer, so they are “interfacing:’ and able to communicate with each other. (Appendices A through F provide information on
Between the parallel interface and the power cord is the “port hole” (a
-
-
-
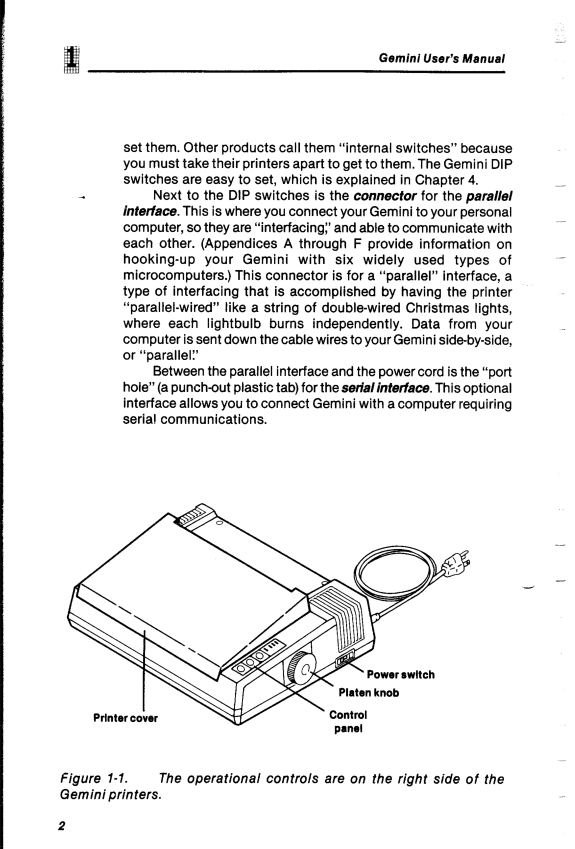
figure 1-1. The operational controls are on the right side of the Gemini printers.
2
