Clearing Paper Jams
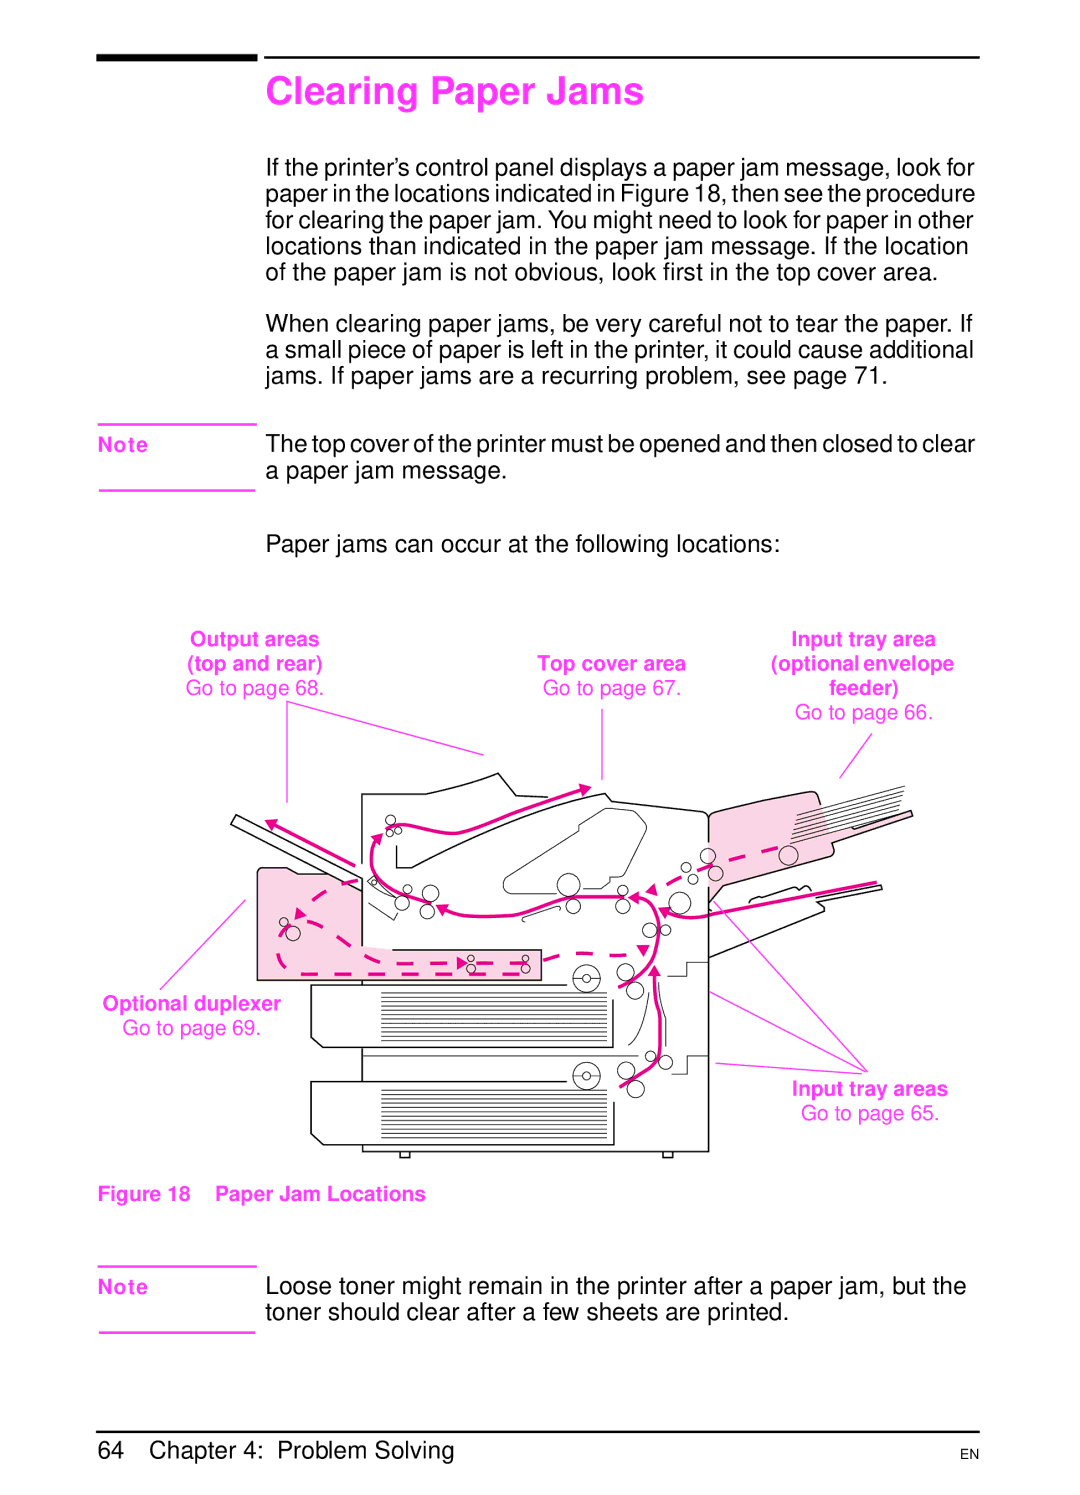
If the printer’s control panel displays a paper jam message, look for paper in the locations indicated in Figure 18, then see the procedure for clearing the paper jam. You might need to look for paper in other locations than indicated in the paper jam message. If the location of the paper jam is not obvious, look first in the top cover area.
When clearing paper jams, be very careful not to tear the paper. If a small piece of paper is left in the printer, it could cause additional jams. If paper jams are a recurring problem, see page 71.
Note | The top cover of the printer must be opened and then closed to clear |
| a paper jam message. |
| Paper jams can occur at the following locations: |
|
Output areas |
| Input tray area |
(top and rear) | Top cover area | (optional envelope |
Go to page 68. | Go to page 67. | feeder) |
|
| Go to page 66. |
Optional duplexer
Go to page 69.
Input tray areas
Go to page 65.
Figure 18 Paper Jam Locations
Note | Loose toner might remain in the printer after a paper jam, but the |
| toner should clear after a few sheets are printed. |
|
|
64 Chapter 4: Problem Solving
EN