4.If the problem persists, print a
This report provides useful information about your print cartridges, including status information.
5.If the
6.If the problem persists, clean the
7.If you are still experiencing problems with printing, determine which print cartridge is experiencing the problem and replace it.
To check the ink levels from the HP Photosmart Software
1.In the HP Solution Center, click Settings, point to Print Settings, and then click Printer Toolbox.
![]() NOTE: You can also open the Printer Toolbox from the Print Properties dialog box. In the Print Properties dialog box, click the Services tab, and then click Service this device.
NOTE: You can also open the Printer Toolbox from the Print Properties dialog box. In the Print Properties dialog box, click the Services tab, and then click Service this device.
The Printer Toolbox appears.
2.Click the Estimated Ink Level tab.
The estimated ink levels for the print cartridges appear.
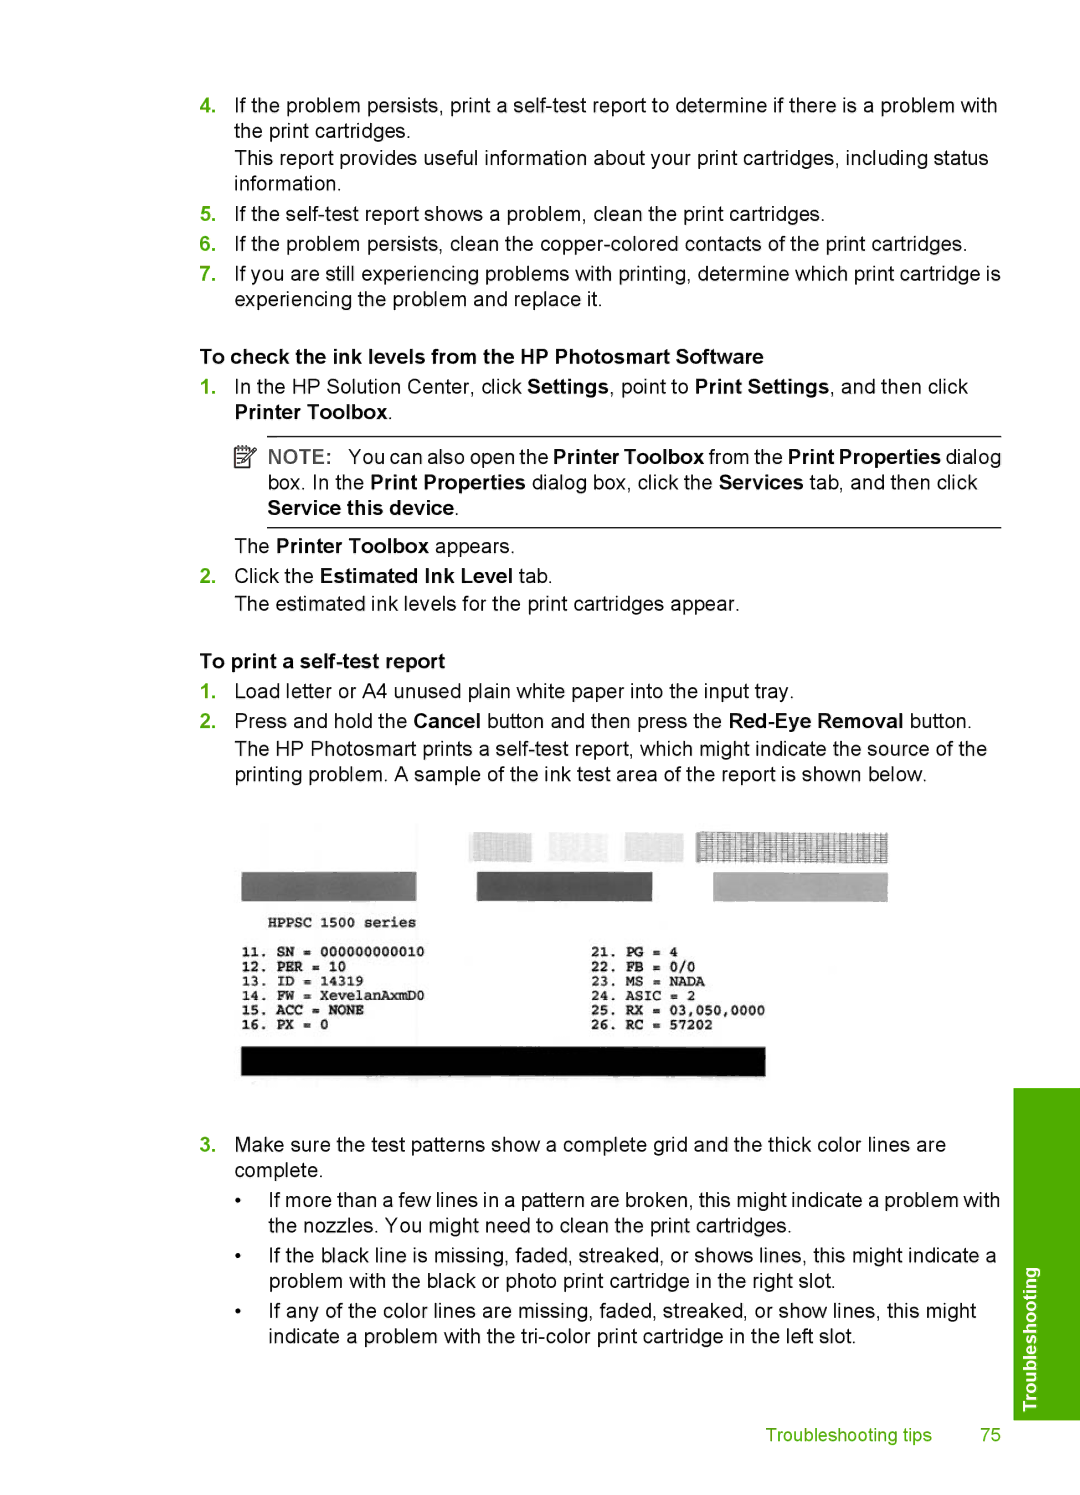
To print a self-test report
1.Load letter or A4 unused plain white paper into the input tray.
2.Press and hold the Cancel button and then press the
3.Make sure the test patterns show a complete grid and the thick color lines are complete.
•If more than a few lines in a pattern are broken, this might indicate a problem with the nozzles. You might need to clean the print cartridges.
•If the black line is missing, faded, streaked, or shows lines, this might indicate a problem with the black or photo print cartridge in the right slot.
•If any of the color lines are missing, faded, streaked, or show lines, this might indicate a problem with the
Troubleshooting tips | 75 |