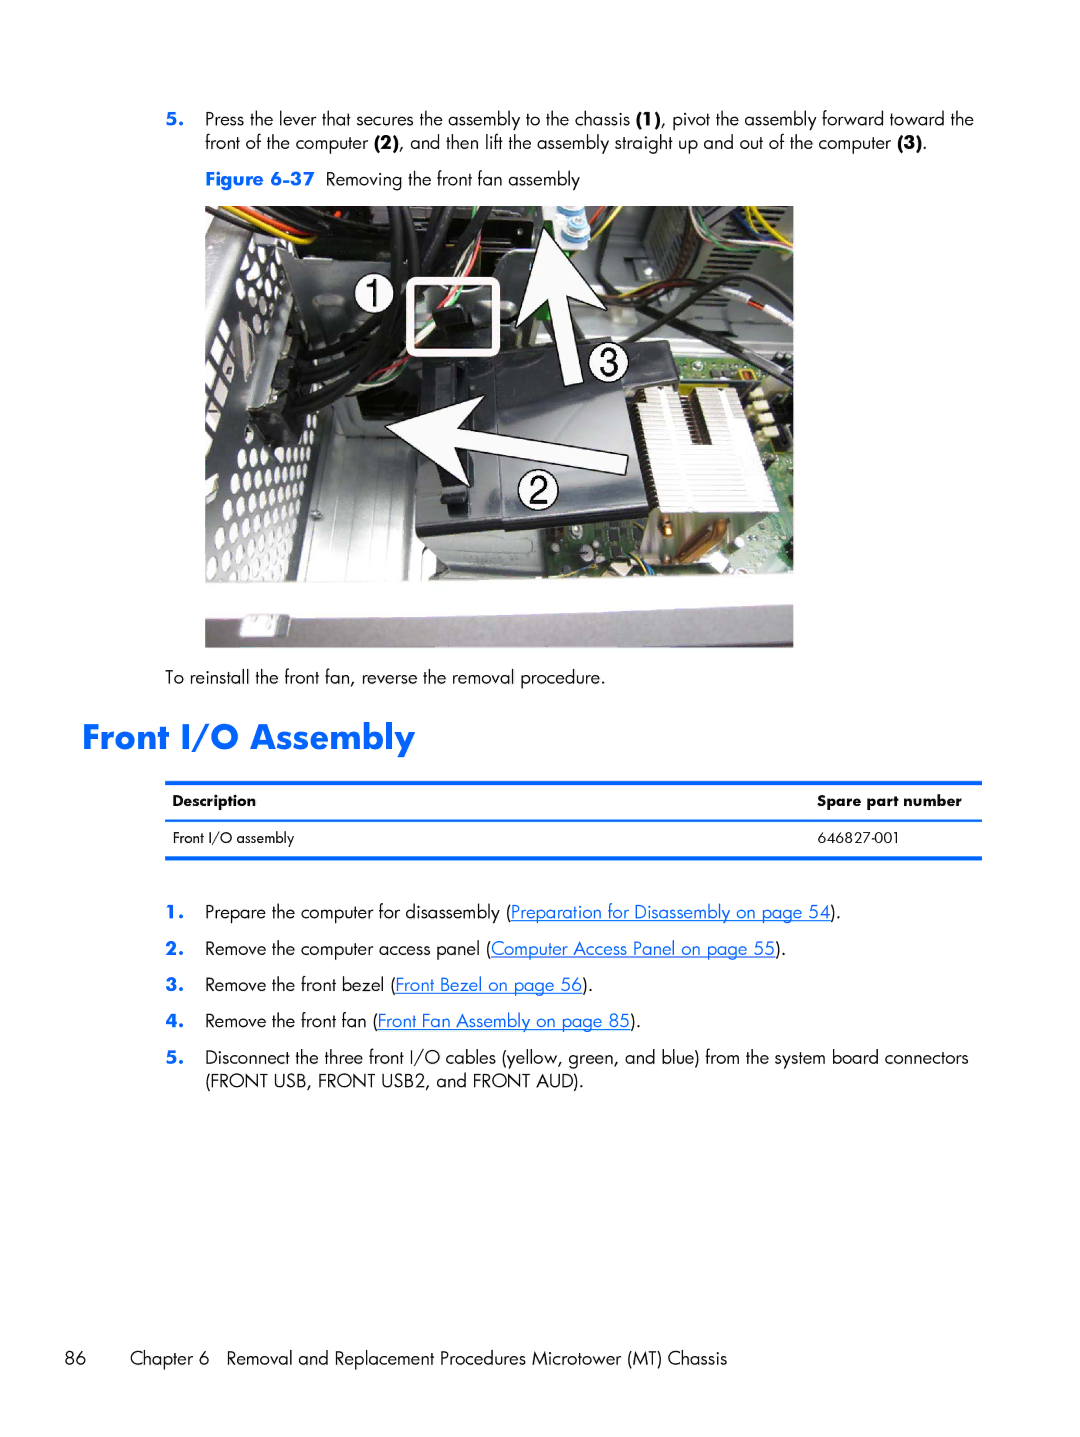
5.Press the lever that secures the assembly to the chassis (1), pivot the assembly forward toward the front of the computer (2), and then lift the assembly straight up and out of the computer (3).
Figure 6-37 Removing the front fan assembly
To reinstall the front fan, reverse the removal procedure.
Front I/O Assembly
Description | Spare part number |
|
|
Front I/O assembly |
|
|
|
1.Prepare the computer for disassembly (Preparation for Disassembly on page 54).
2.Remove the computer access panel (Computer Access Panel on page 55).
3.Remove the front bezel (Front Bezel on page 56).
4.Remove the front fan (Front Fan Assembly on page 85).
5.Disconnect the three front I/O cables (yellow, green, and blue) from the system board connectors (FRONT USB, FRONT USB2, and FRONT AUD).
86 | Chapter 6 Removal and Replacement Procedures Microtower (MT) Chassis |
