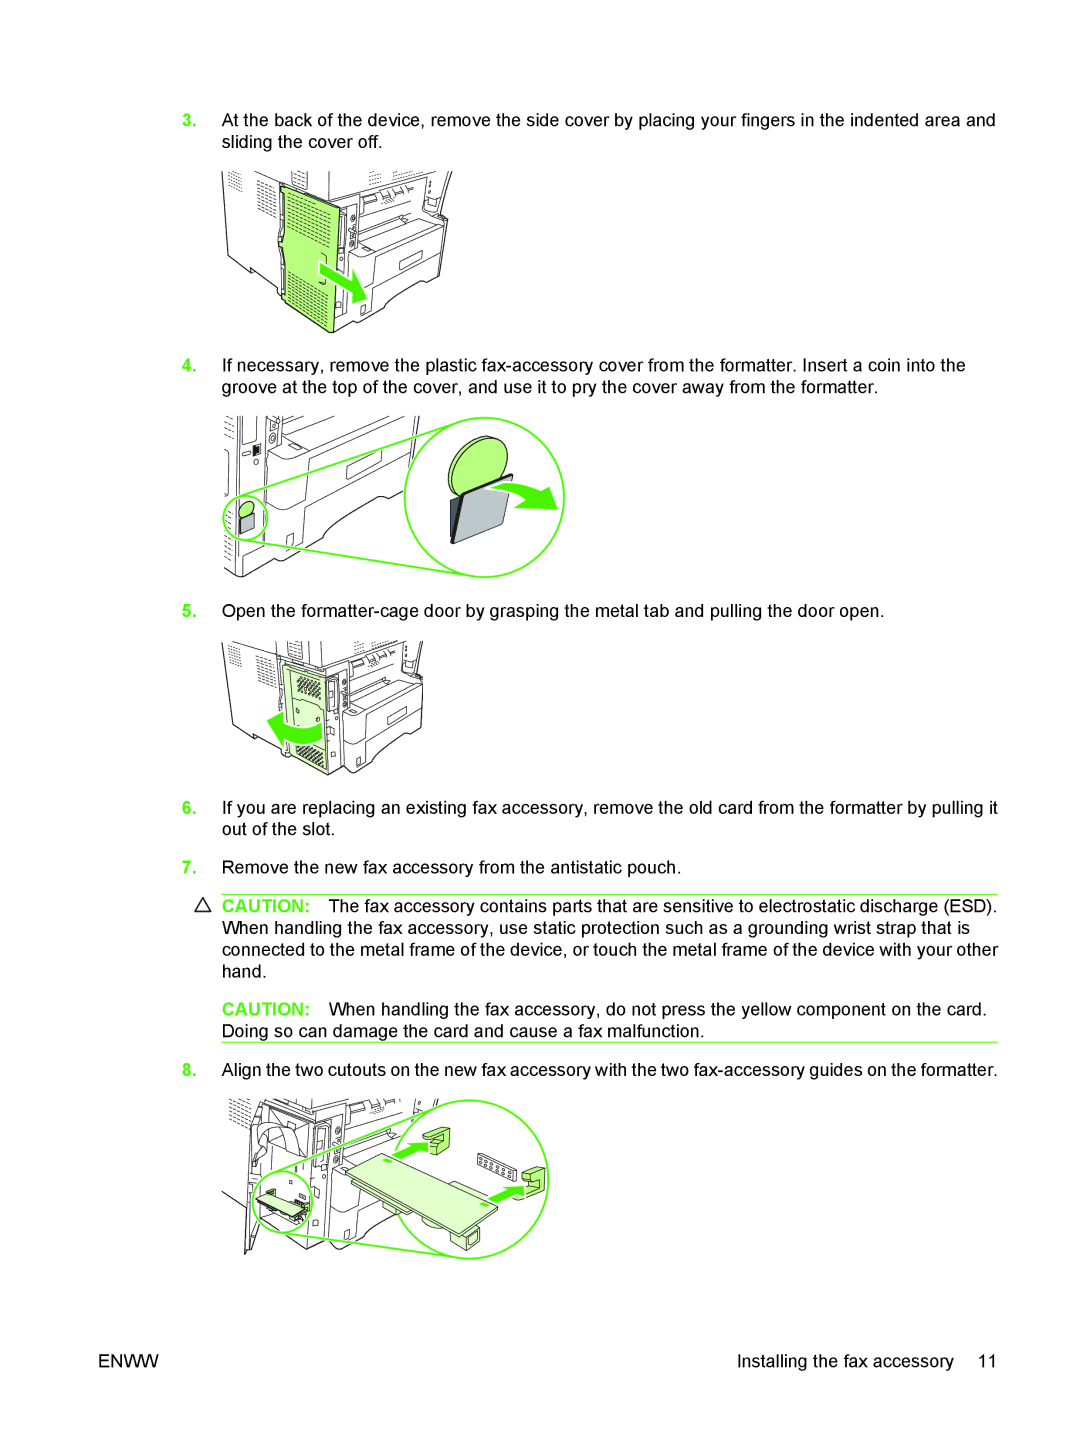
3.At the back of the device, remove the side cover by placing your fingers in the indented area and sliding the cover off.
4.If necessary, remove the plastic
5.Open the
6.If you are replacing an existing fax accessory, remove the old card from the formatter by pulling it out of the slot.
7.Remove the new fax accessory from the antistatic pouch.
![]() CAUTION: The fax accessory contains parts that are sensitive to electrostatic discharge (ESD). When handling the fax accessory, use static protection such as a grounding wrist strap that is connected to the metal frame of the device, or touch the metal frame of the device with your other hand.
CAUTION: The fax accessory contains parts that are sensitive to electrostatic discharge (ESD). When handling the fax accessory, use static protection such as a grounding wrist strap that is connected to the metal frame of the device, or touch the metal frame of the device with your other hand.
CAUTION: When handling the fax accessory, do not press the yellow component on the card. Doing so can damage the card and cause a fax malfunction.
8.Align the two cutouts on the new fax accessory with the two
ENWW | Installing the fax accessory 11 |
