Tab Enhancement (Color Mode with Color Management)
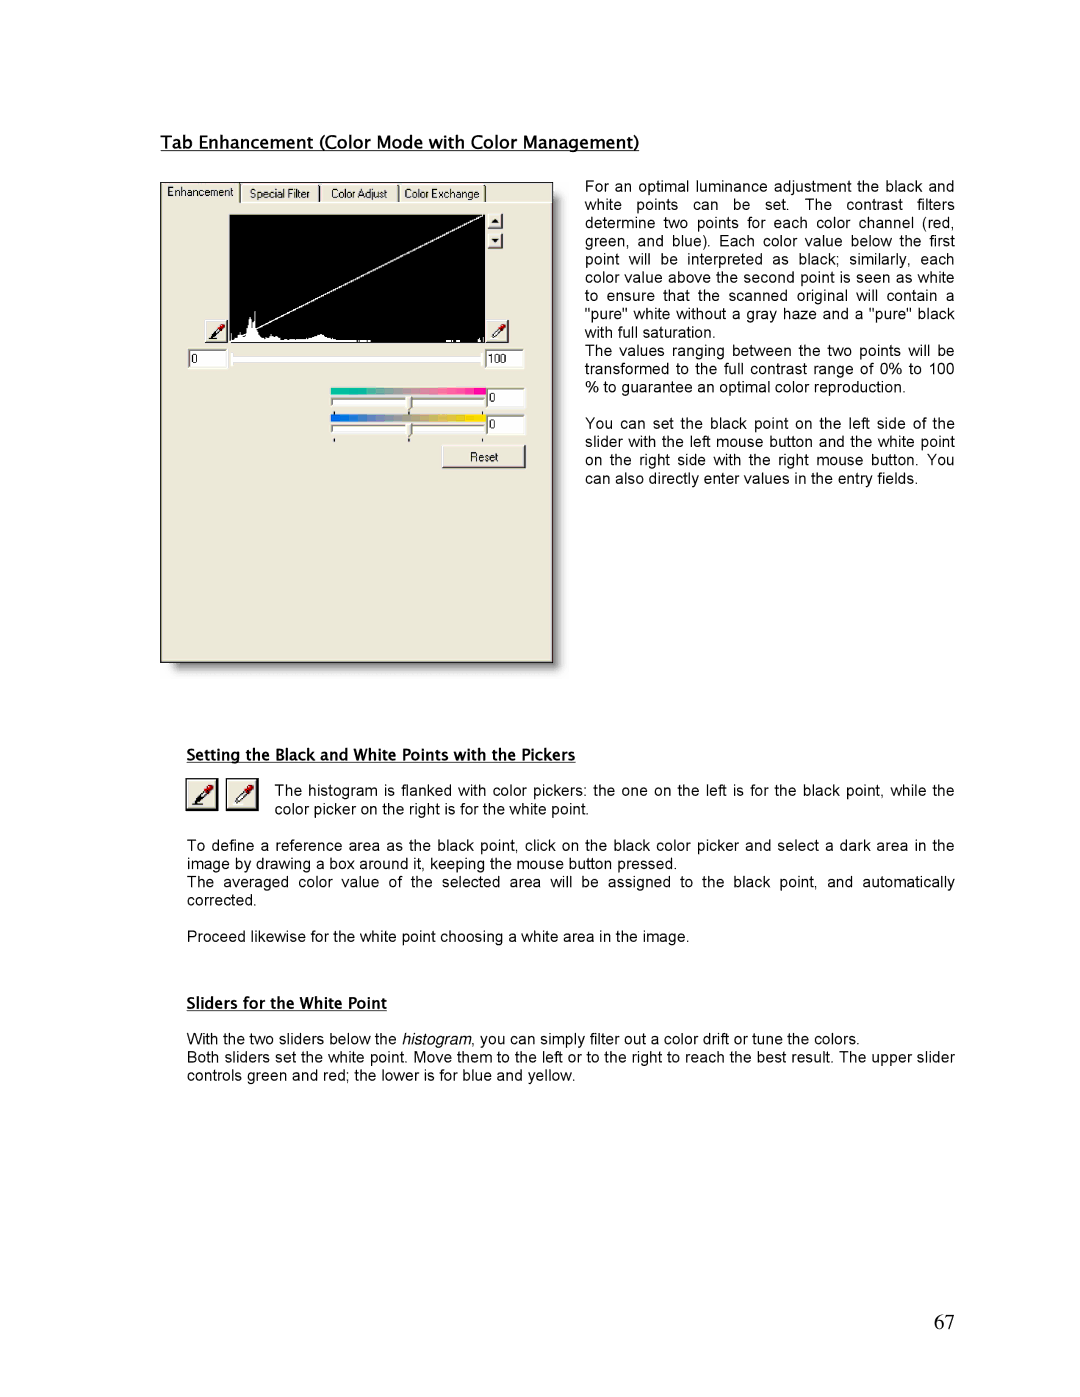
For an optimal luminance adjustment the black and white points can be set. The contrast filters determine two points for each color channel (red, green, and blue). Each color value below the first point will be interpreted as black; similarly, each color value above the second point is seen as white to ensure that the scanned original will contain a "pure" white without a gray haze and a "pure" black with full saturation.
The values ranging between the two points will be transformed to the full contrast range of 0% to 100 % to guarantee an optimal color reproduction.
You can set the black point on the left side of the slider with the left mouse button and the white point on the right side with the right mouse button. You can also directly enter values in the entry fields.
Setting the Black and White Points with the Pickers
The histogram is flanked with color pickers: the one on the left is for the black point, while the color picker on the right is for the white point.
To define a reference area as the black point, click on the black color picker and select a dark area in the image by drawing a box around it, keeping the mouse button pressed.
The averaged color value of the selected area will be assigned to the black point, and automatically corrected.
Proceed likewise for the white point choosing a white area in the image.
Sliders for the White Point
With the two sliders below the histogram, you can simply filter out a color drift or tune the colors.
Both sliders set the white point. Move them to the left or to the right to reach the best result. The upper slider controls green and red; the lower is for blue and yellow.
67
