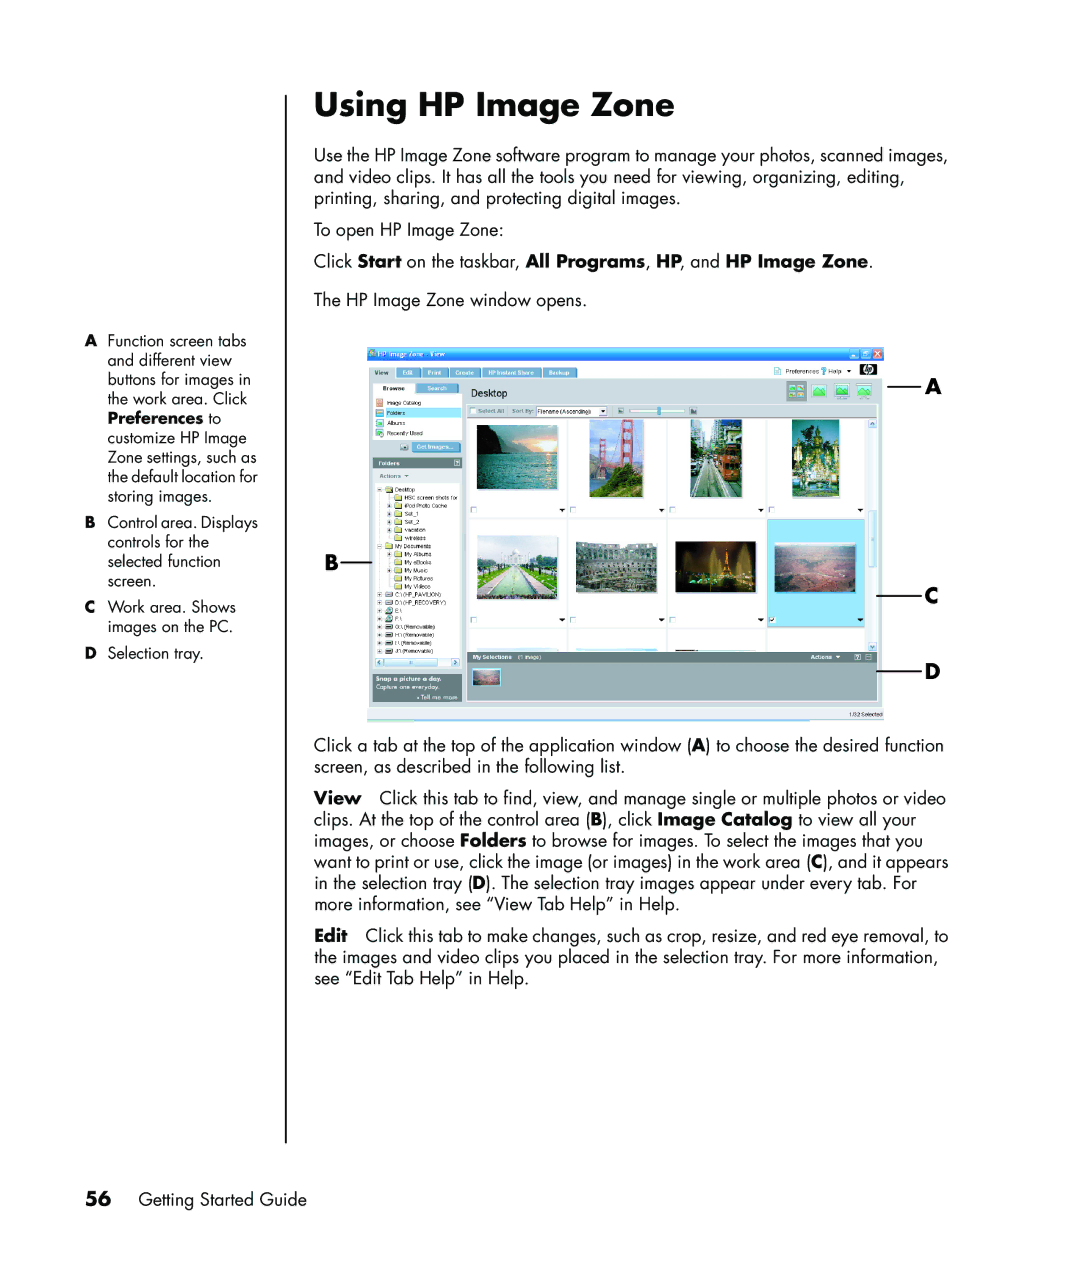
AFunction screen tabs and different view buttons for images in the work area. Click Preferences to customize HP Image Zone settings, such as the default location for storing images.
BControl area. Displays controls for the selected function screen.
CWork area. Shows images on the PC.
DSelection tray.
Using HP Image Zone
Use the HP Image Zone software program to manage your photos, scanned images, and video clips. It has all the tools you need for viewing, organizing, editing, printing, sharing, and protecting digital images.
To open HP Image Zone:
Click Start on the taskbar, All Programs, HP, and HP Image Zone.
The HP Image Zone window opens.
A
B
C
D
Click a tab at the top of the application window (A) to choose the desired function screen, as described in the following list.
View Click this tab to find, view, and manage single or multiple photos or video clips. At the top of the control area (B), click Image Catalog to view all your images, or choose Folders to browse for images. To select the images that you want to print or use, click the image (or images) in the work area (C), and it appears in the selection tray (D). The selection tray images appear under every tab. For more information, see “View Tab Help” in Help.
Edit Click this tab to make changes, such as crop, resize, and red eye removal, to the images and video clips you placed in the selection tray. For more information, see “Edit Tab Help” in Help.