4For type 6 connectors only, connect the side speaker cable to the gray connector on the back of your PC.
5Connect the center speaker and subwoofer speaker cable to the gold connector on the back of your PC.
6Connect the cables to the audio system.
7Connect the front, rear, side, and center speakers to the subwoofer. Refer to the speaker documentation.
8Turn on the PC.
NOTE: Always turn on the PC before you turn on the speaker system.
9Plug in the speaker system power.
10Turn on the speaker system.
11After the speakers are connected to the PC, configure the audio software for sound output for your PC model:
•Type 6 connectors: See “Configuring Audio Output with Sound Effect Manager” on page 34.
•Type 6 connectors —
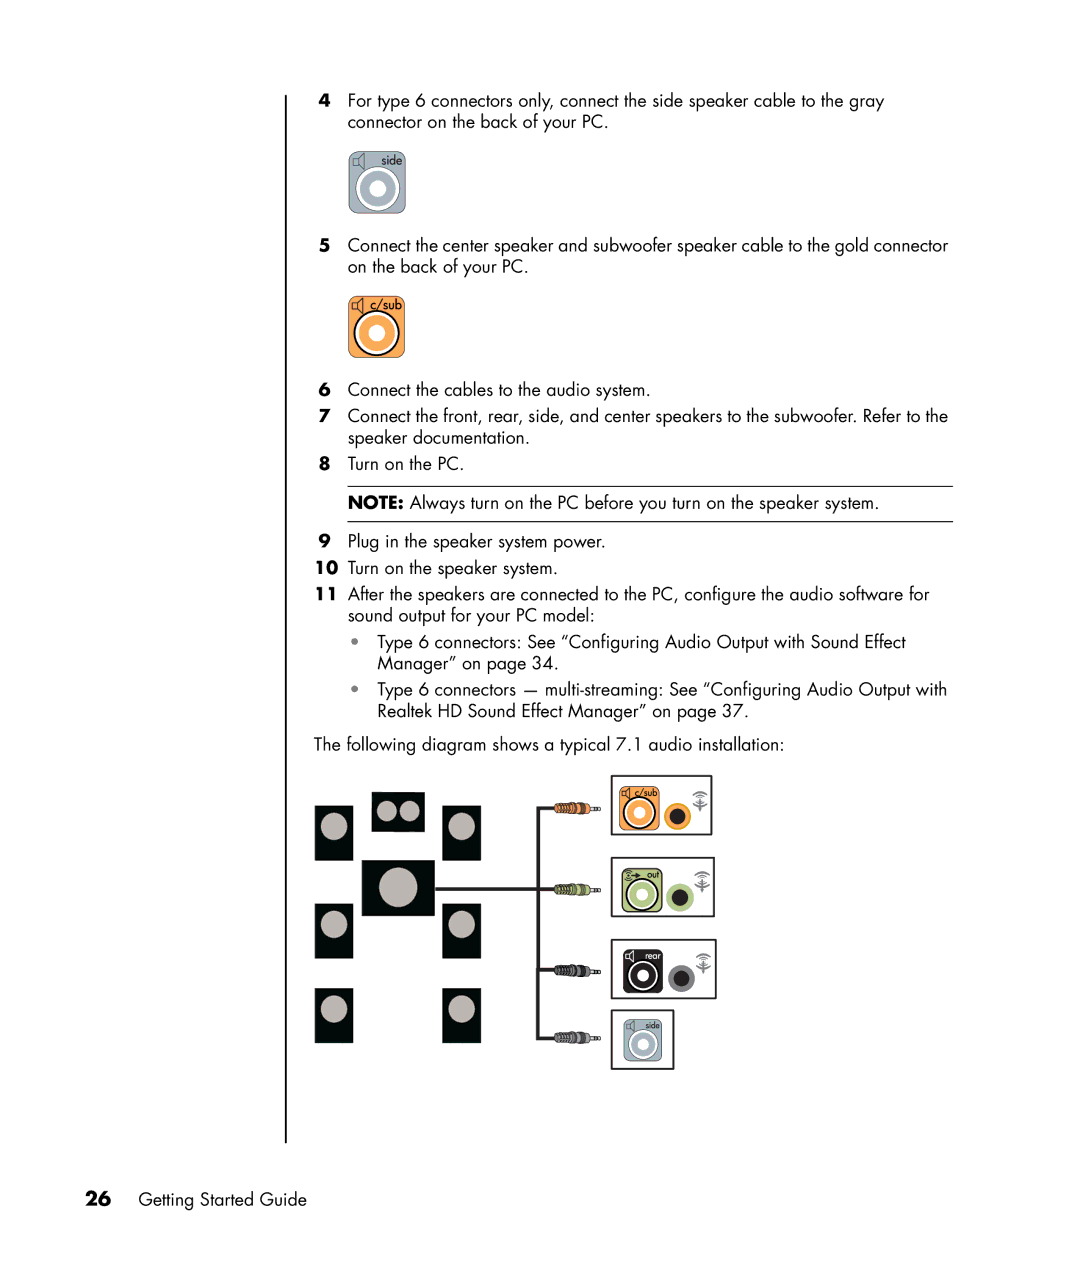
The following diagram shows a typical 7.1 audio installation: