A
B
AF002603
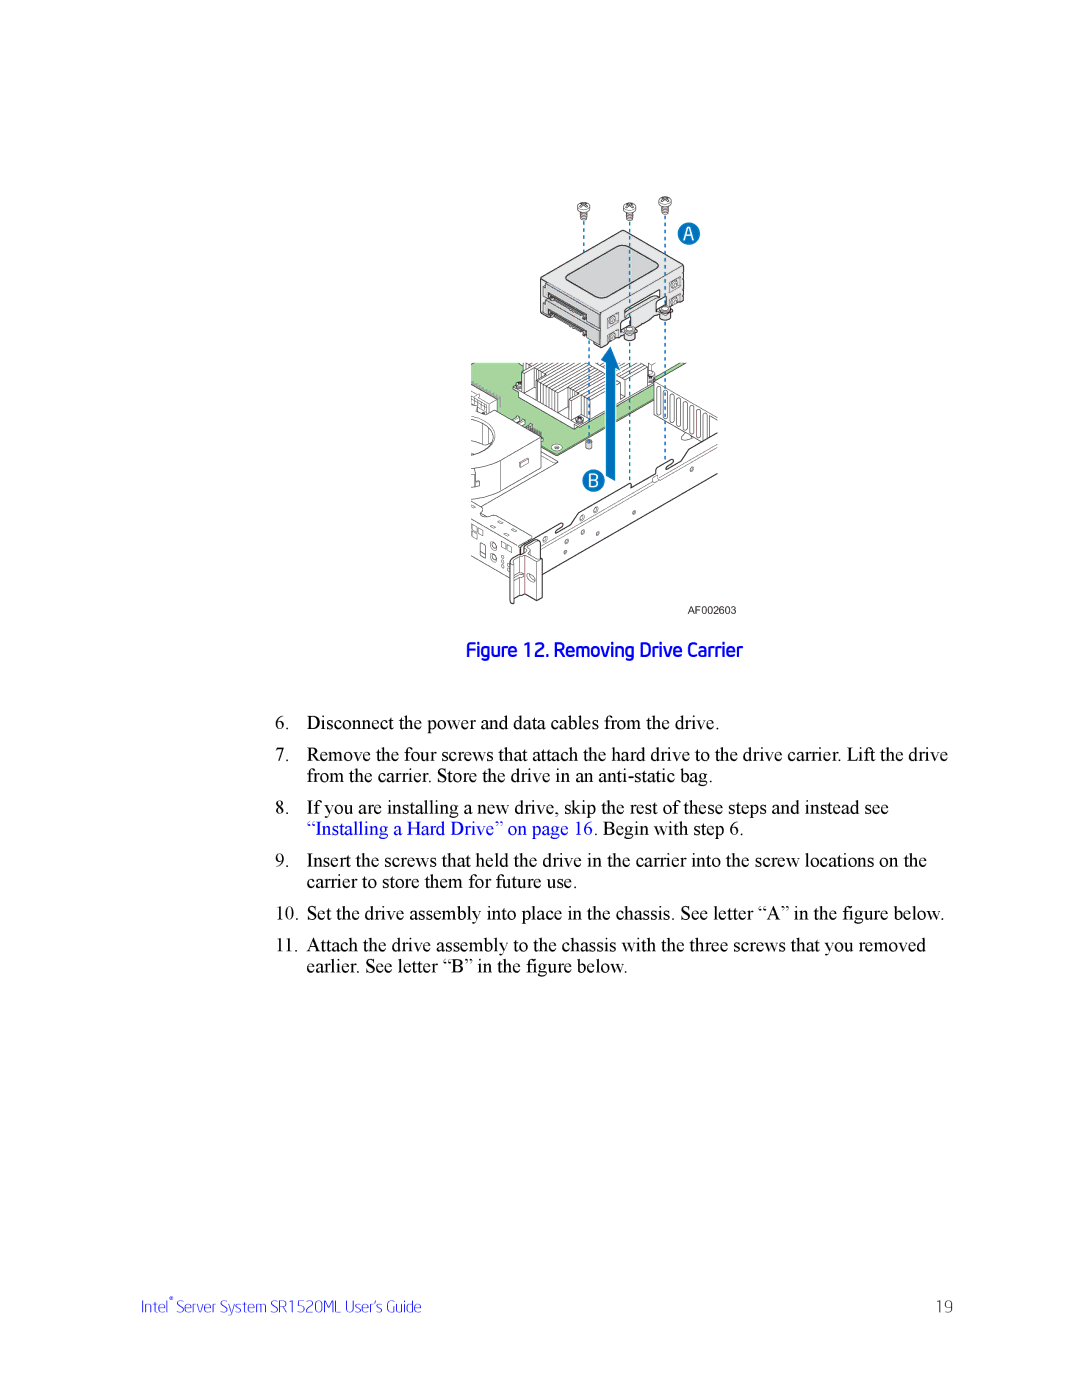
Figure 12. Removing Drive Carrier
6.Disconnect the power and data cables from the drive.
7.Remove the four screws that attach the hard drive to the drive carrier. Lift the drive from the carrier. Store the drive in an
8.If you are installing a new drive, skip the rest of these steps and instead see “Installing a Hard Drive” on page 16. Begin with step 6.
9.Insert the screws that held the drive in the carrier into the screw locations on the carrier to store them for future use.
10.Set the drive assembly into place in the chassis. See letter “A” in the figure below.
11.Attach the drive assembly to the chassis with the three screws that you removed earlier. See letter “B” in the figure below.
Intel® Server System SR1520ML User’s Guide | 19 |
