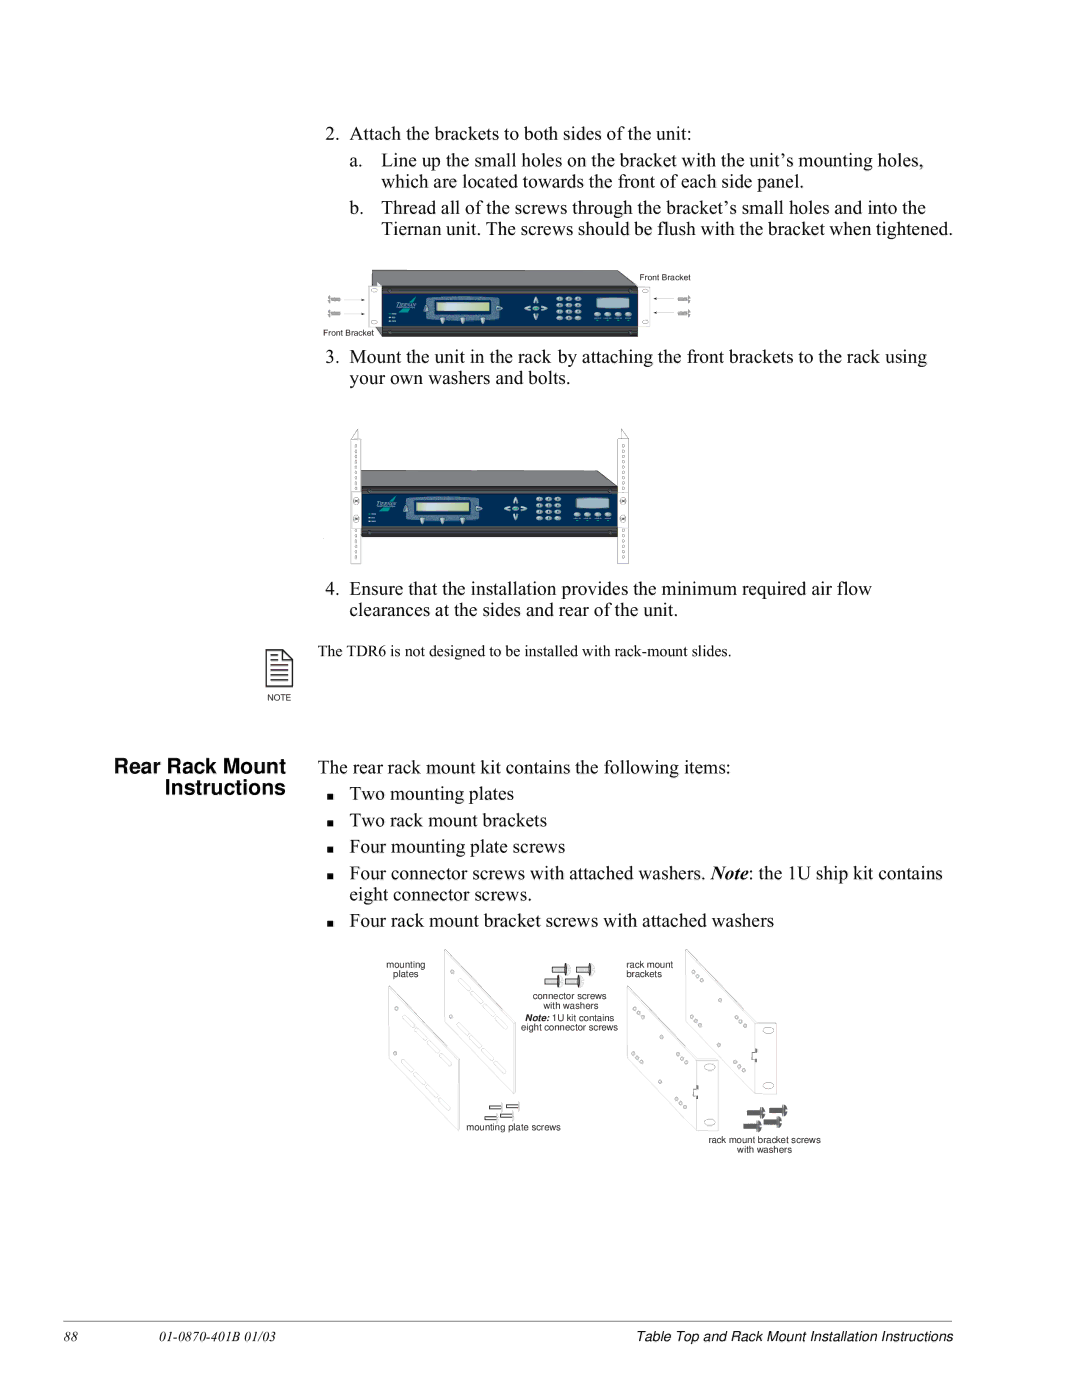
2.Attach the brackets to both sides of the unit:
a.Line up the small holes on the bracket with the unit’s mounting holes, which are located towards the front of each side panel.
b.Thread all of the screws through the bracket’s small holes and into the Tiernan unit. The screws should be flush with the bracket when tightened.
Front Bracket
Front Bracket
3.Mount the unit in the rack by attaching the front brackets to the rack using your own washers and bolts.
4.Ensure that the installation provides the minimum required air flow clearances at the sides and rear of the unit.
The TDR6 is not designed to be installed with
NOTE
Rear Rack Mount Instructions
The rear rack mount kit contains the following items:
■Two mounting plates
■Two rack mount brackets
■Four mounting plate screws
■Four connector screws with attached washers. Note: the 1U ship kit contains eight connector screws.
■Four rack mount bracket screws with attached washers
mounting | rack mount |
plates | brackets |
connector screws with washers
Note: 1U kit contains eight connector screws
mounting plate screws
rack mount bracket screws
with washers
88 |
| Table Top and Rack Mount Installation Instructions |
