Setup Menu: DN9340E
7.2.2Using a DN9340E for master control
Comms channels 1 to 32 are available, enabling a mater/slave network with one DN9340E unit acting as the master and up to 31 DN9340E and/or DN9344E slave units.
To select a master remote communications channel
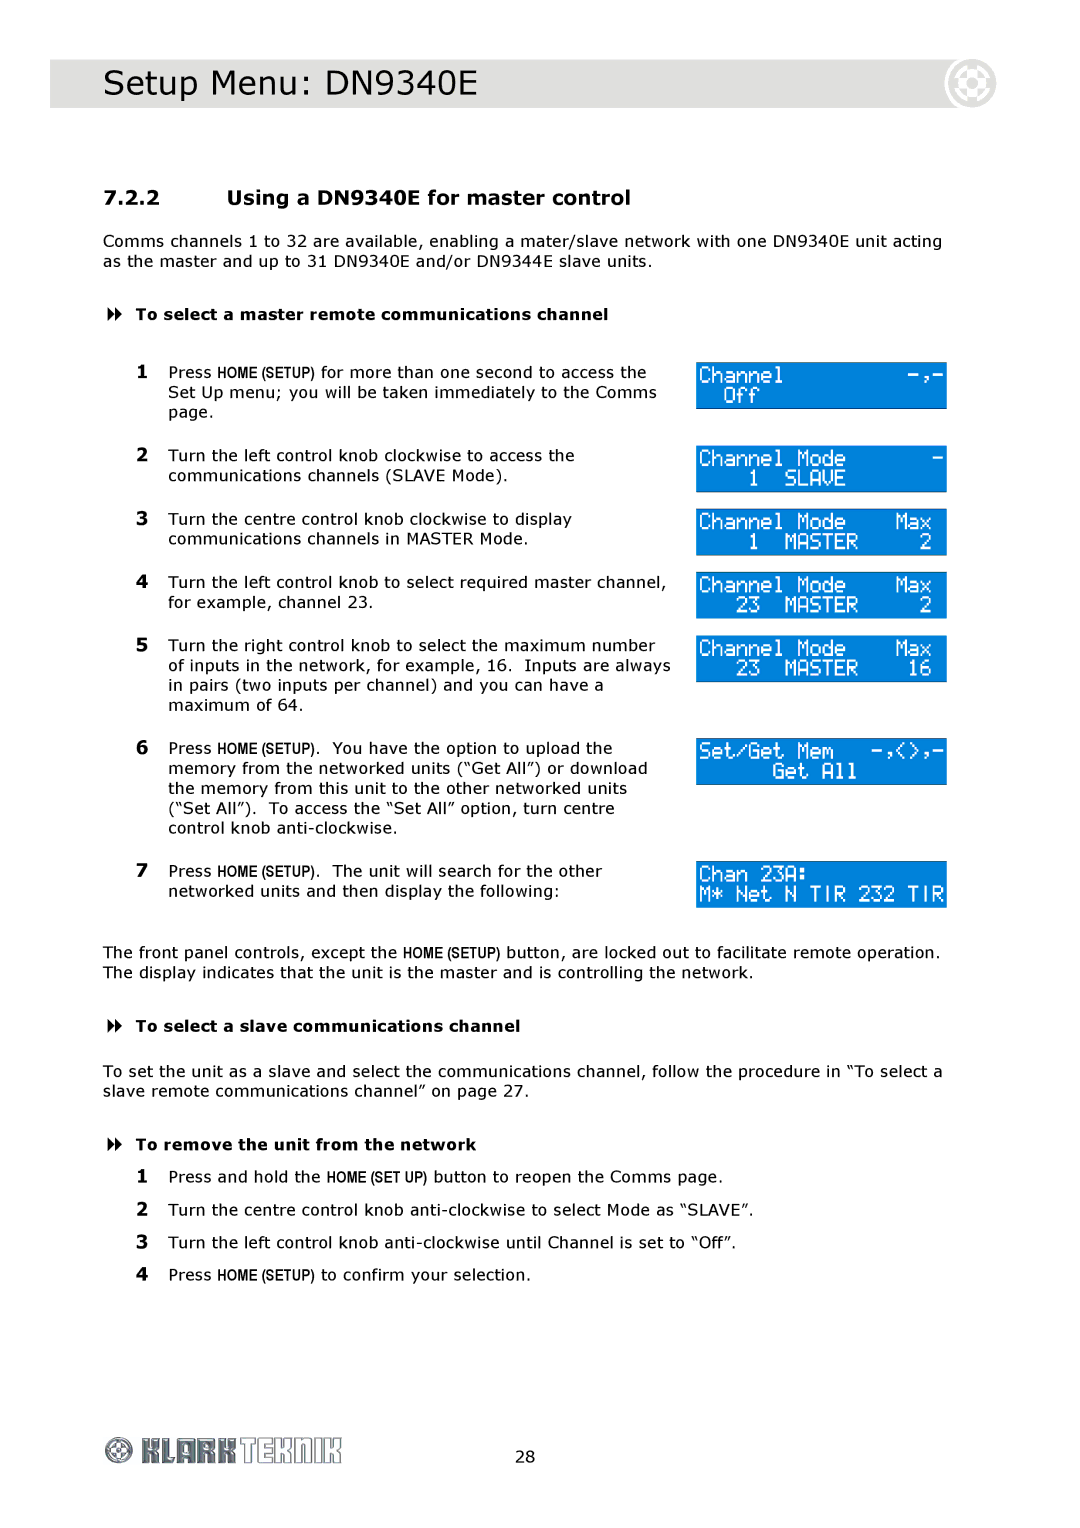
1Press HOME (SETUP) for more than one second to access the Set Up menu; you will be taken immediately to the Comms page.
2Turn the left control knob clockwise to access the communications channels (SLAVE Mode).
3Turn the centre control knob clockwise to display communications channels in MASTER Mode.
4Turn the left control knob to select required master channel, for example, channel 23.
5Turn the right control knob to select the maximum number of inputs in the network, for example, 16. Inputs are always in pairs (two inputs per channel) and you can have a maximum of 64.
6Press HOME (SETUP). You have the option to upload the memory from the networked units (“Get All”) or download the memory from this unit to the other networked units (“Set All”). To access the “Set All” option, turn centre control knob
7Press HOME (SETUP). The unit will search for the other networked units and then display the following:
The front panel controls, except the HOME (SETUP) button, are locked out to facilitate remote operation. The display indicates that the unit is the master and is controlling the network.
To select a slave communications channel
To set the unit as a slave and select the communications channel, follow the procedure in “To select a slave remote communications channel” on page 27.
To remove the unit from the network
1Press and hold the HOME (SET UP) button to reopen the Comms page.
2Turn the centre control knob
3Turn the left control knob
4Press HOME (SETUP) to confirm your selection.
28
