4. 2ch Mix to Disk
As a preparatory step to creating an audio CD from your completed song, you must resample your song to create a
The “2ch Mix to Disk” radio button automatically makes the necessary settings for creating this WAVE file.
■Setup
1Select “Auto Sampling/HD Audio Setup” to open the dialog box.
2Use radio buttons to select 2ch Mix to Disk.
3Press the OK button to execute “Auto Sampling/HD Audio Setup.” If you decide to cancel, press the Cancel button. (For the
■Resampling a completed song to create a WAVE file
4Select the song that you want to resample.
5Press the SAMPLING [REC] key.
6Press the SAMPLING [START/STOP] key. (Standby)
7Press the SEQUENCER [START/STOP] key. Song playback and resampling will begin.
8Press the SEQUENCER [START/STOP] key.
Song playback and resampling will end, and a WAVE file will be created.
![]() If a “Buffer overrun error occurred” or “Buffer under- run error occurred” error message is displayed, refer to “What to do if a “Buffer overrun error occurred” or “Buffer underrun error occurred” error message appears during recording or playback” (☞p.13), and execute the Disk mode
If a “Buffer overrun error occurred” or “Buffer under- run error occurred” error message is displayed, refer to “What to do if a “Buffer overrun error occurred” or “Buffer underrun error occurred” error message appears during recording or playback” (☞p.13), and execute the Disk mode
■Listen to the WAVE file that you created
•Use the Program mode page menu command “Select Directory” to play back the WAVE file. (Program
You can create an audio CD from the WAVE file you created. (☞BG p.118)
The Program mode page menu command “Select Directory” (Program
5. HD Audio Track REC
“HD Audio Track REC” automatically adjusts the settings so that you can play back MIDI tracks while you record only an external
(☞p.9)
Use INDIV. 1/2 OUT to monitor the audio signal being recorded. Connect the AUDIO OUTPUT MAIN L, R, INDIV1, and 2 jacks to your mixer so that you can mon- itor the output.
■Setup
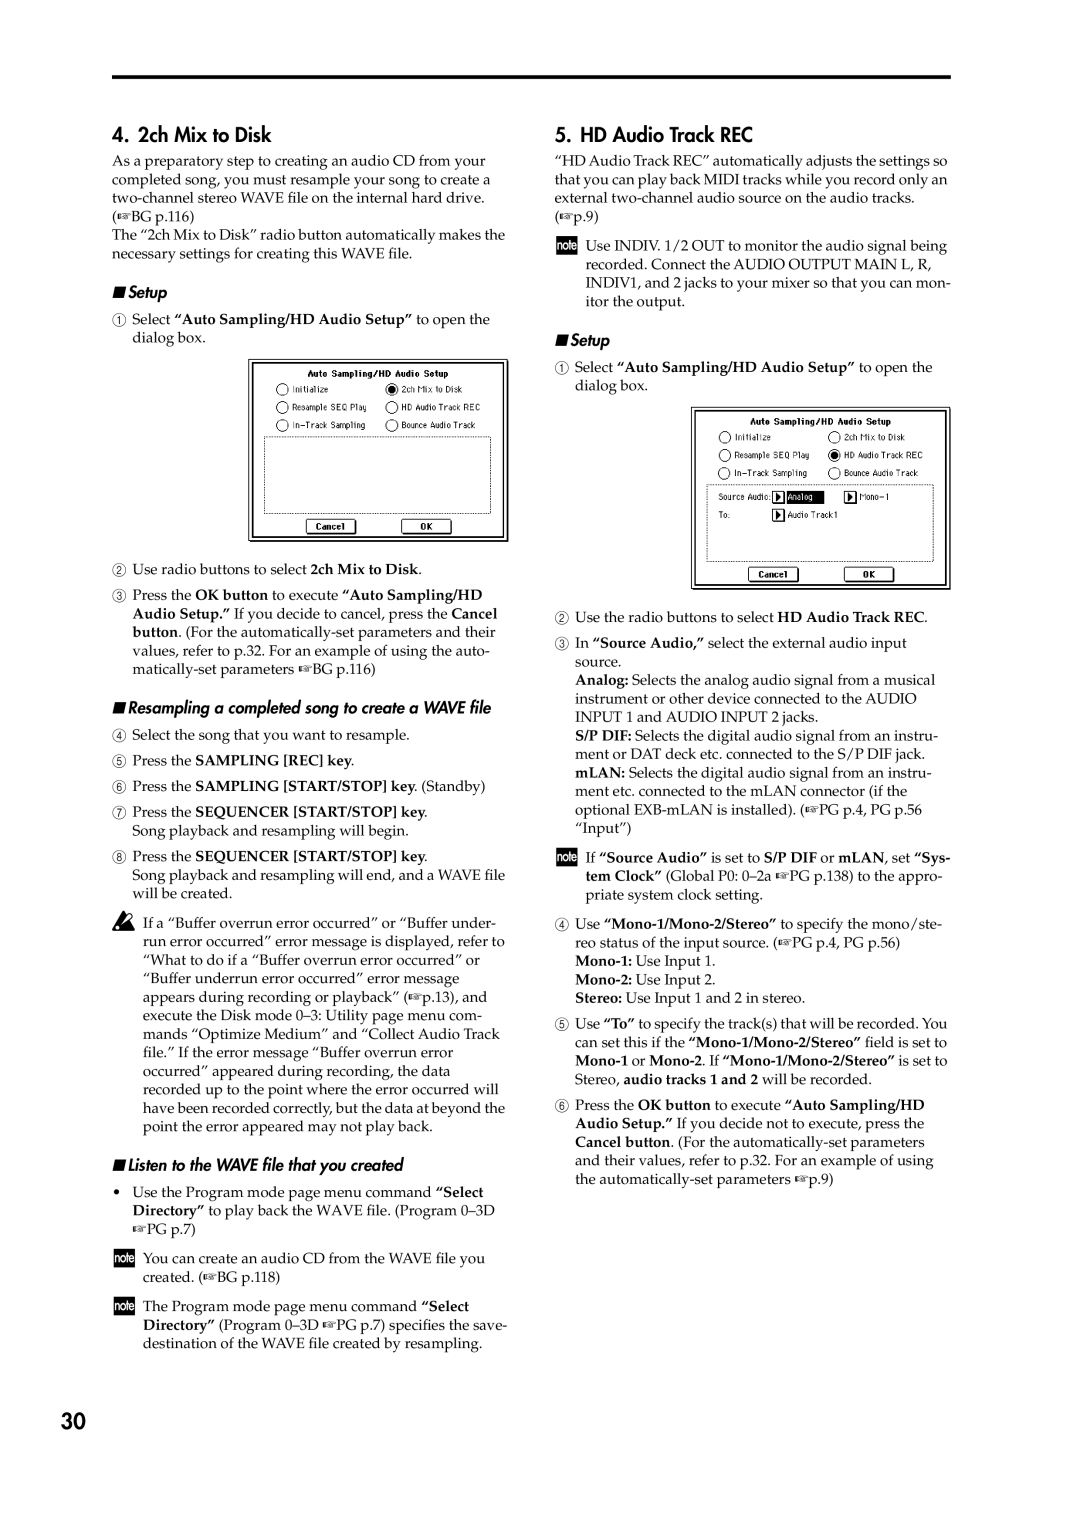
1Select “Auto Sampling/HD Audio Setup” to open the dialog box.
2Use the radio buttons to select HD Audio Track REC.
3In “Source Audio,” select the external audio input source.
Analog: Selects the analog audio signal from a musical instrument or other device connected to the AUDIO INPUT 1 and AUDIO INPUT 2 jacks.
S/P DIF: Selects the digital audio signal from an instru- ment or DAT deck etc. connected to the S/P DIF jack. mLAN: Selects the digital audio signal from an instru- ment etc. connected to the mLAN connector (if the optional
If “Source Audio” is set to S/P DIF or mLAN, set “Sys- tem Clock” (Global P0:
4Use
Stereo: Use Input 1 and 2 in stereo.
5Use “To” to specify the track(s) that will be recorded. You can set this if the
6Press the OK button to execute “Auto Sampling/HD Audio Setup.” If you decide not to execute, press the Cancel button. (For the
30