If “Convert to Program” is not checked, you can listen to the sample by selecting and playing it in Sampling mode.
3. In-Track Sampling
The
The
Use INDIV. 1/2 OUT to monitor the audio signal being recorded. Connect the AUDIO OUTPUT MAIN L, R, INDIV1, and 2 jacks to your mixer so that you can mon- itor the output.
■Setup
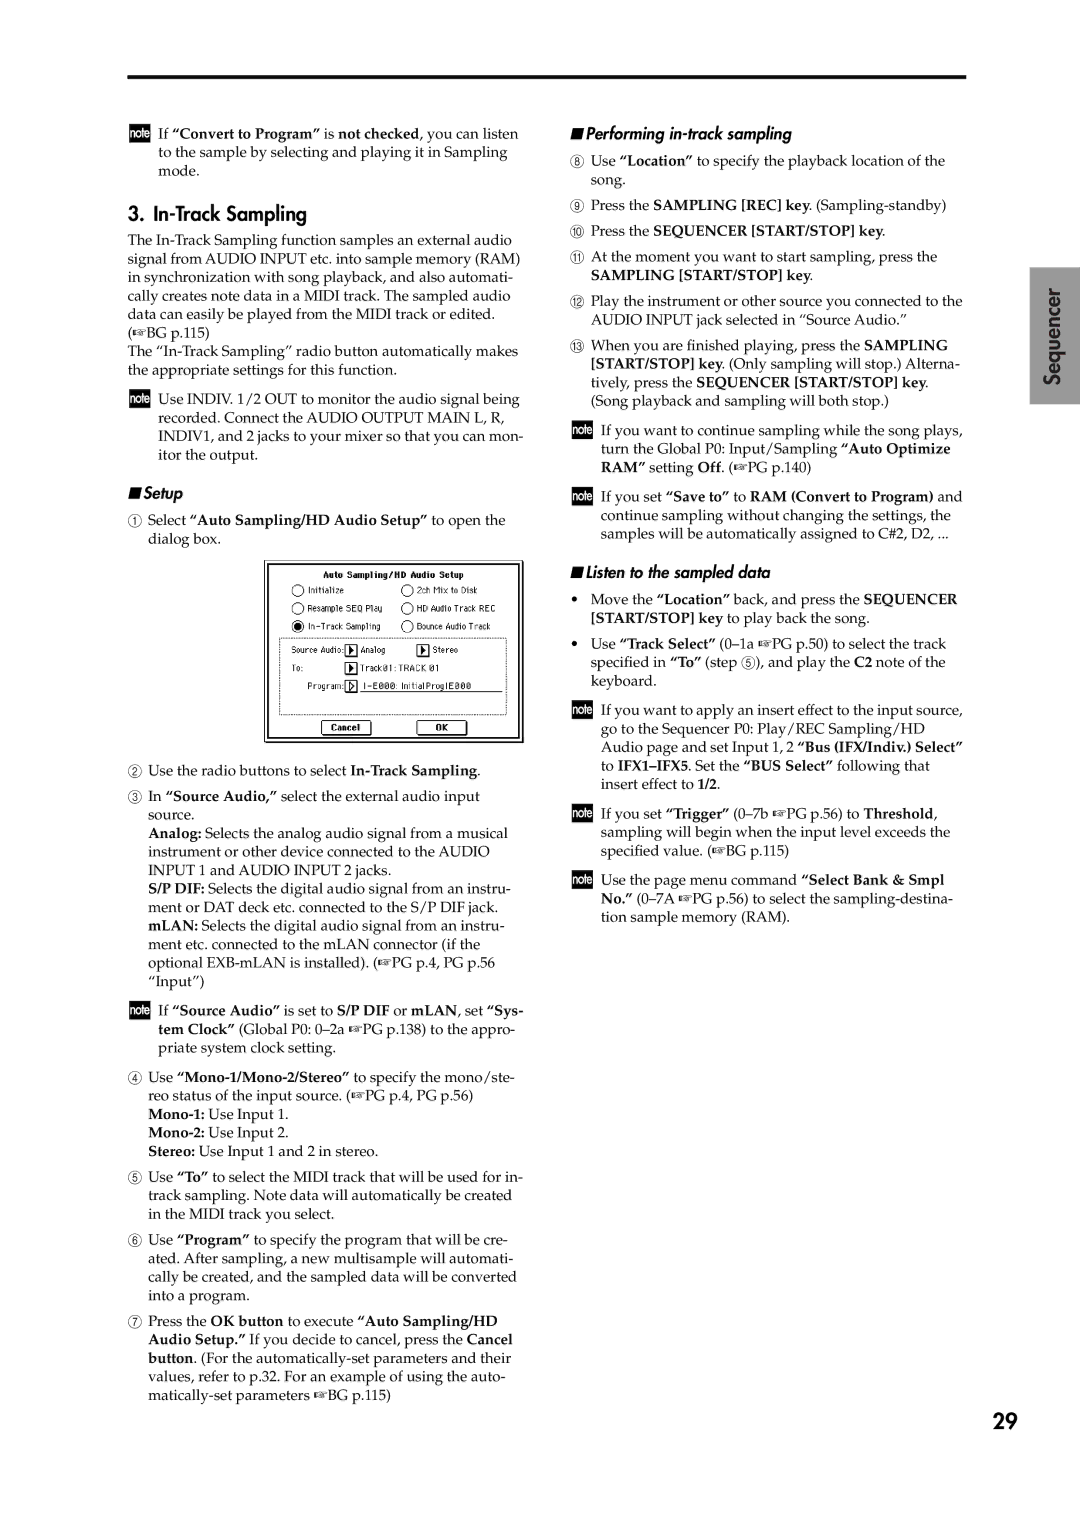
1Select “Auto Sampling/HD Audio Setup” to open the dialog box.
2Use the radio buttons to select
3In “Source Audio,” select the external audio input source.
Analog: Selects the analog audio signal from a musical instrument or other device connected to the AUDIO INPUT 1 and AUDIO INPUT 2 jacks.
S/P DIF: Selects the digital audio signal from an instru- ment or DAT deck etc. connected to the S/P DIF jack. mLAN: Selects the digital audio signal from an instru- ment etc. connected to the mLAN connector (if the optional
If “Source Audio” is set to S/P DIF or mLAN, set “Sys- tem Clock” (Global P0:
4Use
Stereo: Use Input 1 and 2 in stereo.
5Use “To” to select the MIDI track that will be used for in- track sampling. Note data will automatically be created in the MIDI track you select.
6Use “Program” to specify the program that will be cre- ated. After sampling, a new multisample will automati- cally be created, and the sampled data will be converted into a program.
7Press the OK button to execute “Auto Sampling/HD Audio Setup.” If you decide to cancel, press the Cancel button. (For the
■Performing in-track sampling
8Use “Location” to specify the playback location of the song.
9Press the SAMPLING [REC] key.
0Press the SEQUENCER [START/STOP] key.
AAt the moment you want to start sampling, press the SAMPLING [START/STOP] key.
BPlay the instrument or other source you connected to the AUDIO INPUT jack selected in “Source Audio.”
CWhen you are finished playing, press the SAMPLING [START/STOP] key. (Only sampling will stop.) Alterna- tively, press the SEQUENCER [START/STOP] key. (Song playback and sampling will both stop.)
If you want to continue sampling while the song plays, turn the Global P0: Input/Sampling “Auto Optimize RAM” setting Off. (☞PG p.140)
If you set “Save to” to RAM (Convert to Program) and continue sampling without changing the settings, the samples will be automatically assigned to C#2, D2, ...
■Listen to the sampled data
•Move the “Location” back, and press the SEQUENCER [START/STOP] key to play back the song.
•Use “Track Select”
If you want to apply an insert effect to the input source, go to the Sequencer P0: Play/REC Sampling/HD Audio page and set Input 1, 2 “Bus (IFX/Indiv.) Select” to
If you set “Trigger”
Use the page menu command “Select Bank & Smpl No.”
Sequencer
29