Sequencer P5: Track Edit
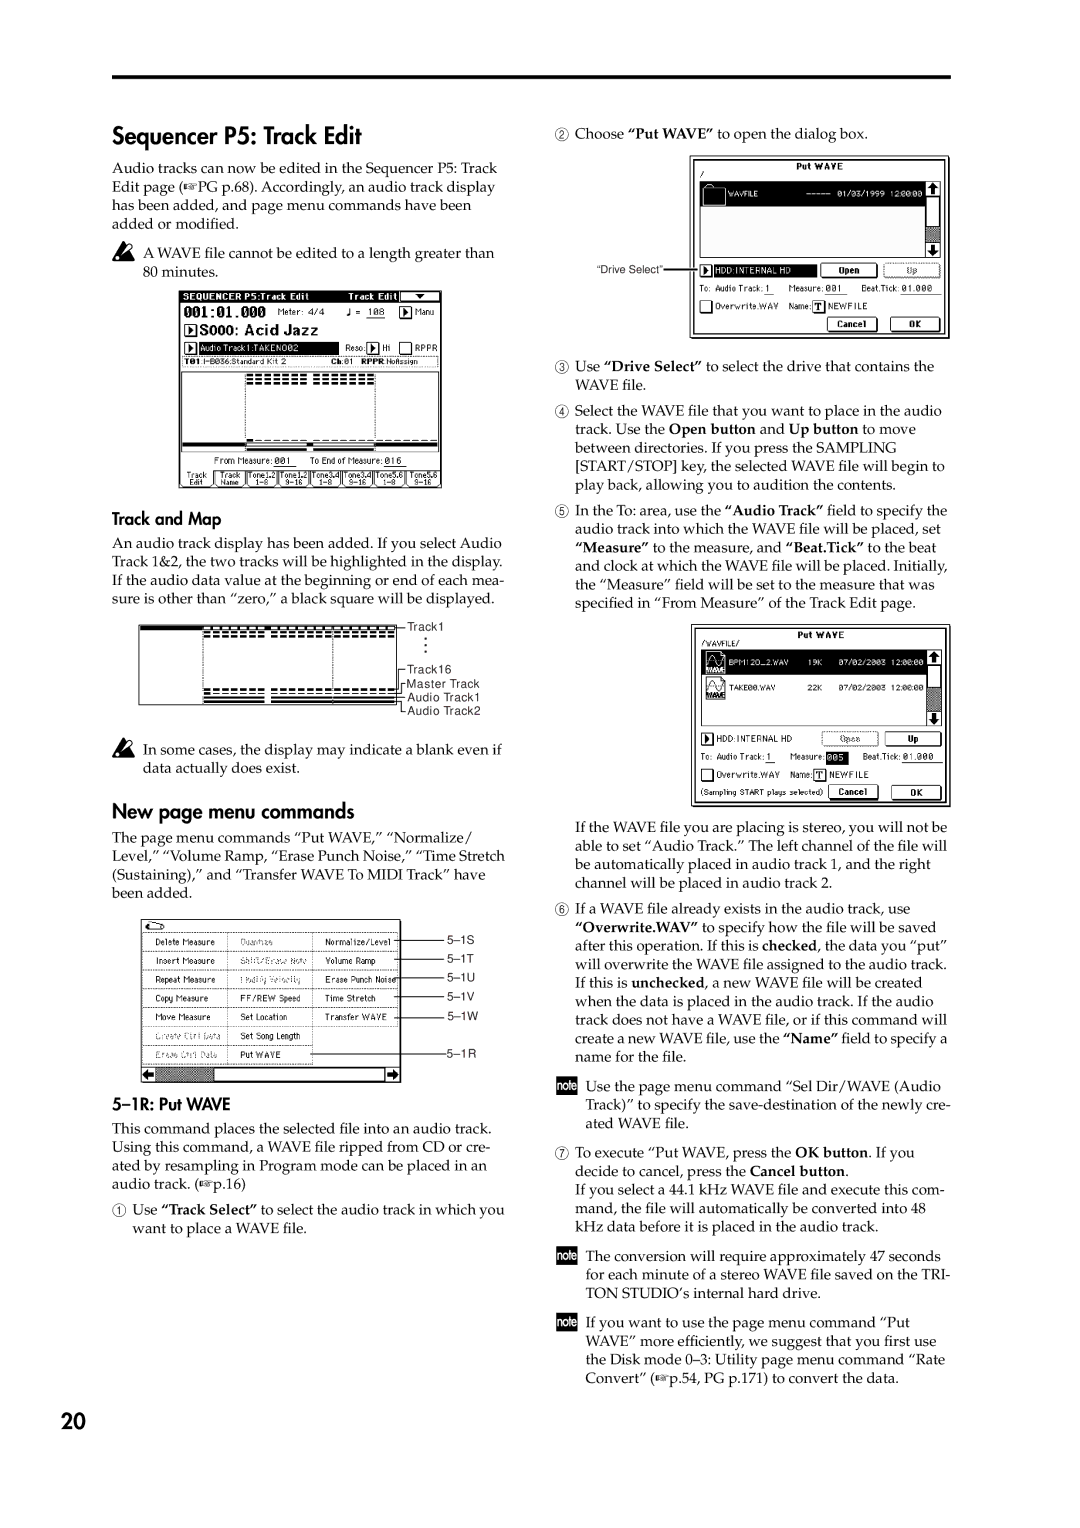
Audio tracks can now be edited in the Sequencer P5: Track Edit page (☞PG p.68). Accordingly, an audio track display has been added, and page menu commands have been added or modified.
![]() A WAVE file cannot be edited to a length greater than 80 minutes.
A WAVE file cannot be edited to a length greater than 80 minutes.
Track and Map
An audio track display has been added. If you select Audio Track 1&2, the two tracks will be highlighted in the display. If the audio data value at the beginning or end of each mea- sure is other than “zero,” a black square will be displayed.
Track1
Track16
Master Track
![]() Audio Track1
Audio Track1
![]() Audio Track2
Audio Track2
![]() In some cases, the display may indicate a blank even if data actually does exist.
In some cases, the display may indicate a blank even if data actually does exist.
New page menu commands
The page menu commands “Put WAVE,” “Normalize/ Level,” “Volume Ramp, “Erase Punch Noise,” “Time Stretch (Sustaining),” and “Transfer WAVE To MIDI Track” have been added.
5–1R: Put WAVE
This command places the selected file into an audio track. Using this command, a WAVE file ripped from CD or cre- ated by resampling in Program mode can be placed in an audio track. (☞p.16)
1Use “Track Select” to select the audio track in which you want to place a WAVE file.
2Choose “Put WAVE” to open the dialog box.
“Drive Select”
3Use “Drive Select” to select the drive that contains the WAVE file.
4Select the WAVE file that you want to place in the audio track. Use the Open button and Up button to move between directories. If you press the SAMPLING [START/STOP] key, the selected WAVE file will begin to play back, allowing you to audition the contents.
5In the To: area, use the “Audio Track” field to specify the audio track into which the WAVE file will be placed, set “Measure” to the measure, and “Beat.Tick” to the beat and clock at which the WAVE file will be placed. Initially, the “Measure” field will be set to the measure that was specified in “From Measure” of the Track Edit page.
If the WAVE file you are placing is stereo, you will not be able to set “Audio Track.” The left channel of the file will be automatically placed in audio track 1, and the right channel will be placed in audio track 2.
6If a WAVE file already exists in the audio track, use “Overwrite.WAV” to specify how the file will be saved after this operation. If this is checked, the data you “put” will overwrite the WAVE file assigned to the audio track. If this is unchecked, a new WAVE file will be created when the data is placed in the audio track. If the audio track does not have a WAVE file, or if this command will create a new WAVE file, use the “Name” field to specify a name for the file.
Use the page menu command “Sel Dir/WAVE (Audio Track)” to specify the
7To execute “Put WAVE, press the OK button. If you decide to cancel, press the Cancel button.
If you select a 44.1 kHz WAVE file and execute this com- mand, the file will automatically be converted into 48 kHz data before it is placed in the audio track.
The conversion will require approximately 47 seconds for each minute of a stereo WAVE file saved on the TRI- TON STUDIO’s internal hard drive.
If you want to use the page menu command “Put WAVE” more efficiently, we suggest that you first use the Disk mode
20
