![]() If you select a WAVE file that is other than 44.1 kHz or 48 kHz, an error message of “Can’t Put” will appear.
If you select a WAVE file that is other than 44.1 kHz or 48 kHz, an error message of “Can’t Put” will appear.
![]() You cannot “put” a WAVE file that is longer than 80 minutes.
You cannot “put” a WAVE file that is longer than 80 minutes.
5–1S: Normalize/Level (Normalize/Level Adjust)
This command applies the same processing as the Sampling mode Sampling P1: Sample Edit page menu command “Normalize/Level Adjust” to a WAVE file. (☞PG p.104 “1– 1l: Normalize/Level Adj.”)
The data values (volume) in the “From
In the dialog box, use the “From Measure,” “To Measure,” and “Beat.Tick” fields to specify the region to which the command will apply.
Use “From Measure” and “To Measure” to specify the mea- sures, and “Beat.Tick” to specify the beat and clock. By default, “From Measure” and “To Measure” are set to the “From Measure” and “To End of Measure” setting of the Track Edit page.
“Overwrite.WAV” specifies whether the data that results from executing the command will overwrite the original file, or saved as a new file. If a new file will be created, use “Name” to specify a name for it.
Use the page menu command “Sel Dir/WAVE (Audio Track)” to specify the
The way in which the Compare function operates will depend on the “Overwrite.WAV” setting. (☞p.44)
5–1T: Volume Ramp
This command applies the same processing as the Sampling mode Sampling P1: Sample Edit page menu command “Vol- ume Ramp” to a WAVE file. (☞PG p.104
The data values (volume) in the “From
The “From Measure,” “To Measure,” “Beat.Tick,” and “Overwrite.WAV” fields in this dialog box are the same as described in
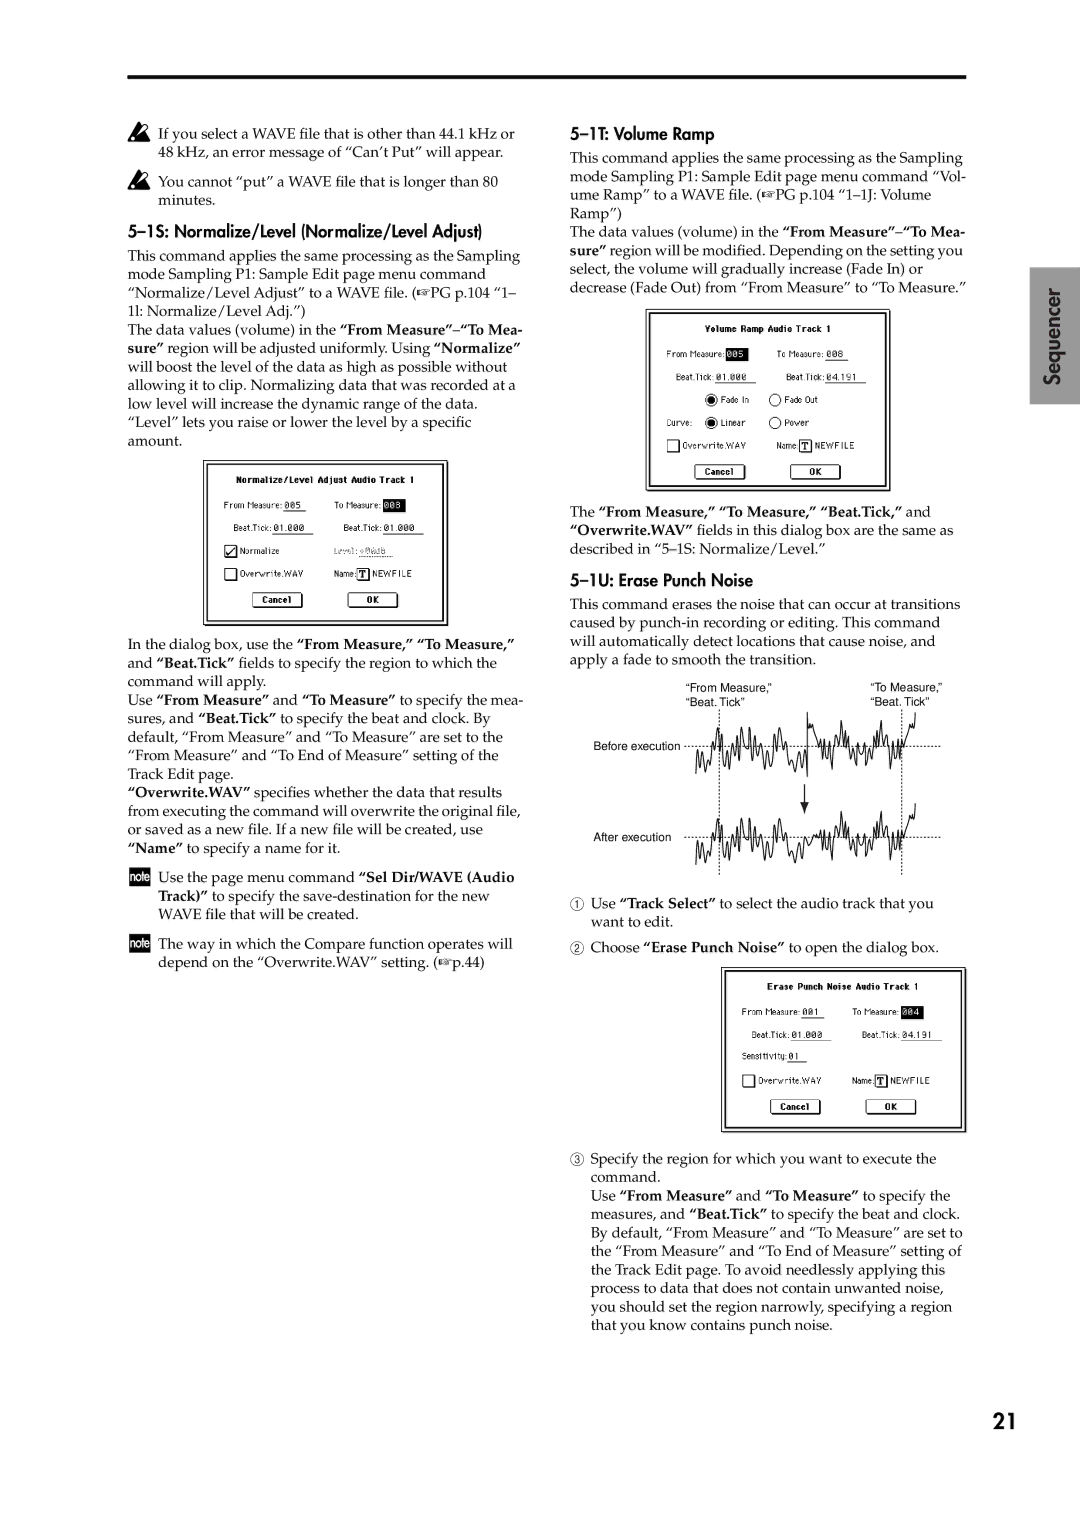
5–1U: Erase Punch Noise
This command erases the noise that can occur at transitions caused by
“From Measure,” | “To Measure,” |
“Beat. Tick” | “Beat. Tick” |
Before execution
After execution
1Use “Track Select” to select the audio track that you want to edit.
2Choose “Erase Punch Noise” to open the dialog box.
3Specify the region for which you want to execute the command.
Use “From Measure” and “To Measure” to specify the measures, and “Beat.Tick” to specify the beat and clock. By default, “From Measure” and “To Measure” are set to the “From Measure” and “To End of Measure” setting of the Track Edit page. To avoid needlessly applying this process to data that does not contain unwanted noise, you should set the region narrowly, specifying a region that you know contains punch noise.
Sequencer
21