Sample Memory Configurations
Bank 0 | Bank 1 | Bank 2 | Total RAM |
128 MB | 32 MB | 32 MB | 192 MB |
128 MB | 64 MB | Empty | 192 MB |
128 MB | 64 MB | 32 MB | 224 MB |
128 MB | 64 MB | 64 MB | 256 MB |
128 MB | 128 MB | Empty | 256 MB |
128 MB | 128 MB | 32 MB | 288 MB |
128 MB | 128 MB | 64 MB | 320 MB |
128 MB | 128 MB | 128 MB | 384 MB |
|
|
|
|
DIMM Removal
Use the following procedure to remove a DIMM.
!CAUTION
Reduce static discharge by touching the system’s metal chassis.
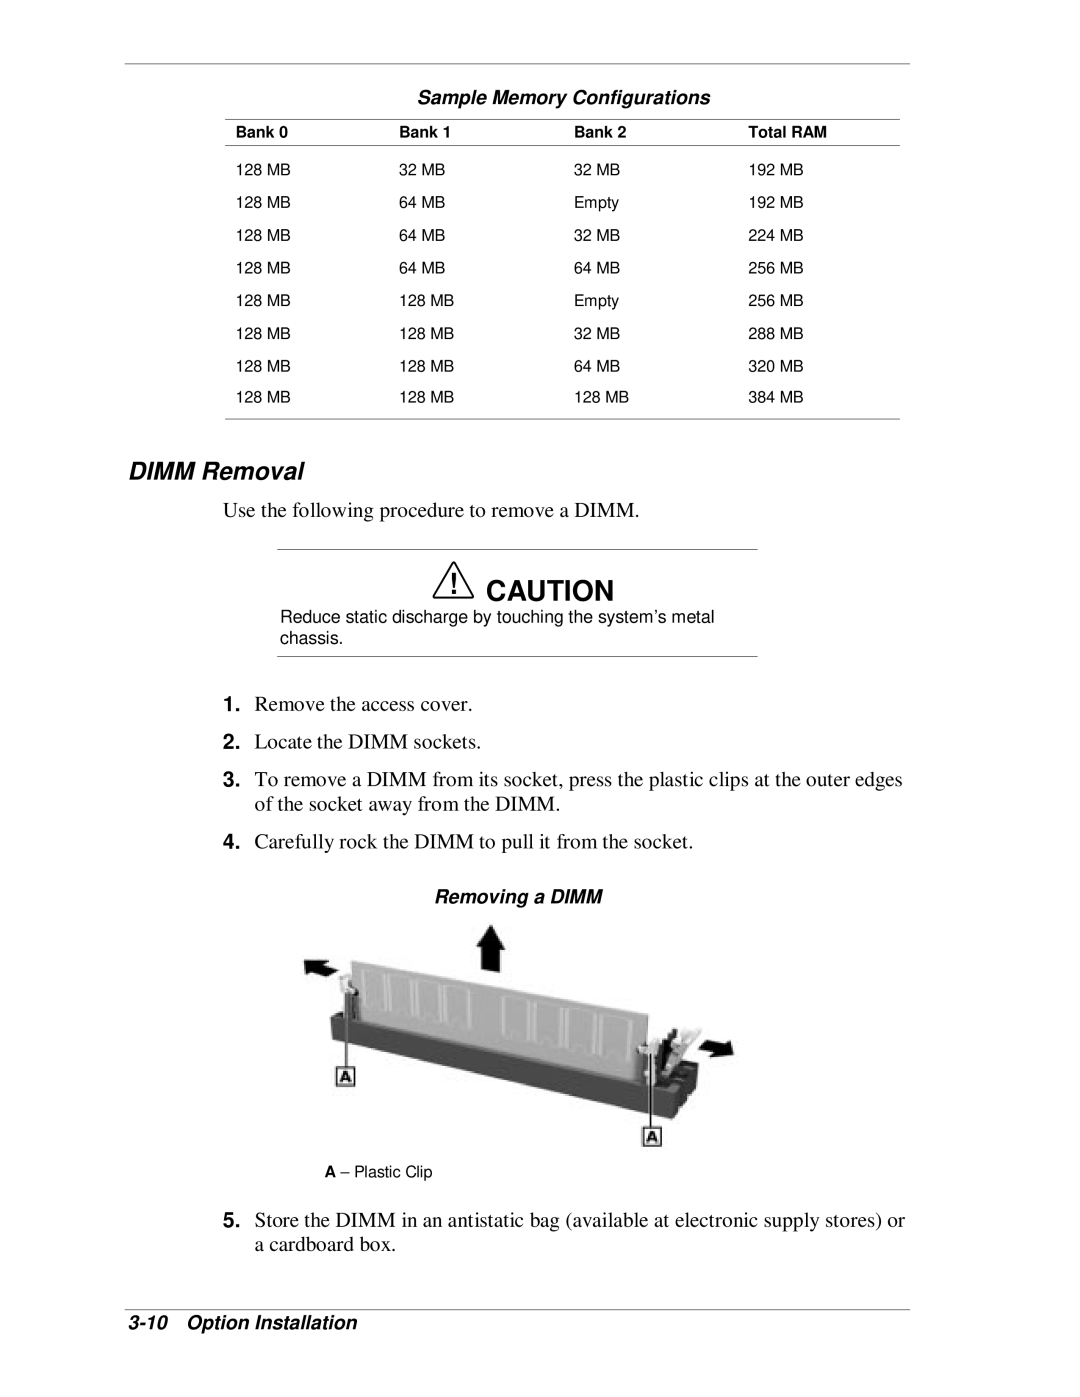
1.Remove the access cover.
2.Locate the DIMM sockets.
3.To remove a DIMM from its socket, press the plastic clips at the outer edges of the socket away from the DIMM.
4.Carefully rock the DIMM to pull it from the socket.
Removing a DIMM
A – Plastic Clip
5.Store the DIMM in an antistatic bag (available at electronic supply stores) or a cardboard box.