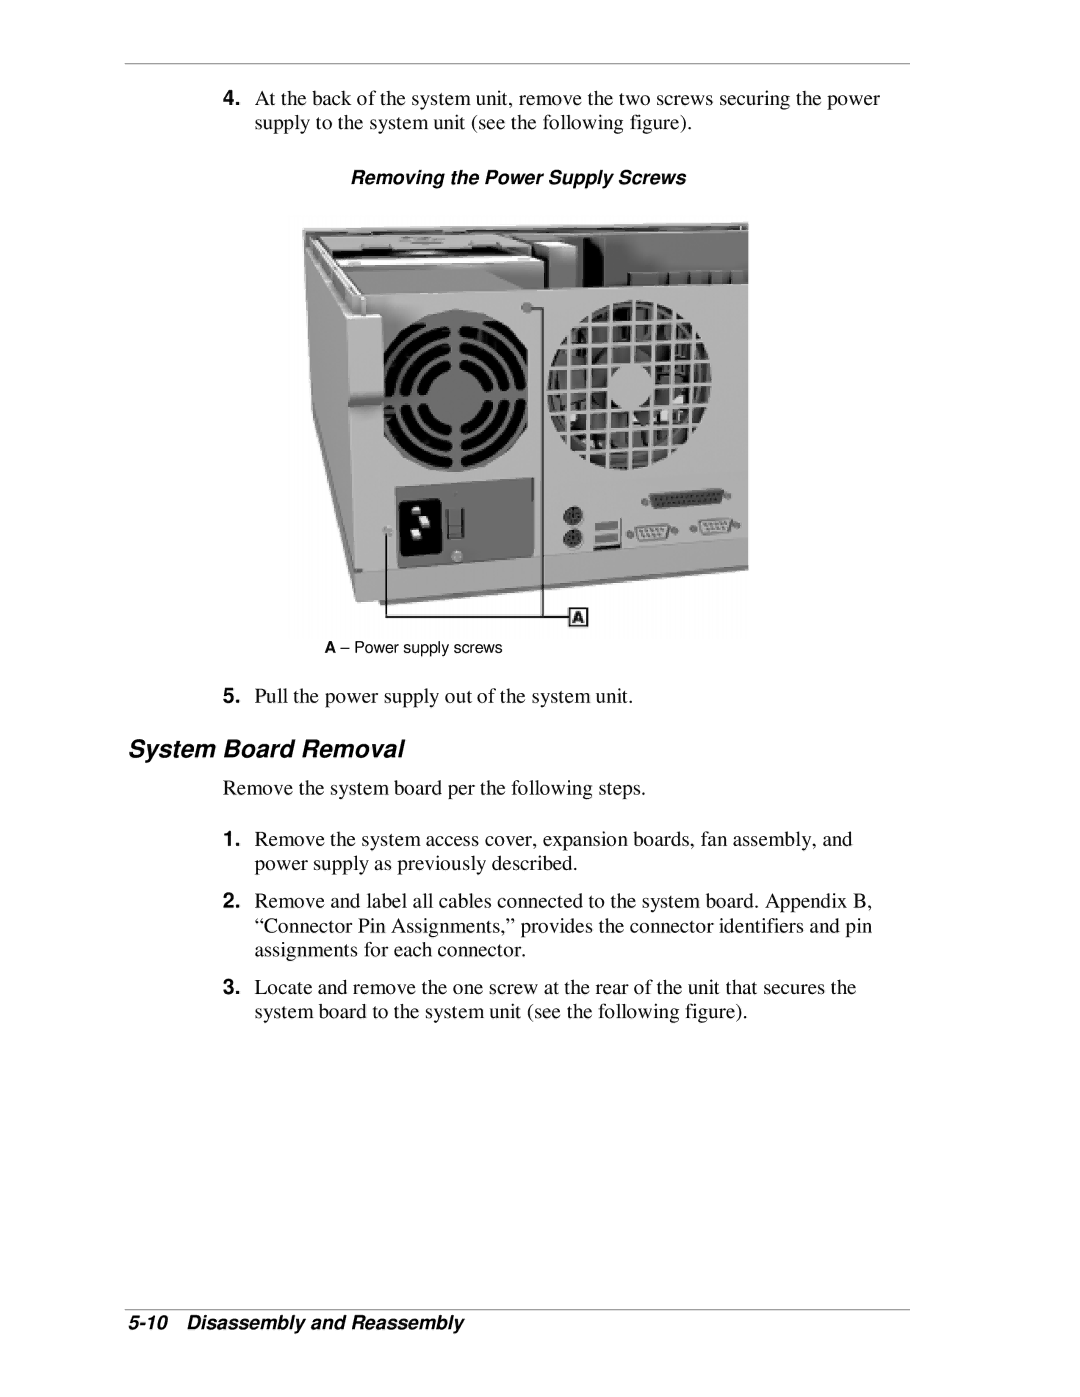
4.At the back of the system unit, remove the two screws securing the power supply to the system unit (see the following figure).
Removing the Power Supply Screws
A – Power supply screws
5.Pull the power supply out of the system unit.
System Board Removal
Remove the system board per the following steps.
1.Remove the system access cover, expansion boards, fan assembly, and power supply as previously described.
2.Remove and label all cables connected to the system board. Appendix B, “Connector Pin Assignments,” provides the connector identifiers and pin assignments for each connector.
3.Locate and remove the one screw at the rear of the unit that secures the system board to the system unit (see the following figure).