Removing the 5 1/4-Inch Device Screws
4.Slide the device out from the front of the system unit.
Optional 3 1/2-Inch Hard Drive Removal
Remove the optional 3
1.Remove the system access cover and front panel as previously described.
2.Label and unplug the hard drive power and signal cables from the hard drive.
3.Remove the two screws securing the 3
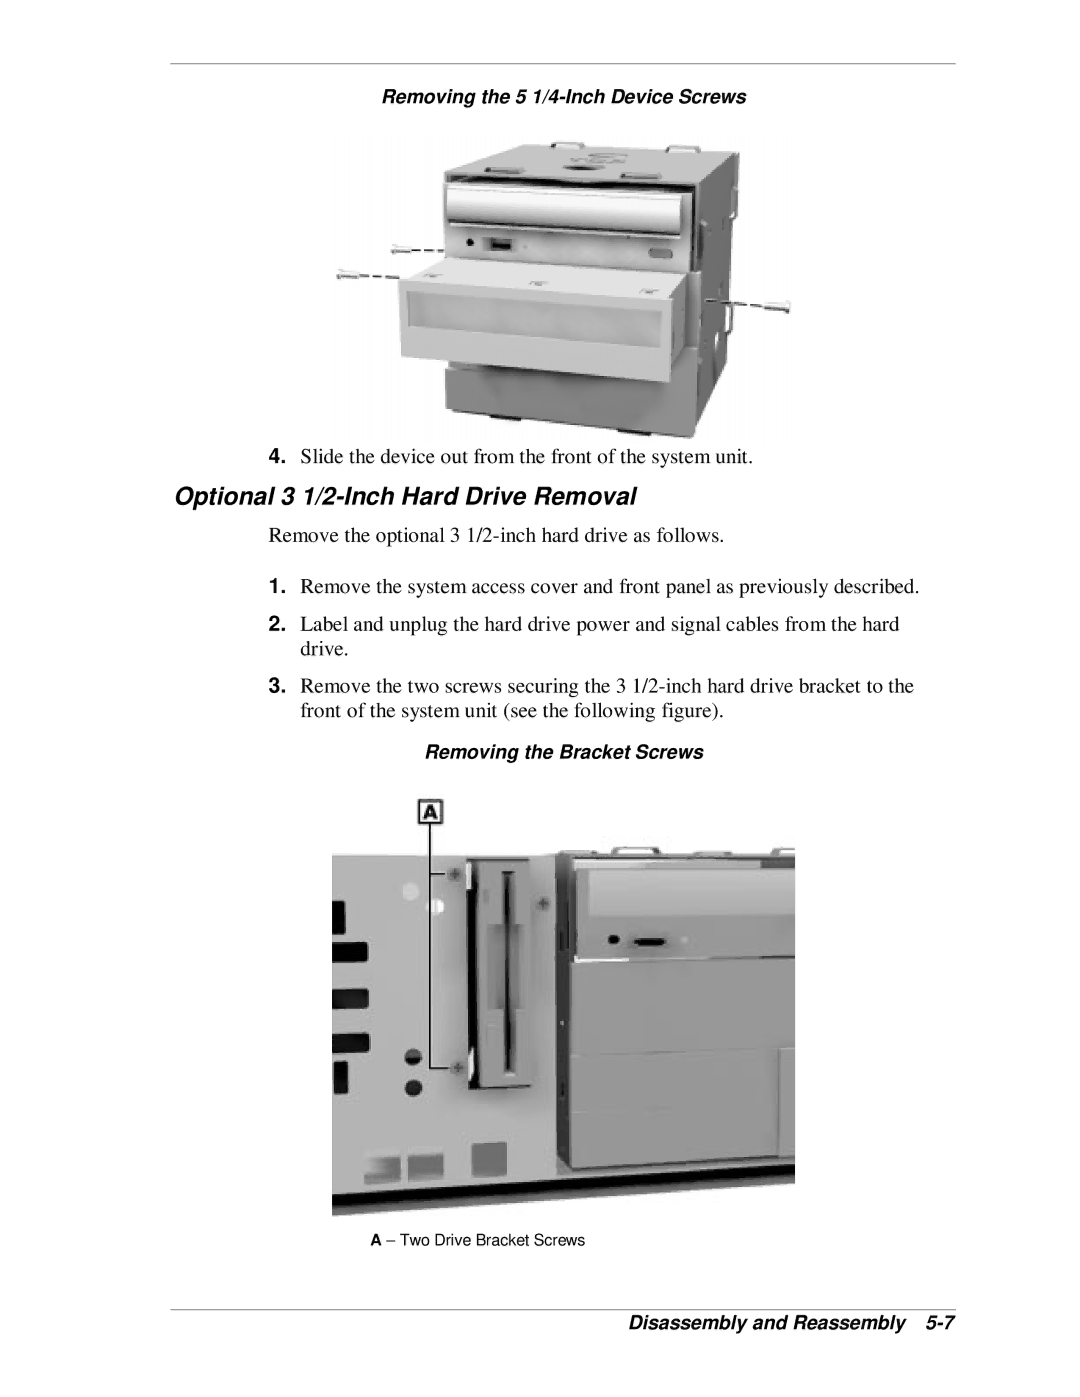
Removing the Bracket Screws
A – Two Drive Bracket Screws