N150 and N300 WiFi DSL Modem Routers
The BASIC Home screen displays.
5.Select ADVANCED > Advanced Setup > IPv6. The IPv6 screen displays.
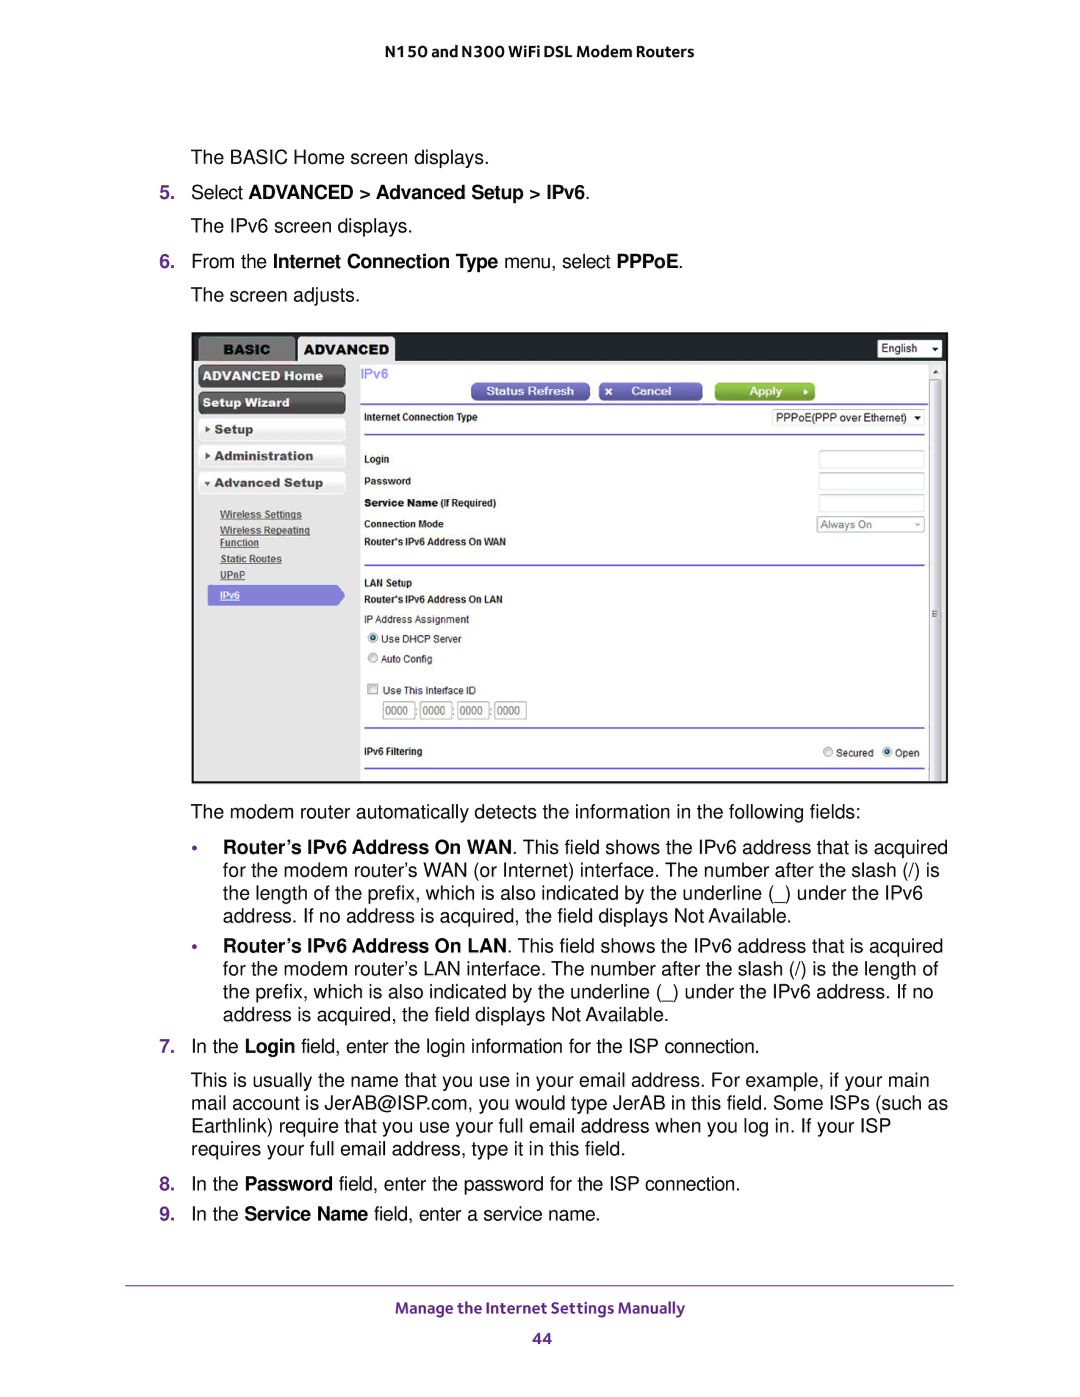
6.From the Internet Connection Type menu, select PPPoE. The screen adjusts.
The modem router automatically detects the information in the following fields:
•Router’s IPv6 Address On WAN. This field shows the IPv6 address that is acquired for the modem router’s WAN (or Internet) interface. The number after the slash (/) is the length of the prefix, which is also indicated by the underline (_) under the IPv6 address. If no address is acquired, the field displays Not Available.
•Router’s IPv6 Address On LAN. This field shows the IPv6 address that is acquired for the modem router’s LAN interface. The number after the slash (/) is the length of the prefix, which is also indicated by the underline (_) under the IPv6 address. If no address is acquired, the field displays Not Available.
7.In the Login field, enter the login information for the ISP connection.
This is usually the name that you use in your email address. For example, if your main mail account is JerAB@ISP.com, you would type JerAB in this field. Some ISPs (such as Earthlink) require that you use your full email address when you log in. If your ISP requires your full email address, type it in this field.
8.In the Password field, enter the password for the ISP connection.
9.In the Service Name field, enter a service name.
Manage the Internet Settings Manually
44