2.2 Wiring !
WARNING
Wiring should be done only after you have read this section. The section consists of the following subsections:
2.2.1Rear Panel Terminal Arrangement
2.2.2Power Supply Wiring
2.2.3Input Signal Wiring
2.2.4Alarm Output Wiring
2.2.5Remote Control Wiring
Make sure to fasten the wiring at the rear wall of the mounting panel and employ some kind of strain relief between the rear wall and the recorder.
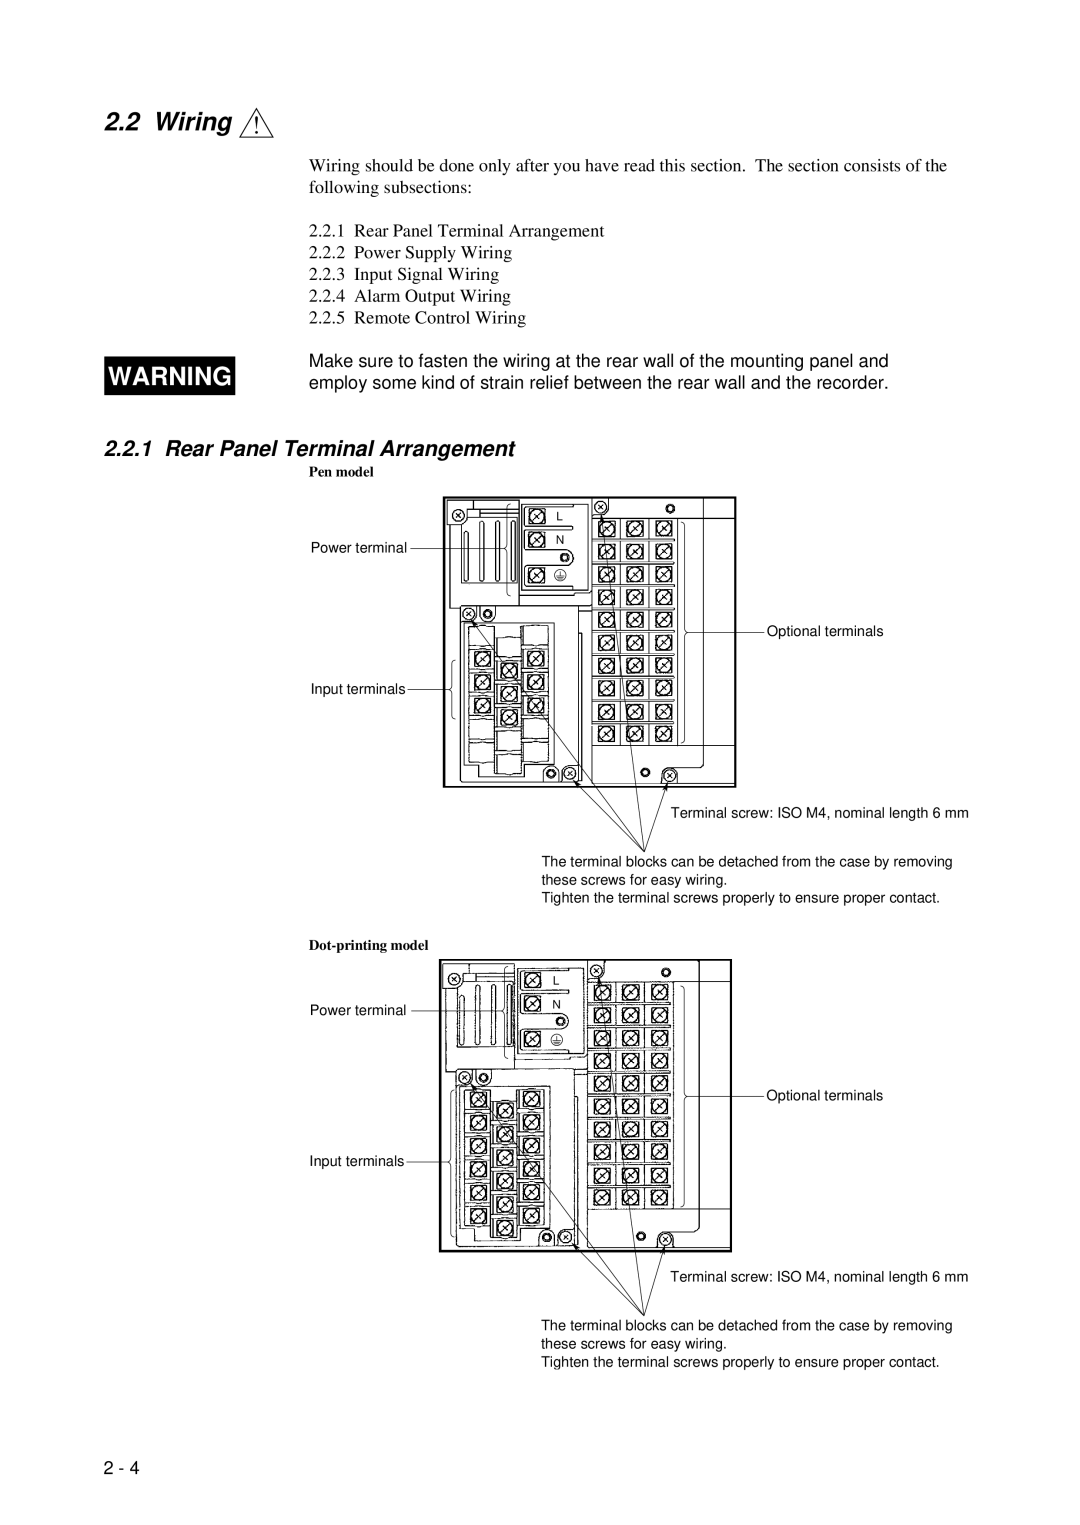
2.2.1 Rear Panel Terminal Arrangement
Pen model
Power terminal
Input terminals
L
N
Optional terminals
Terminal screw: ISO M4, nominal length 6 mm
Dot-printing model
Power terminal
Input terminals
The terminal blocks can be detached from the case by removing these screws for easy wiring.
Tighten the terminal screws properly to ensure proper contact.
L
N
Optional terminals
Terminal screw: ISO M4, nominal length 6 mm
The terminal blocks can be detached from the case by removing these screws for easy wiring.
Tighten the terminal screws properly to ensure proper contact.
2 - 4
