Digital Input Setting (DI Setting)
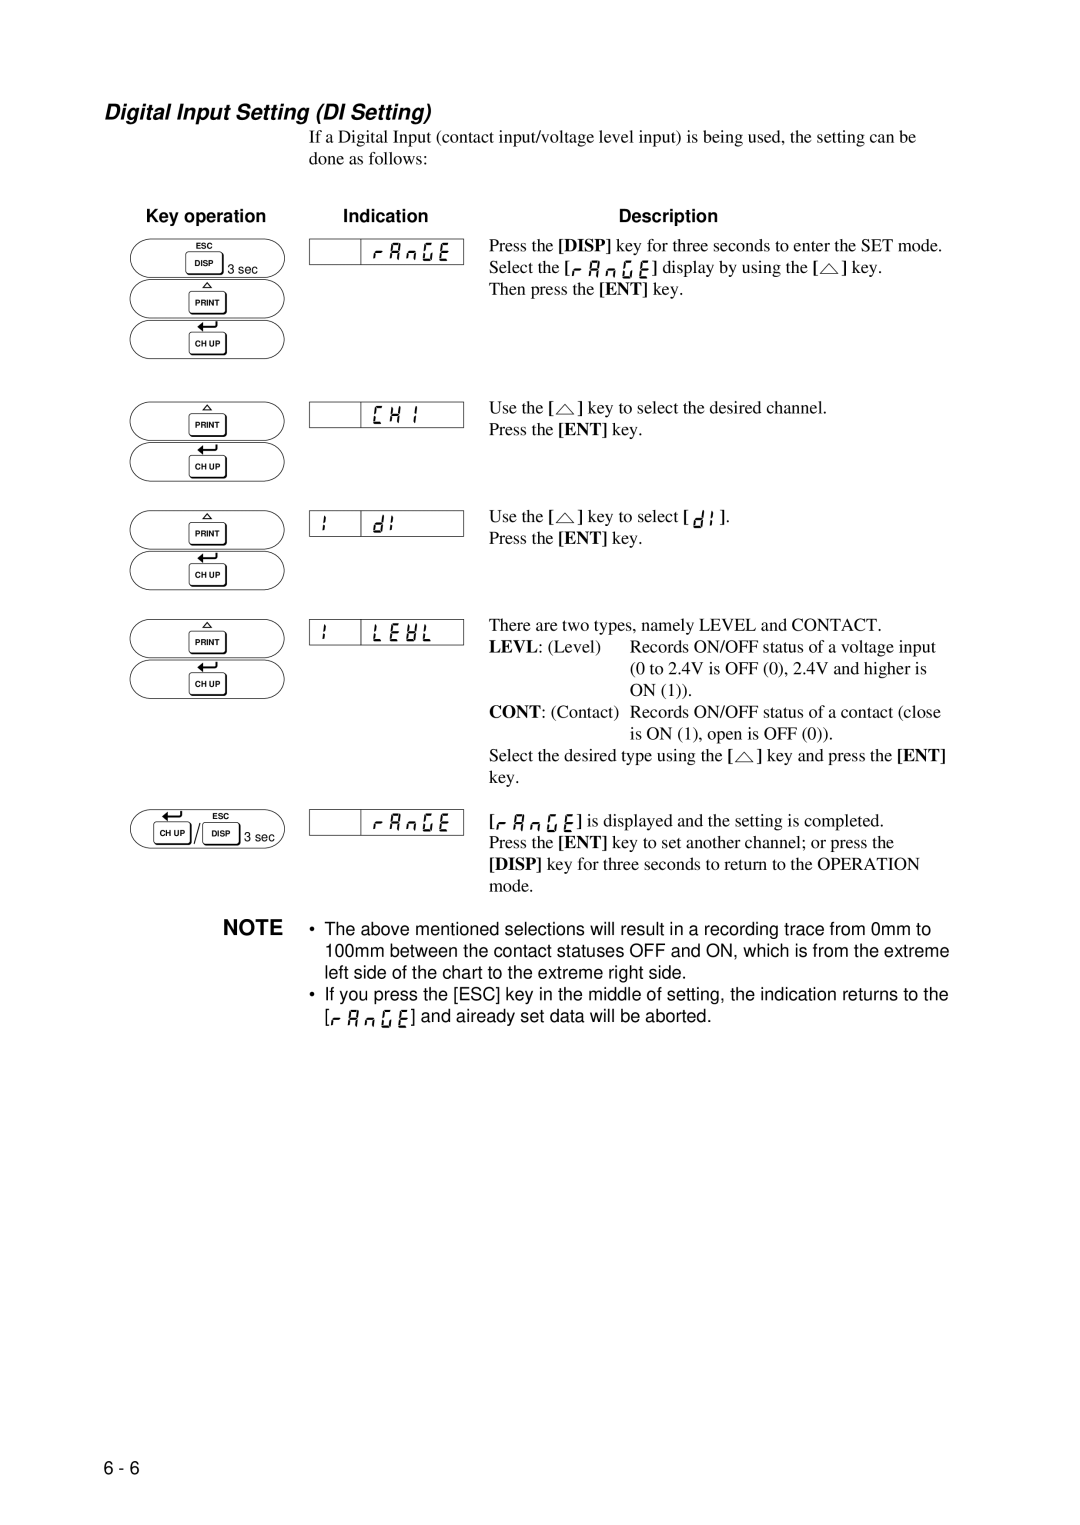
If a Digital Input (contact input/voltage level input) is being used, the setting can be done as follows:
Key operation
ESC
DISP
3 sec
CH UP
CH UP
CH UP
CH UP
Indication
Description
Press the [DISP] key for three seconds to enter the SET mode.
Select the [ ![]()
![]()
![]()
![]()
![]()
![]() ] display by using the [
] display by using the [![]() ] key. Then press the [ENT] key.
] key. Then press the [ENT] key.
Use the [![]() ] key to select the desired channel.
] key to select the desired channel.
Press the [ENT] key.
Use the [![]() ] key to select [
] key to select [ ![]()
![]() ].
].
Press the [ENT] key.
There are two types, namely LEVEL and CONTACT.
LEVL: (Level) | Records ON/OFF status of a voltage input |
| (0 to 2.4V is OFF (0), 2.4V and higher is |
| ON (1)). |
CONT: (Contact) | Records ON/OFF status of a contact (close |
| is ON (1), open is OFF (0)). |
Select the desired type using the [![]() ] key and press the [ENT] key.
] key and press the [ENT] key.
| ESC |
|
CH UP | DISP | 3 sec |
|
|
[ ![]()
![]()
![]()
![]()
![]()
![]() ] is displayed and the setting is completed. Press the [ENT] key to set another channel; or press the [DISP] key for three seconds to return to the OPERATION mode.
] is displayed and the setting is completed. Press the [ENT] key to set another channel; or press the [DISP] key for three seconds to return to the OPERATION mode.
NOTE • The above mentioned selections will result in a recording trace from 0mm to 100mm between the contact statuses OFF and ON, which is from the extreme left side of the chart to the extreme right side.
•If you press the [ESC] key in the middle of setting, the indication returns to the
[ ![]()
![]()
![]()
![]()
![]()
![]() ] and aiready set data will be aborted.
] and aiready set data will be aborted.
6 - 6