PRINT FEED
CH UP
CH UP
CH UP
NOTE
| ESC |
|
CH UP | DISP | 3 sec |
|
|
NOTE
6.3 Setting Alarms (ALARM)
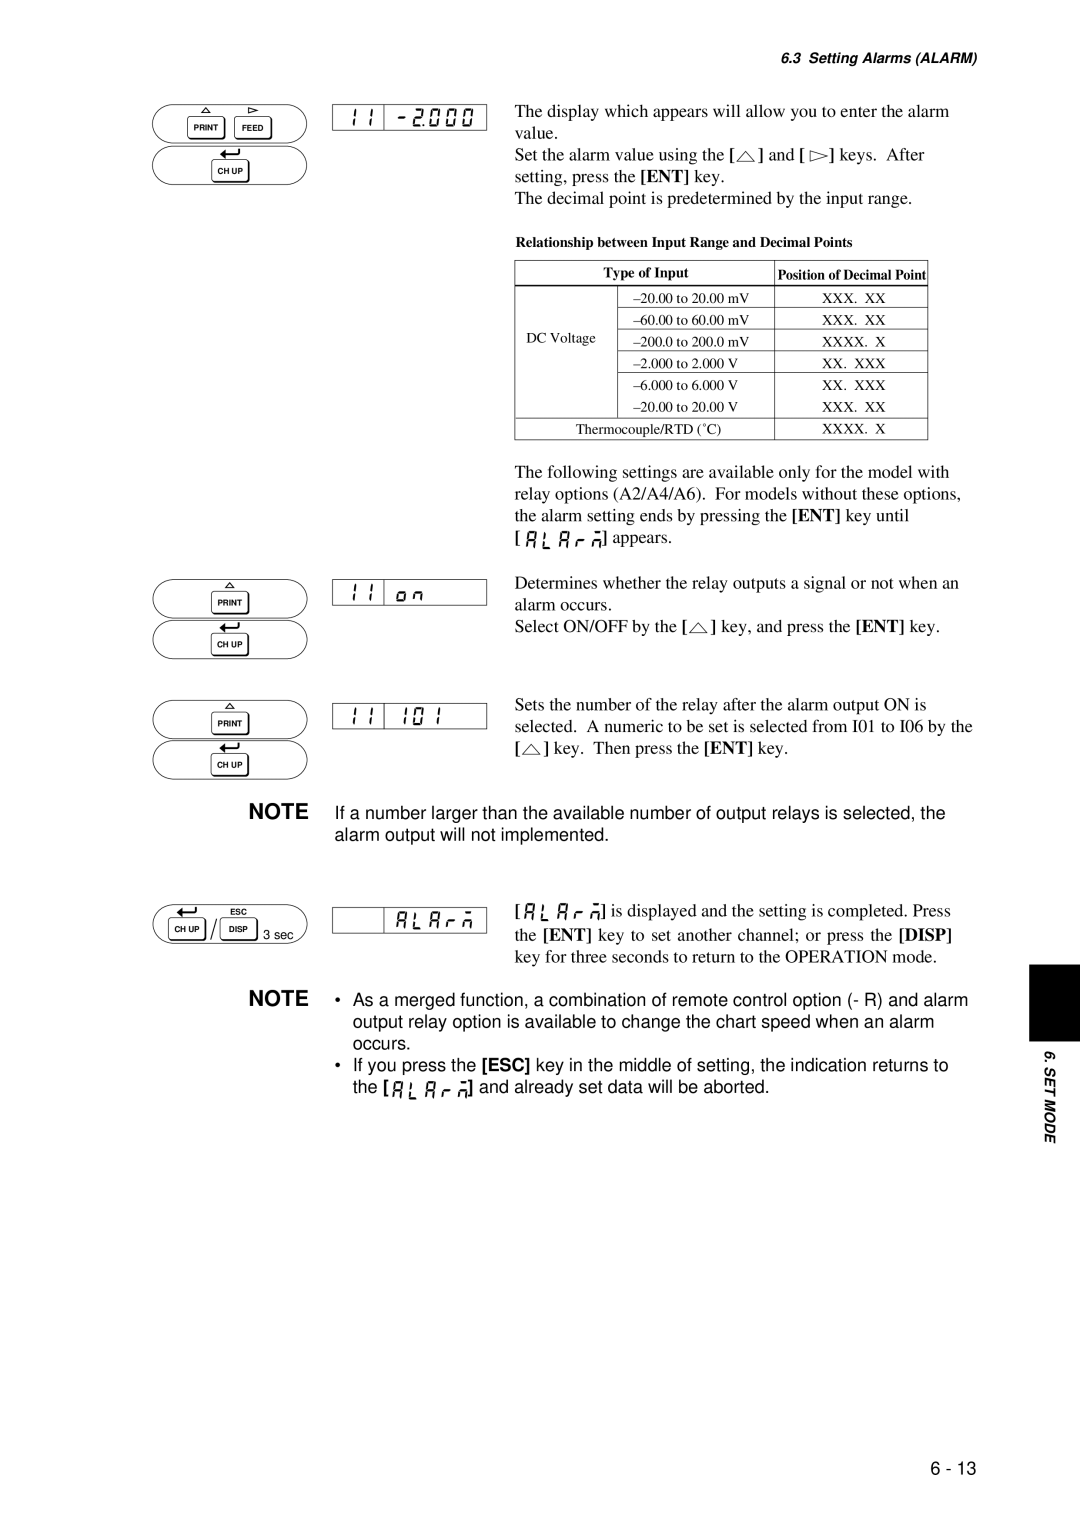
The display which appears will allow you to enter the alarm value.
Set the alarm value using the [![]() ] and [
] and [ ![]() ] keys. After setting, press the [ENT] key.
] keys. After setting, press the [ENT] key.
The decimal point is predetermined by the input range.
Relationship between Input Range and Decimal Points
| Type of Input | Position of Decimal Point | |
|
|
|
|
|
| XXX. XX | |
|
| XXX. XX | |
DC Voltage |
| XXXX. X | |
|
| XX. XXX | |
|
| XX. XXX | |
|
| XXX. XX | |
|
|
| |
Thermocouple/RTD (˚C) | XXXX. X | ||
|
|
|
|
The following settings are available only for the model with relay options (A2/A4/A6). For models without these options, the alarm setting ends by pressing the [ENT] key until
[ ![]()
![]()
![]()
![]()
![]()
![]()
![]() ] appears.
] appears.
Determines whether the relay outputs a signal or not when an alarm occurs.
Select ON/OFF by the [![]() ] key, and press the [ENT] key.
] key, and press the [ENT] key.
Sets the number of the relay after the alarm output ON is selected. A numeric to be set is selected from I01 to I06 by the [![]() ] key. Then press the [ENT] key.
] key. Then press the [ENT] key.
If a number larger than the available number of output relays is selected, the alarm output will not implemented.
[ | ] is displayed and the setting is completed. Press |
the [ENT] key to set another channel; or press the [DISP] key for three seconds to return to the OPERATION mode.
•As a merged function, a combination of remote control option (- R) and alarm output relay option is available to change the chart speed when an alarm occurs.
•If you press the [ESC] key in the middle of setting, the indication returns to
the [ ![]()
![]()
![]()
![]()
![]()
![]()
![]() ] and already set data will be aborted.
] and already set data will be aborted.
6. SET MODE
6 - 13