4.3 Installing (or Replacing) Pens (Pen model)
Felt-tip pen
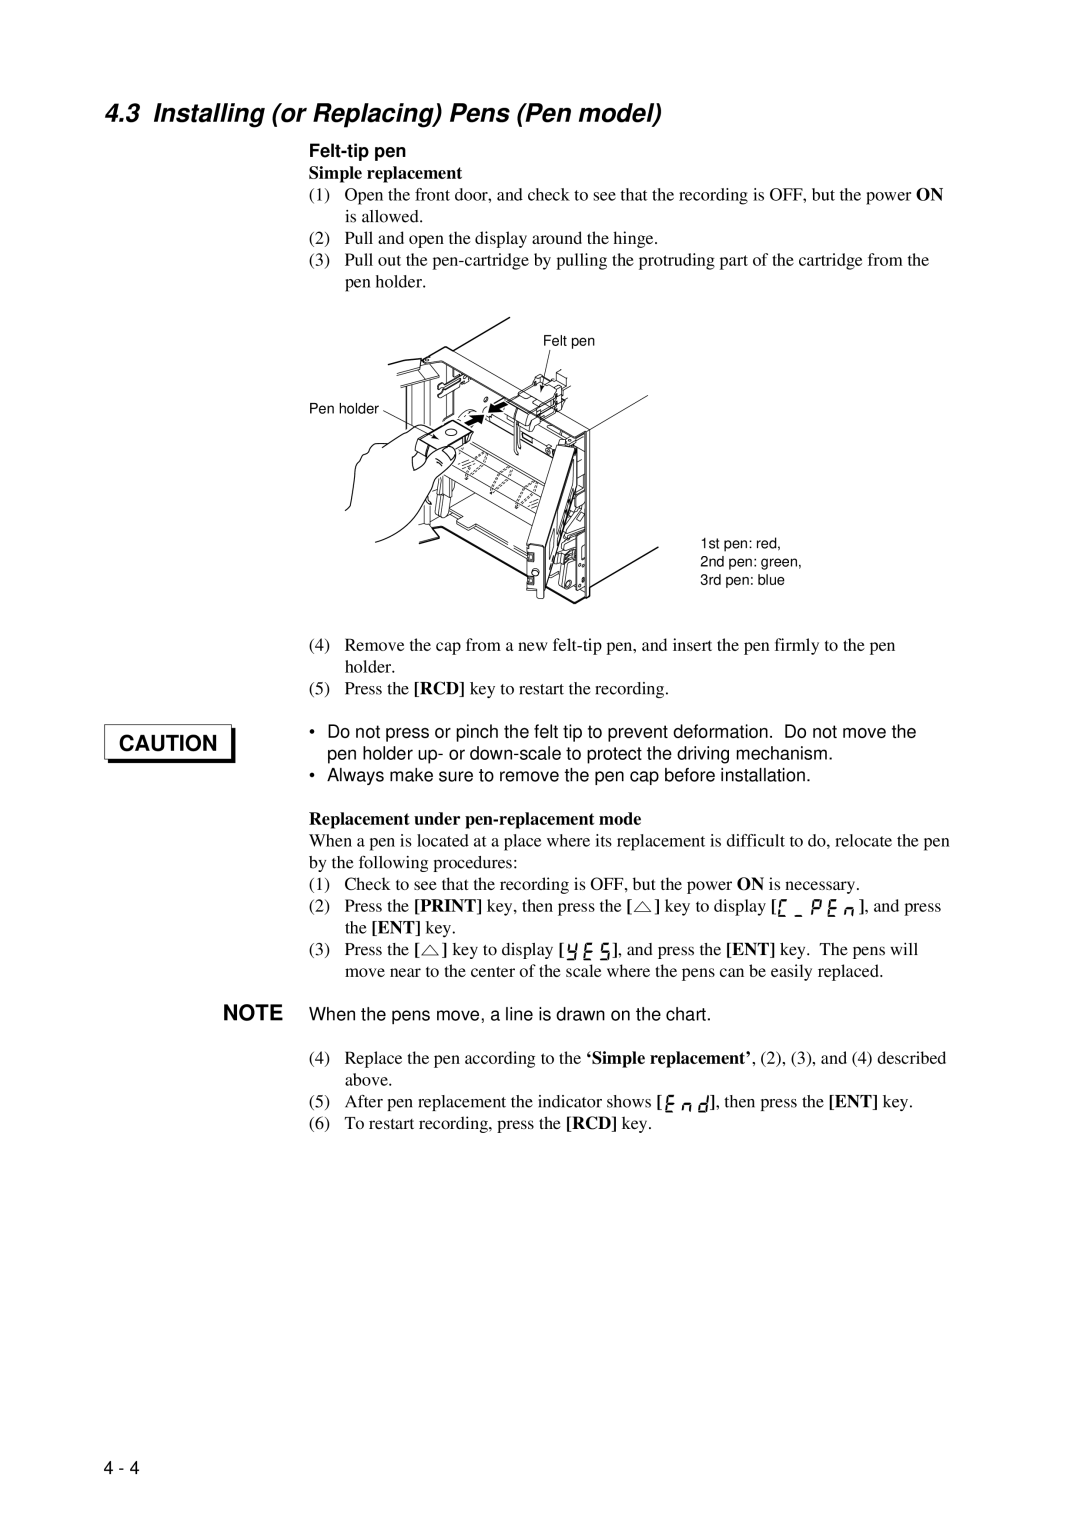
Simple replacement
(1)Open the front door, and check to see that the recording is OFF, but the power ON is allowed.
(2)Pull and open the display around the hinge.
(3)Pull out the
Felt pen
Pen holder
1st pen: red,
2nd pen: green,
3rd pen: blue
CAUTION
NOTE
(4)Remove the cap from a new
(5)Press the [RCD] key to restart the recording.
•Do not press or pinch the felt tip to prevent deformation. Do not move the pen holder up- or
•Always make sure to remove the pen cap before installation.
Replacement under pen-replacement mode
When a pen is located at a place where its replacement is difficult to do, relocate the pen by the following procedures:
(1) Check to see that the recording is OFF, but the power ON is necessary.
(2) Press the [PRINT] key, then press the [![]() ] key to display [
] key to display [ ![]()
![]()
![]()
![]()
![]() ], and press the [ENT] key.
], and press the [ENT] key.
(3)Press the [![]() ] key to display [
] key to display [ ![]()
![]()
![]()
![]() ], and press the [ENT] key. The pens will move near to the center of the scale where the pens can be easily replaced.
], and press the [ENT] key. The pens will move near to the center of the scale where the pens can be easily replaced.
When the pens move, a line is drawn on the chart.
(4)Replace the pen according to the ‘Simple replacement’, (2), (3), and (4) described above.
(5)After pen replacement the indicator shows [ ![]()
![]()
![]() ], then press the [ENT] key.
], then press the [ENT] key.
(6)To restart recording, press the [RCD] key.
4 - 4