CHAPTER 3: Replacing notebook components
9Detach the
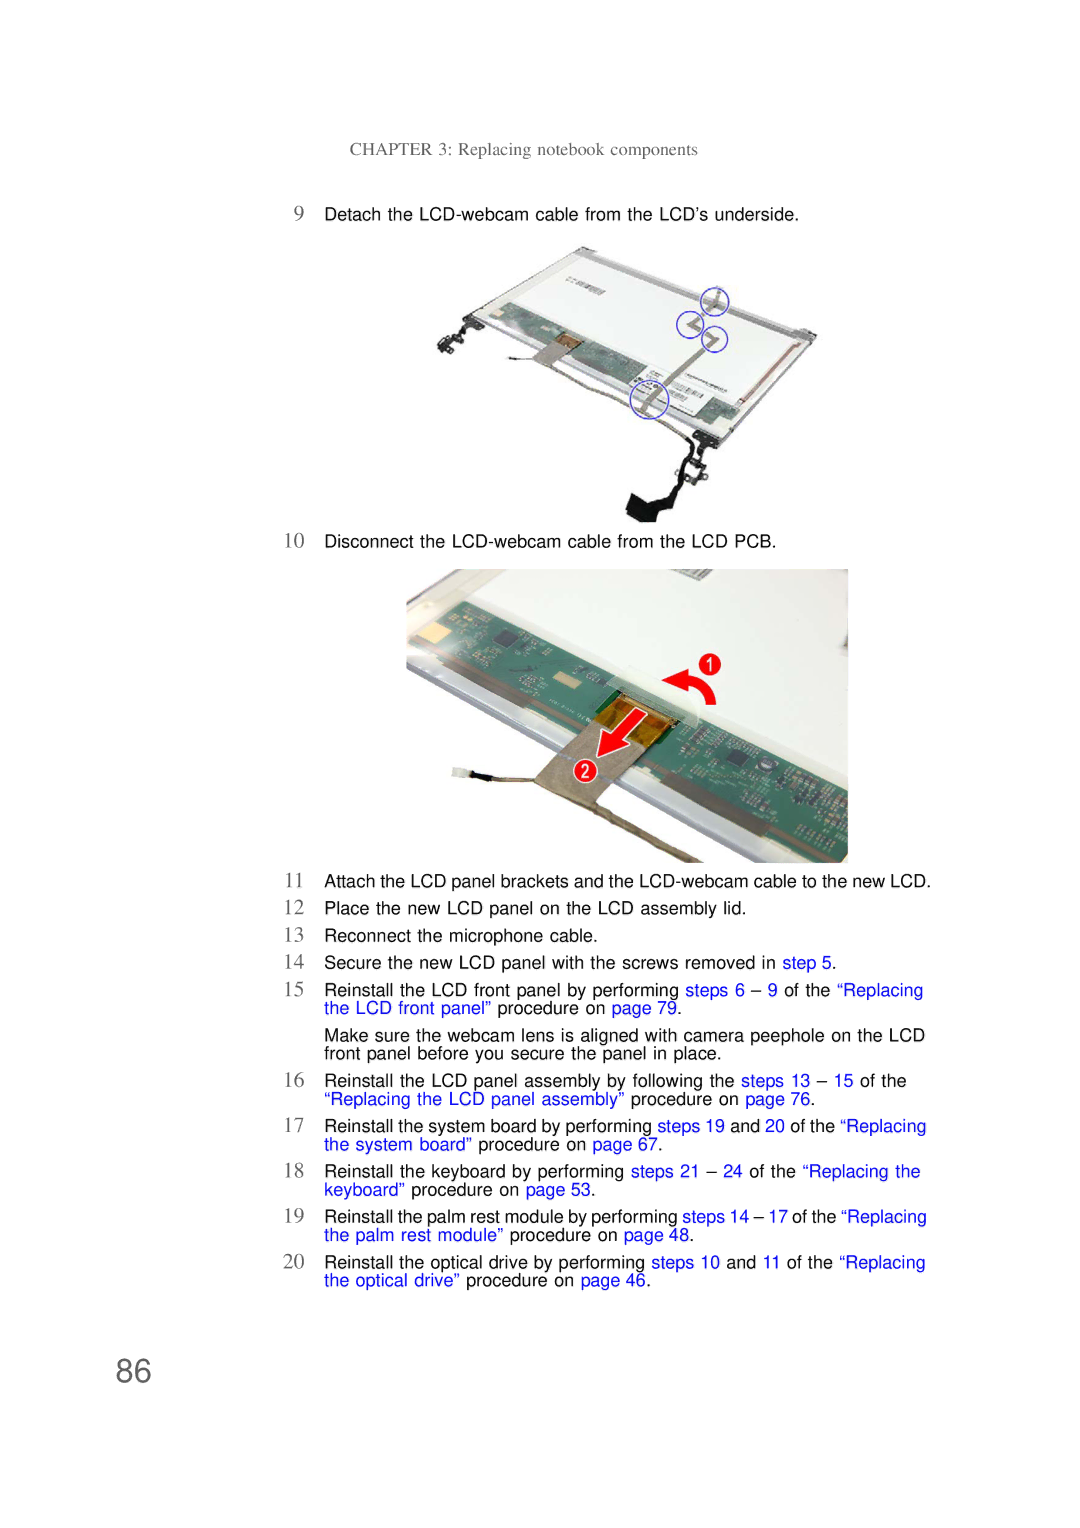
10Disconnect the
11Attach the LCD panel brackets and the
12Place the new LCD panel on the LCD assembly lid.
13Reconnect the microphone cable.
14Secure the new LCD panel with the screws removed in step 5.
15Reinstall the LCD front panel by performing steps 6 – 9 of the “Replacing the LCD front panel” procedure on page 79.
Make sure the webcam lens is aligned with camera peephole on the LCD front panel before you secure the panel in place.
16Reinstall the LCD panel assembly by following the steps 13 – 15 of the “Replacing the LCD panel assembly” procedure on page 76.
17Reinstall the system board by performing steps 19 and 20 of the “Replacing the system board” procedure on page 67.
18Reinstall the keyboard by performing steps 21 – 24 of the “Replacing the keyboard” procedure on page 53.
19Reinstall the palm rest module by performing steps 14 – 17 of the “Replacing the palm rest module” procedure on page 48.
20Reinstall the optical drive by performing steps 10 and 11 of the “Replacing the optical drive” procedure on page 46.
86