www.packardbell.com
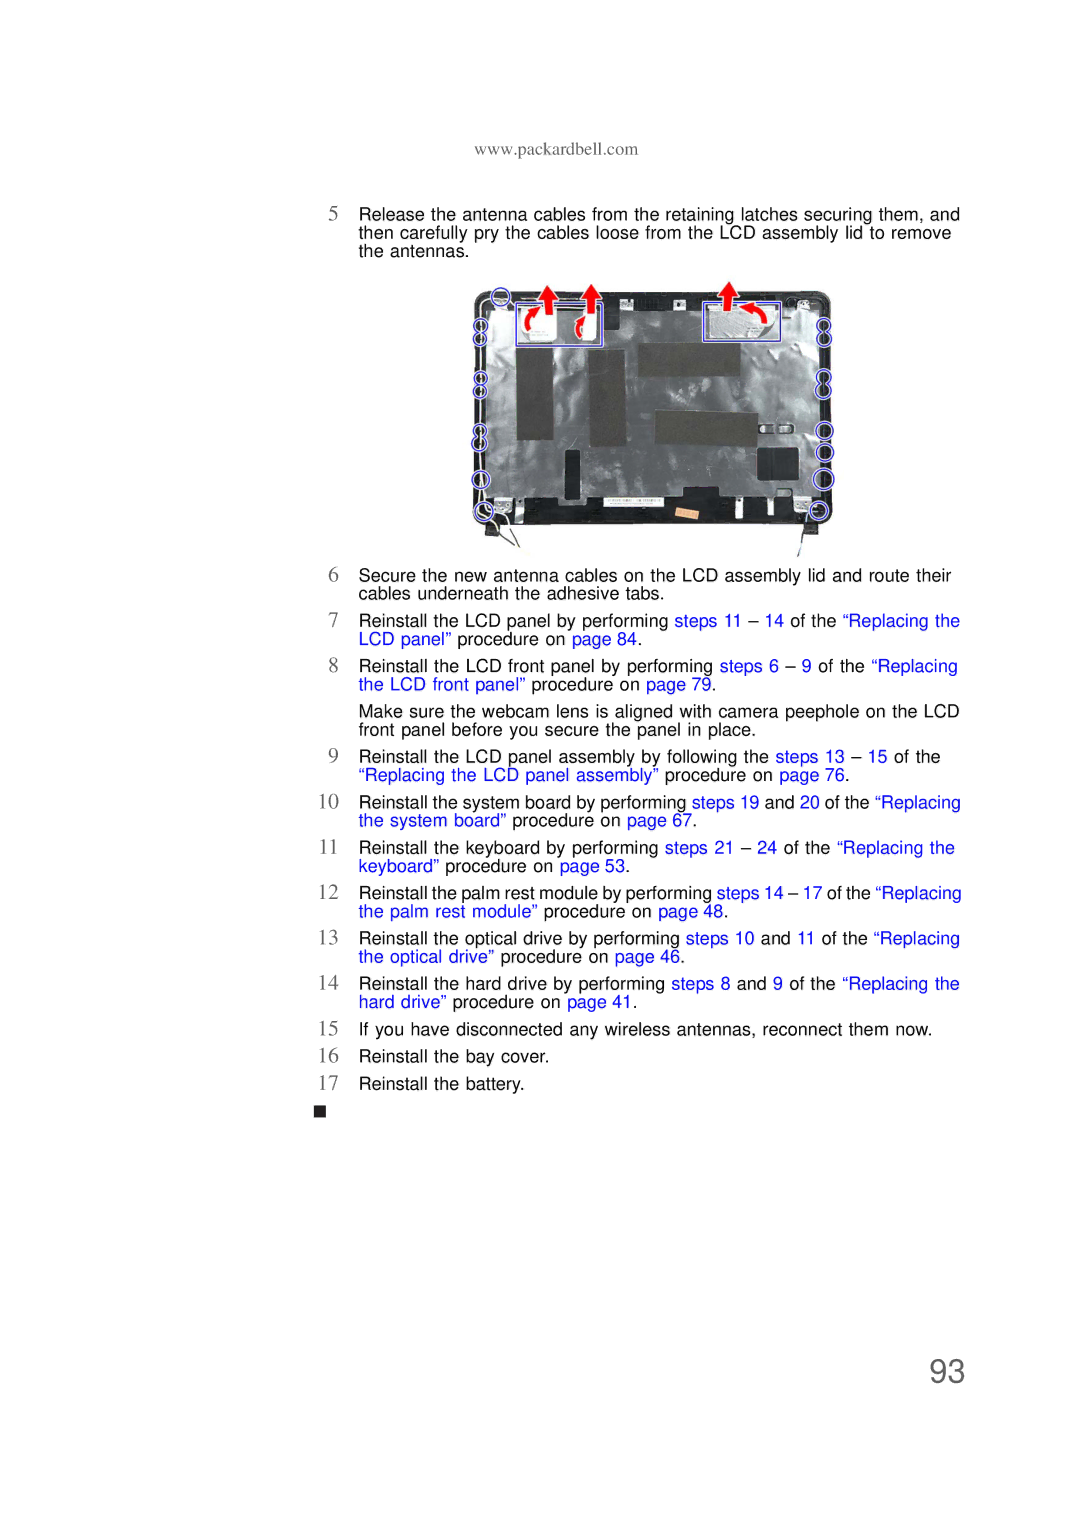
5Release the antenna cables from the retaining latches securing them, and then carefully pry the cables loose from the LCD assembly lid to remove the antennas.
6Secure the new antenna cables on the LCD assembly lid and route their cables underneath the adhesive tabs.
7Reinstall the LCD panel by performing steps 11 – 14 of the “Replacing the LCD panel” procedure on page 84.
8Reinstall the LCD front panel by performing steps 6 – 9 of the “Replacing the LCD front panel” procedure on page 79.
Make sure the webcam lens is aligned with camera peephole on the LCD front panel before you secure the panel in place.
9Reinstall the LCD panel assembly by following the steps 13 – 15 of the “Replacing the LCD panel assembly” procedure on page 76.
10Reinstall the system board by performing steps 19 and 20 of the “Replacing the system board” procedure on page 67.
11Reinstall the keyboard by performing steps 21 – 24 of the “Replacing the keyboard” procedure on page 53.
12Reinstall the palm rest module by performing steps 14 – 17 of the “Replacing the palm rest module” procedure on page 48.
13Reinstall the optical drive by performing steps 10 and 11 of the “Replacing the optical drive” procedure on page 46.
14Reinstall the hard drive by performing steps 8 and 9 of the “Replacing the hard drive” procedure on page 41.
15If you have disconnected any wireless antennas, reconnect them now.
16Reinstall the bay cover.
17Reinstall the battery.
93