Chapter 4: Basic operation
Viewing in multiscreen
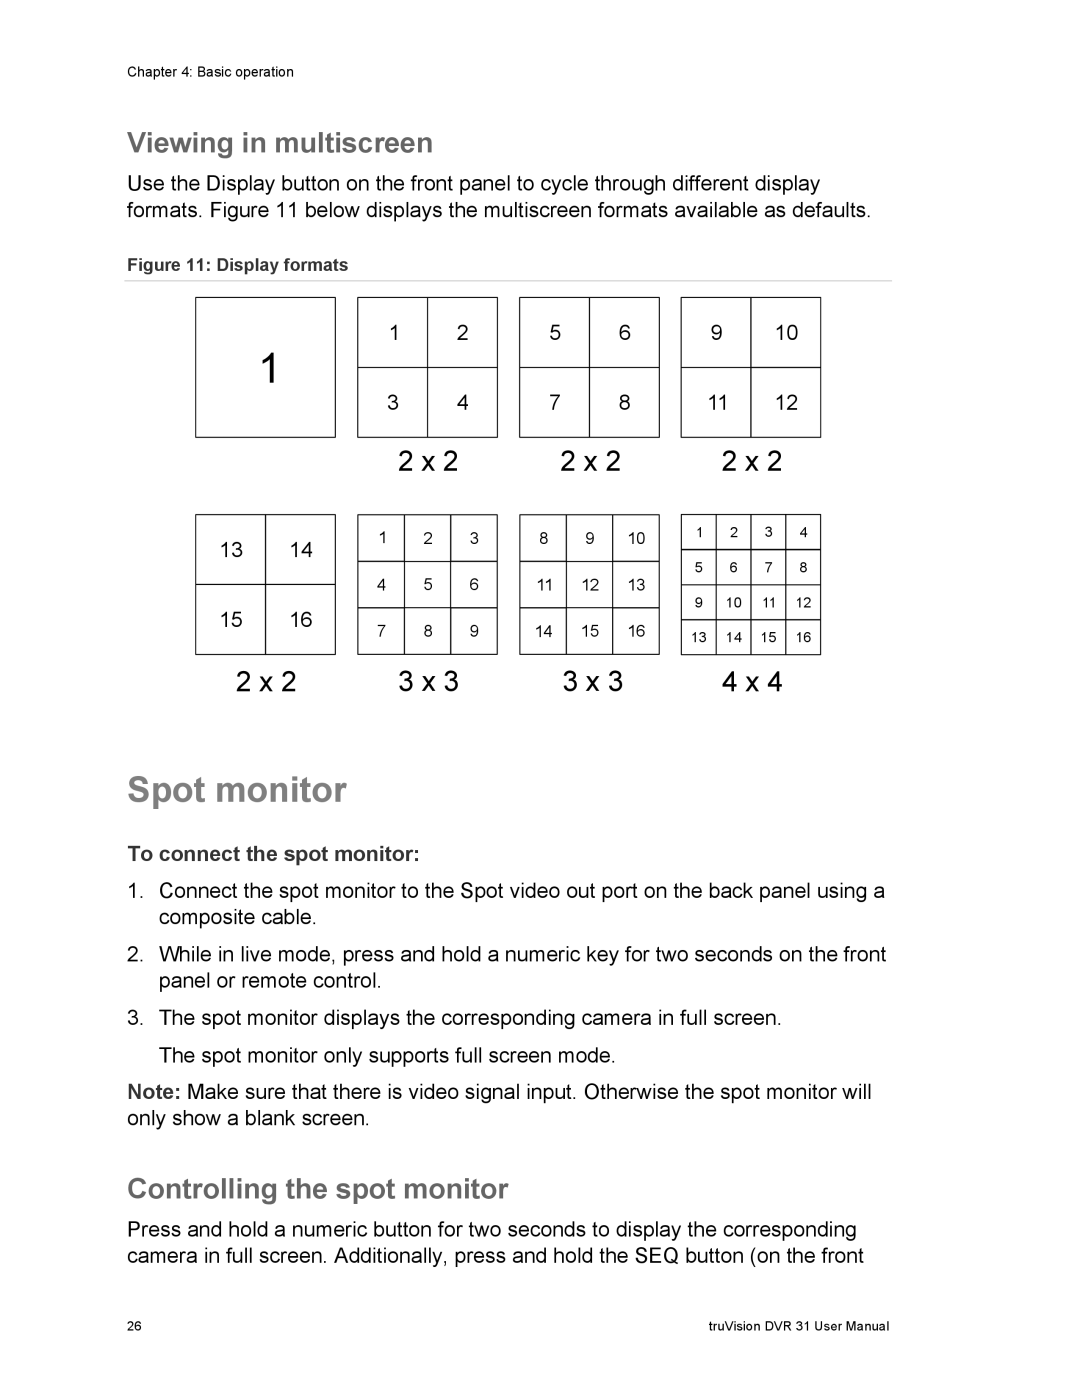
Use the Display button on the front panel to cycle through different display formats. Figure 11 below displays the multiscreen formats available as defaults.
Figure 11: Display formats
1
1 | 2 |
|
|
3 | 4 |
|
|
2 x 2 | |
5 | 6 |
| 9 | 10 |
|
|
|
|
|
7 | 8 |
| 11 | 12 |
|
|
|
|
|
2 x 2 |
| 2 x 2 | ||
13 | 14 |
|
|
15 | 16 |
|
|
2 x 2
1 | 2 | 3 |
|
|
|
4 | 5 | 6 |
|
|
|
7 | 8 | 9 |
|
|
|
3 x 3
8 | 9 | 10 |
|
|
|
11 12 13
14 15 16
3 x 3
1 | 2 | 3 | 4 |
|
|
|
|
5 | 6 | 7 | 8 |
|
|
|
|
9 | 10 | 11 | 12 |
|
|
|
|
13 | 14 | 15 | 16 |
|
|
|
|
4 x 4
Spot monitor
To connect the spot monitor:
1.Connect the spot monitor to the Spot video out port on the back panel using a composite cable.
2.While in live mode, press and hold a numeric key for two seconds on the front panel or remote control.
3.The spot monitor displays the corresponding camera in full screen.
The spot monitor only supports full screen mode.
Note: Make sure that there is video signal input. Otherwise the spot monitor will only show a blank screen.
Controlling the spot monitor
Press and hold a numeric button for two seconds to display the corresponding camera in full screen. Additionally, press and hold the SEQ button (on the front
26 | truVision DVR 31 User Manual |
